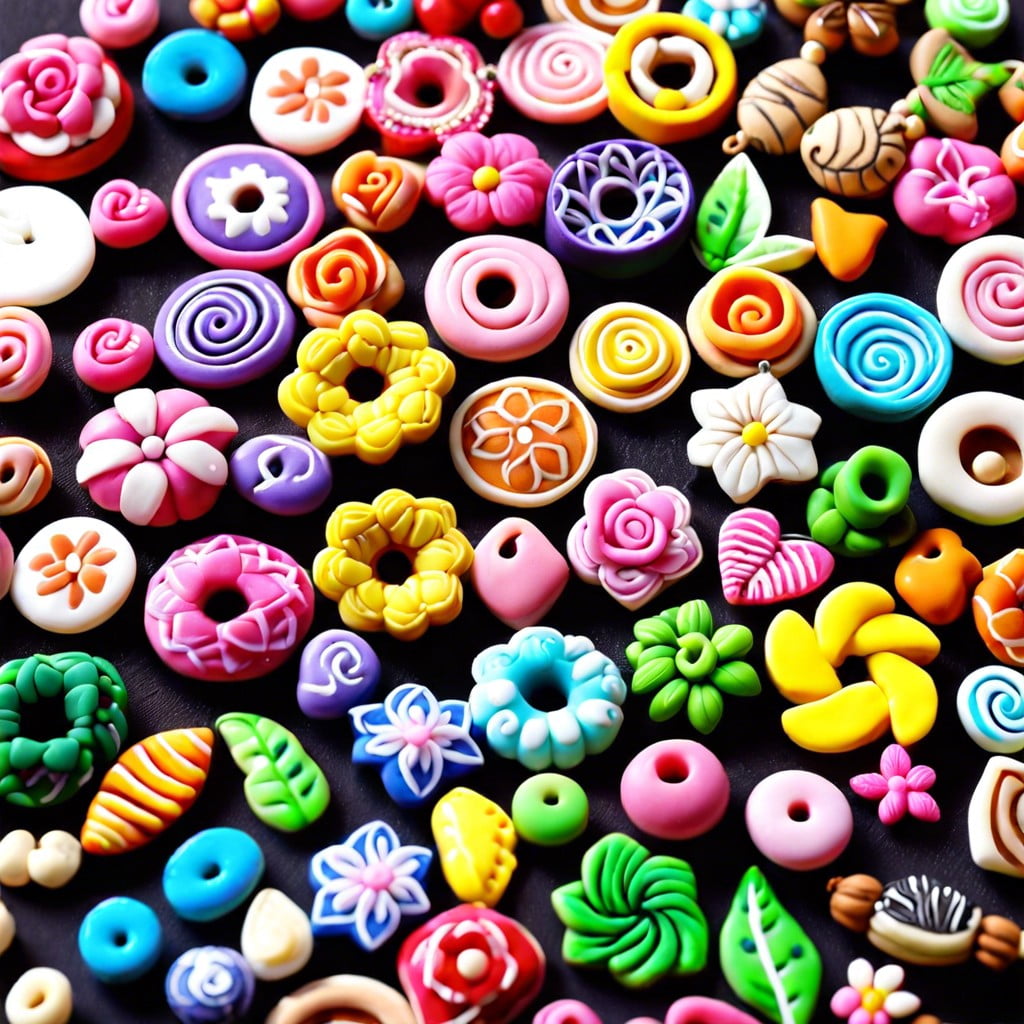
Exploring polymer clay charms becomes fascinating because it intersects art, science, and creativity, thereby birthing an array of customizable, durable, and aesthetically pleasing handcrafts.
Diving into the world of polymer clay charms invites both creativity and craftsmanship, as these delightful creations can add a personalized touch to jewelry, gifts, and more.
Whether you’re aspiring to make your first charm or refine your technique, understanding the selection of the right polymer clay, mastering essential tools, and acquiring shaping skills are crucial components to crafting charms that are not only eye-catching but also durable.
Through this article, you will learn the essential steps to condition and manipulate polymer clay effectively, explore the different styles you can achieve with specific techniques, and start shaping charms that truly express your unique vision.
Prepare to transform simple materials into intricate and charming designs that will stand the test of time.
Key takeaways:
- Choosing the right polymer clay is important for durable charms.
- Essential tools include acrylic roller, sculpting tools, baking tray.
- Condition clay by kneading and rolling repeatedly for better texture.
- Start shaping charms with basic forms before adding details.
- Use different techniques for different types of charms
Selection of Polymer Clay
Choosing the right polymer clay is crucial for creating durable and attractive charms. Brands like Sculpey, Fimo, and Kato Polyclay each have their own characteristics; some may be softer and more malleable, while others are firmer, making them better suited for more detailed work.
When selecting clay, consider the following:
- Softness: Softer clays are easier to condition but may be too delicate for thin or intricate designs.
- Firmness: Firmer clays require more effort to condition but hold fine details well and are less prone to deformation.
- Color Range: Some brands offer a wide variety of colors. Select one that provides the hues needed without extensive color mixing.
- Finish: After baking, different clays have varying levels of shine. Decide whether you want your charms to have a matte or glossy finish.
- Strength: For charms that will be handled often, choose a clay known for its strength and durability after baking.
Your choice will also depend on personal preferences developed through experience. It’s recommended to try small amounts of different brands to find the one that feels right for you. Remember, the clay must be compatible with the detail level and functionality of your intended charm design.
Essential Tools for Charm Making
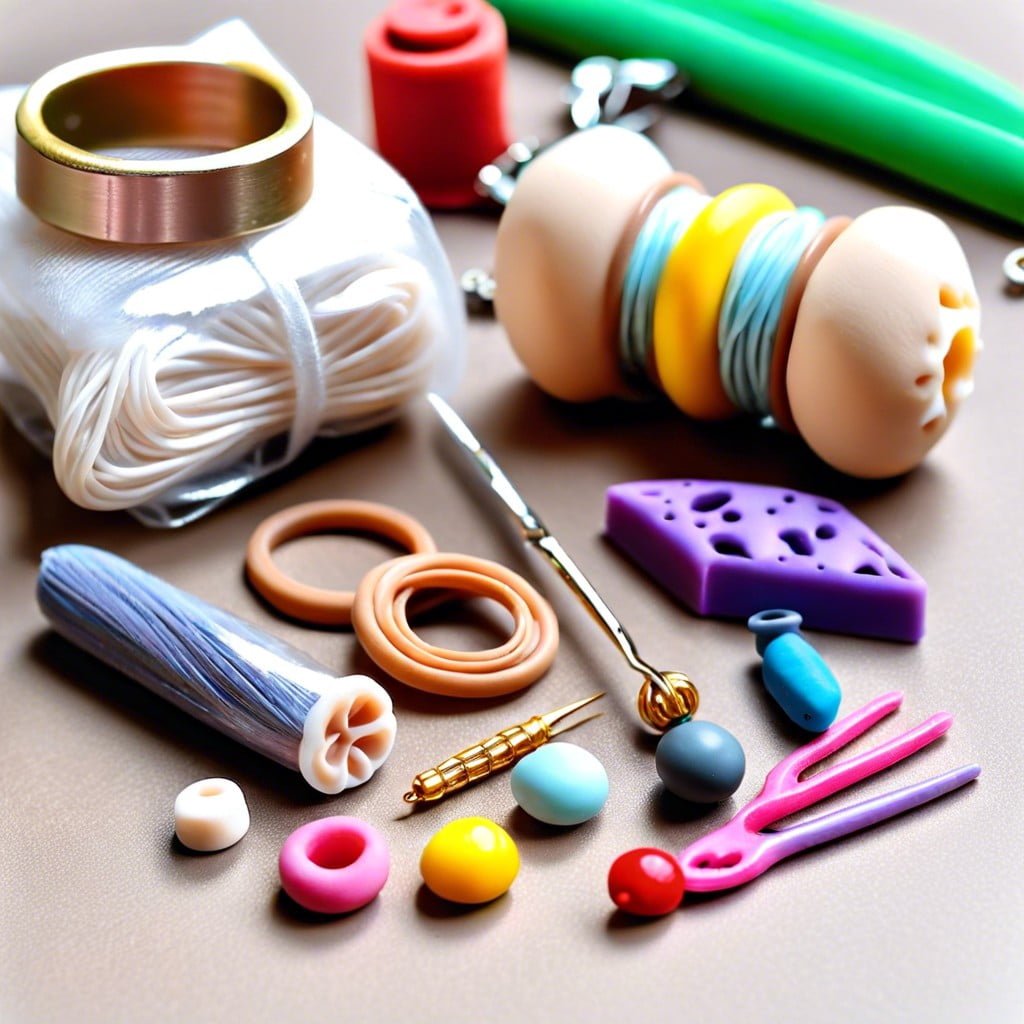
To kick-start your journey into crafting polymer clay charms, focus on gathering a few key tools that will enhance your creative process:
- Rolling and Cutting Tools: A smooth acrylic roller and various shape cutters provide control over thickness and form.
- Sculpting Tools: Needle tools, toothpicks, and metal or silicone-tipped tools help in adding fine details and textures.
- A Work Surface: Ceramic tiles or glass surfaces offer a clean, flat area for rolling and cutting without sticking.
- Baking Tray: A dedicated tray for polymer clay avoids contamination with food items during baking.
- Oven Thermometer: Ensuring the correct baking temperature is vital for the durability of your charms.
- Fine Grit Sandpaper: For smoothing edges and surfaces after baking.
- Jewelry Findings: Jump rings, earring hooks, and necklace chains transform your charms into wearable art.
- Adhesive: A strong glue secures findings to your baked charms.
These tools are building blocks in crafting that guarantee a smoother creation process and a more polished final product.
Conditioning Polymer Clay
Conditioning is a vital step to prep the clay for charm creation. It warms up the material, making it pliable and easier to shape. Start by kneading the clay with your hands or running it through a pasta machine. This process aligns the polymer particles, reducing potential cracks and ensuring uniformity. If the clay is particularly firm, a bit of clay softener can help. Roll and fold the clay repeatedly until it’s smooth and exhibits a malleable consistency. Remember, thoroughly conditioned clay will result in better texture and durability of your finished charms.
Basics of Shaping Charms
Shaping polymer clay into charms starts with creating the fundamental shape that will form the base of your design. For instance, an owl charm begins with a simple oval or tear-drop shape, while a cloud charm is typically shaped from a flattened ball sculpted with wavy edges.
Fruit charms emerge from basic shapes such as spheres for oranges, elongated ovals for bananas, or custom shapes like strawberry bodies with indents. Flower charms may start with petal shapes pressed together at the center, and a disc charm is shaped by flattening a ball and smoothing the edges. Star charms require pulling and pinching to form points, while animal charms can start with a basic body shape, adding limbs, ears, and features afterward.
The key is to establish the silhouette before refining with details.
Owl Charm
Begin with a ball of conditioned polymer clay in your chosen base color. Gently roll and shape it into an oval to form the body of the owl. Flatten slightly to give the charm stability when it’s rested.
For the head, press down on the top edge of the oval, creating a rounded heart shape which serves as the facial outline. Pinch two small amounts at the top for the ears.
Use a small ball tool or the end of a paintbrush to create two indents where you’ll later place the eyes. Roll tiny balls of a contrasting color for the eyes, and even smaller black dots for the pupils. Position these in the indents.
Create a small beak using a triangle of orange clay and place it between the eyes. Feather textures can be added by lightly dragging the tip of a needle or toothpick across the clay in a pattern that mimics the layered look of owl feathers.
Wings can be fashioned by flattening two small pieces of clay into teardrop shapes and attaching them to the sides of the body. Use a tool to indent lines for feathers.
If you plan to hang the charm, insert a headpin or an eye screw at the top before baking. Follow the manufacturer’s instructions for the correct baking temperature and duration. Once baked and cooled, the charm can be further detailed with acrylic paints or left as is for a classic, matte look.
Cloud Charm
Begin by selecting a soft, white polymer clay. Flatten the clay into an even base—roughly 1/4 inch thick—for a puffy appearance. To achieve the cloud’s shape, use a small, rounded cutter or mold with your hands to create gentle curves and indentations reminiscent of a cloud’s fluffy edges.
For added texture, employ a toothbrush or stippling tool to gently press against the surface, creating a soft, textured look. If you desire facial features, small black beads can be embedded for eyes and a tiny, curved piece of red clay for a smile.
Before baking, ensure the charm is smooth and free from fingerprints by gently rubbing it with your finger or using a piece of smooth plastic. Once satisfied, follow the manufacturer’s instructions to bake the charm to the correct hardness, ensuring it’s durable enough for use as a charm. After baking, adding a gloss or matte glaze can enhance the charm’s appearance, providing a final touch that brings your cloud charm to life.
Fruit Charms
Creating fruit charms can be a delightful project with polymer clay, offering a vibrant array of colors and shapes to work with. Here are some points to help you craft these miniature goodies:
- Color Mixing: Start by mixing colors to achieve the realistic tones of the fruit you’re trying to replicate. For example, blend red and yellow to make a perfect orange for an orange charm.
- Simple Shapes: Most fruit charms begin with basic shapes such as spheres for oranges, elongated teardrops for bananas, and cylinders for apples with gently indented tops and bottoms.
- Adding Details: For textural details, use tools like toothpicks or needles to create the divots on strawberries or the lines on a banana. Tiny bits of contrasting clay can be added for seeds or stems.
- Use of Canes: For fruits with intricate internal patterns like kiwis or oranges, consider the use of pre-made canes which can be sliced to reveal the detailed inside patterns once baked and added to the outer shape of the fruit charm.
- Scale Proportionality: Keep size in mind; charms should be small enough to be worn comfortably but large enough to allow for detailed work and visual impact.
- Assembly and Curing: Once shaped, carefully assemble any separate pieces, such as leaves or stems, ensuring they are securely attached before baking according to the clay manufacturer’s guidelines to set the charm.
By paying attention to color, shape, and detail, you can create a charming basket of polymer clay fruits, ready to be turned into earrings, necklaces, or even keychains.
Flower Charms
Begin by choosing colors that reflect the type of flower you wish to create. Condition the clay thoroughly to ensure smoothness and workability. Roll out a thin sheet for the petals, cutting them into desired shapes with a craft knife or specific petal cutters. For a realistic touch, use a toothpick or a needle tool to create veins and textures.
Form the center of the flower by rolling a small ball of clay, and attach the petals around this center one by one. You can layer petals for a fuller look, or use a ball tool to cup them slightly for dimension.
Sculpt leaves and stems if desired, texturing them with a veining tool or toothpick. Attach these to the back of the flower, taking care to blend the clay at the contact points for a secure bond.
Finally, insert a wire or eye pin if you plan to use the charm as jewelry before the baking process. This step will allow for easy attachment to bracelets, necklaces, or earrings after the charm is finished.
Disc Charm
Roll out your conditioned polymer clay to an even thickness of about 1/4 inch using a rolling pin or clay roller. Utilize a round cutter or a household item with a circular edge to punch out the disc shape. Smooth the edges with your fingers to remove any irregularities.
To personalize your charm, you can press small stamps or found objects into the surface to create textures or patterns. For a monogram or name tag effect, use letter stamps to imprint initials or words.
If you plan to hang your charm, make a hole at the top with a needle tool or a toothpick before baking. Ensure that the hole is large enough to accommodate your choice of jewelry findings, like jump rings, but not so close to the edge that it might tear.
Bake according to the manufacturer’s instructions. Once cooled, you can leave the piece in its natural state, or you can add color with acrylic paint or alcohol inks for a more vibrant effect. Apply thin layers, allowing drying time in between, to achieve the desired look.
Star Charm
Begin by rolling out a small ball of polymer clay. Flatten this ball into the shape of a disc, ensuring an even thickness for uniform baking. Use a star-shaped cutter to press down into the clay, creating the star silhouette. Carefully extract the star from the cutter, and smooth out any rough edges with your fingers or a clay tool.
To give your star charm more personality, use a toothpick or a needle tool to make small indents along the arms of the star, mimicking sparkle lines or texture. Poke a hole at one tip of the star with a needle tool if you plan to hang it as a charm. This should be done before baking to ensure a clean, precise hole.
For added effect, consider mixing glitter into the clay before shaping, or pressing fine glitter onto the surface after shaping but before baking. This enhances the star’s charming and whimsical quality. Remember, the finer the glitter, the smoother the baked surface will be.
Place the star on a baking sheet lined with parchment paper, and follow the recommended baking instructions specific to your brand of polymer clay. After baking, let the star cool completely before painting or glazing, if desired. Adding a coat of clear gloss or varnish will not only protect the charm but also give it a luminous sheen, akin to a star in the night sky.
Animal Charms
Creating animal charms from polymer clay involves a combination of basic shaping skills and imaginative detail work. Here are key points to guide you:
1. Start Simple: Begin with animal shapes that have simple silhouettes, like a fish or bird, before moving on to more complex forms like a lion or elephant.
2. Use a Reference: Having a picture of the animal handy will help you capture the essential features accurately.
3. Form the Base: Shape the body of the animal first, ensuring it’s smooth and free of any fingerprints or unwanted textures.
4. Add Details: Roll out tiny bits of clay for eyes, ears, tails, and other features. Use tools to blend these onto the body securely.
5. Texturize: Give life to your charm by adding textures. Use a needle tool for fur, a toothpick for scales, or a small brush to create a fluffy effect.
6. Be Inventive with Colors: Animals come in a variety of colors and patterns. Have fun mixing different shades of clay to achieve the desired look.
7. Keep It Balanced: Ensure your charm lays flat or has a loop inserted so it will hang properly once attached to jewelry or keychains.
By focusing on the character of the animal and the joy of creation, you can craft charming polymer clay animals that bring delight with their unique details and personality.
Adding Details and Texturing Techniques
Crafting polymer clay charms involves a delicate process of adding intricate details to breathe life into your creations. Begin with simple tools like toothpicks, needles, and sculpting tools to etch fine lines or create patterns.
For textural depth, consider using household items such as a piece of lace, a leaf, or a textured fabric. Press these gently into the clay to imprint their patterns. Rubber stamps offer an array of designs that transfer easily onto the clay’s surface.
Layering techniques can give a three-dimensional look, especially effective for flower petals or animal features. Remember, a light touch is key to ensuring the base shape isn’t distorted.
For a more personalized touch, silicone molds make replicating complex textures and patterns a breeze. Plus, sculpting tool sets specifically designed for polymer clay can help in achieving more precision with your detailing work.
Adding mica powders, chalk pastels, or acrylic paints into the clay or on the surface can introduce color and further enhance textures, giving your charms a unique finish that stands out.
Experiment with these methods to discover how they can complement your charm designs, keeping in mind that even the smallest detail can make a significant impact.
Baking Polymer Clay Charms
Once your polymer clay charms are shaped and detailed, it’s time to harden them through baking. Follow the manufacturer’s instructions regarding oven temperature and baking time to ensure proper curing. Typically, the temperature will be within the range of 215-300°F (102-149°C), and baking time varies from 15 minutes to an hour, depending on the size and thickness of your charms.
Place your charms on a baking sheet lined with parchment paper to prevent sticking. To avoid fingerprints, use a ceramic tile or a piece of cardboard to transfer your designs to the oven. It’s also a good idea to tent your charms with aluminum foil to protect them from direct heat and avoid scorching.
To check for doneness, look for solid-looking charms that are no longer malleable when cooled. Resist the temptation to poke or bend the pieces right out of the oven, as they’ll still be soft when hot and could deform.
Remember, over-baking might cause discoloration or burning, while under-baking can leave charms brittle. Using an oven thermometer can provide a more accurate reading if your oven’s temperature settings are unreliable.
Once baked and fully cooled, your charms are now ready for their final finishing touches.
Finishing: Sanding and Buffing
After baking, your charms are almost ready, but first they need a bit of pampering to get a smooth, professional finish. Start with sanding; it erases fingerprints, evens out surfaces, and preps charms for a high sheen. Use wet/dry sandpaper and begin with a coarser grit, gradually working your way to finer grits—water acts as a lubricant, reducing dust.
Post-sanding, switch to buffing. You can buff by hand with a soft cloth, creating a satin finish. For a glossy look, a power tool with a buffing wheel is your friend. Apply gentle pressure, and let the wheel do the work, bringing your charms to a brilliant shine. Remember, patience during this stage truly pays off in the final look and feel of your creations.
Decorating and Painting Charms
Once your polymer clay charm is baked and cooled, you can enhance its appearance with decorative techniques. Acrylic paints are well-suited for polymer clay and allow for a spectrum of custom colors and effects. For delicate details, use a fine-tipped brush and steady hand, or employ stencils and stamps for consistency and patterns.
Metallic powders and mica can be applied to give your charm a shimmering finish. Simply brush the powder on the surface before baking for a second time to set the powder into the clay.
For an embossed look, press small beads, textured fabrics, or other implements into the clay before it’s baked. This can add dimension and interest to the surface of your charm.
Consider adding sparkle to your charm with glitters or glass rhinestones. Use clear-drying glue to affix these embellishments securely after the charm has cooled from baking.
If you make a mistake or aren’t satisfied with your painting, don’t worry. Acrylic paints can often be wiped off with a damp cloth if they haven’t fully dried, allowing you to start again.
Remember to let all paints and glues dry completely before handling or using your charm to ensure the best finish.
Glazing and Sealing Charms
To protect your charms and enhance their appearance, glazing and sealing are essentials steps.
1. Select a Sealant: Choose a polymer clay-compatible sealant like water-based varnish, resin, or a specific polymer clay glaze. Avoid nail polish or other solvents that could react with the clay over time.
2. Application Technique: Apply a thin layer using a soft brush to prevent brush strokes. If you’d prefer a shinier finish, opt for gloss varnish; for a more natural look, matte is your best bet.
3. Drying Time: Allow sufficient drying time between coats. This ensures the previous layer is not disturbed and a smooth finish is achieved. Follow the manufacturer’s instructions for best results.
4. Multiple Coats: For durability, two to three thin coats may be necessary. Thinner coats reduce the risk of drips or an uneven finish.
5. Testing: Test the sealant on scrap clay before applying it to your charms to ensure it reacts well and cures properly with your specific type of polymer clay.
By following these steps, your charms will be more durable, colors will appear more vibrant, and the finished products will have a professional look.
Attaching Hardware to Charms
After your charms are baked and cooled, it’s time to transform them into wearable art.
Start by selecting the right findings: jump rings for dangles, eye pins for pendants, or studs for earrings. With a small drill or a needle tool, carefully create a hole where the hardware will attach. Ensure the hole is slightly larger than the hardware to avoid stress on the clay when inserting.
Open a jump ring sideways using pliers, slip it through the hole, and close it firmly. For a pendant, thread an eye pin through the charm and form a loop at the top. Secure it with a dab of strong adhesive suitable for polymers, like E6000, for longevity.
Be delicate when handling the charms to maintain their shape and design throughout this process. Your charm is now ready to be part of various jewelry or accessory projects.
Ideas for Using Polymer Clay Charms
Polymer clay charms can accentuate a wide range of items and projects, both as functional accessories and decorative embellishments. Here are some inventive ways to use your handmade creations:
- Jewelry: Incorporate them into bracelets, necklaces, and earrings for personalized jewelry pieces.
- Keychains: Attach them to key rings for unique key holders that are easy to spot.
- Zipper Pulls: Use them to adorn zippers on jackets, backpacks, and purses for a custom touch.
- Bookmarks: Create charming book thongs or clips that mark pages with style.
- Home Decor: Embellish picture frames or plant pots with small charms.
- Gift Embellishments: Add a special clay charm to gift wrapping for a memorable finishing touch.
- Party Favors: Make themed charms for weddings, baby showers, or birthday parties as bespoke souvenirs for guests.
Remember, the utility of these charms is limited only by your imagination. Use them wherever a splash of color and a dash of creativity is desired.
Caring for Polymer Clay Charms
Polymer clay charms are durable, but proper care ensures they last even longer and retain their beauty. Here are some tips:
- Avoid prolonged exposure to sunlight and heat, which may cause the charms to become brittle or discolor.
- Remove charms before swimming or showering to prevent water damage, especially if they’re not glazed.
- Clean gently with a soft, damp cloth. Do not use harsh chemicals or abrasive cleaners.
- Store in a cool, dry place, ideally separated by a soft cloth to prevent scratches.
- If the charm has moving parts or delicate features, handle with care to avoid breakage.
- For charms that are not glazed or sealed, minimize direct contact with skin oils and lotions, which can leave residue over time.
Advanced Charm Making Techniques
Leverage the millefiori technique, a glasswork method adapted for clay, to create intricate patterns. Start with layered logs of different colored clays, then stretch and compress them into complex designs.
Incorporate the skinner blend to achieve smooth, graduated color transitions. This involves blending two or more colors of clay side by side then folding and rolling repeatedly.
Experiment with translucent clays for depth and a glass-like appearance. Mix translucent clay with small inclusions like glitter, leaf metal, or colored clay for unique effects.
Use image transfers to add detailed graphics to your charms. Print an image with a laser printer and press it onto a flat sheet of clay, then rub off the paper after baking.
Create faux effects that imitate materials like wood, stone, or metal. Use specific color mixes, texture techniques, and finishes to mimic these materials.
Explore silkscreen printing on clay for detailed patterns. Place a thin silkscreen over your clay sheet, apply acrylic paint, and remove carefully to reveal the design.
Try caning to build shapes within the clay that run through its length, which, when sliced, reveal detailed designs. This can replicate intricate flower or geometric shapes.
Apply sculptural techniques to achieve three-dimensional effects. Add volume to your charms by layering clay, using armatures, or carving into solid forms.
Introduce mixed media elements, such as embedding beads, wires, or fabric into the clay before baking, to add texture and interest.
Explore the use of liquid polymer clay as a versatile medium for image transfer, glazing, or creating your own clay sheets with embedded elements.
FAQ
What is the best clay for charms?
The best clay for charms is either Premo, Cernit, Fimo Professional, Pardo, or Souffle as these are suitable for jewelry making.
How durable is polymer clay jewelry?
Polymer clay jewelry is extremely durable, resistant to breaking even when bent or dropped, provided it’s properly baked.
What is the best polymer clay for making jewelry?
The best polymer clay for making jewelry is Sculpey Souffle due to its lightweight nature, strength, and ability to hold intricate details.
What techniques are essential for crafting fine details in polymer clay charms?
To craft fine details in polymer clay charms, essential techniques include precise shaping with tools, a steady hand for intricate patterning, and controlled baking to maintain the integrity of the designs.
How can you ensure the longevity of polymer clay jewelry with proper care and maintenance?
To ensure the longevity of polymer clay jewelry, it should be handled gently, stored away from heat and ultraviolet light, and cleaned using mild soap and a soft cloth, steering clear from harsh cleaning chemicals or submerging it in water.
Is it possible to customize the color and texture of polymer clay for jewelry-making? If so, how?
Yes, polymer clay can be customized for jewelry-making by blending different hues and incorporating various inclusions for texture, before baking it to harden.
Related Reading
 Polymer Siding: A Durable Ally for Your Home
 Protein Polymer Example: Unlocking Nature’s Building Blocks
 Polymer Lipids: Revolutionizing Building Materials
 Polymer-Gel: The Secret Sauce for Durable Buildings
 Creative Polymer Solutions for Innovative Construction
Recap