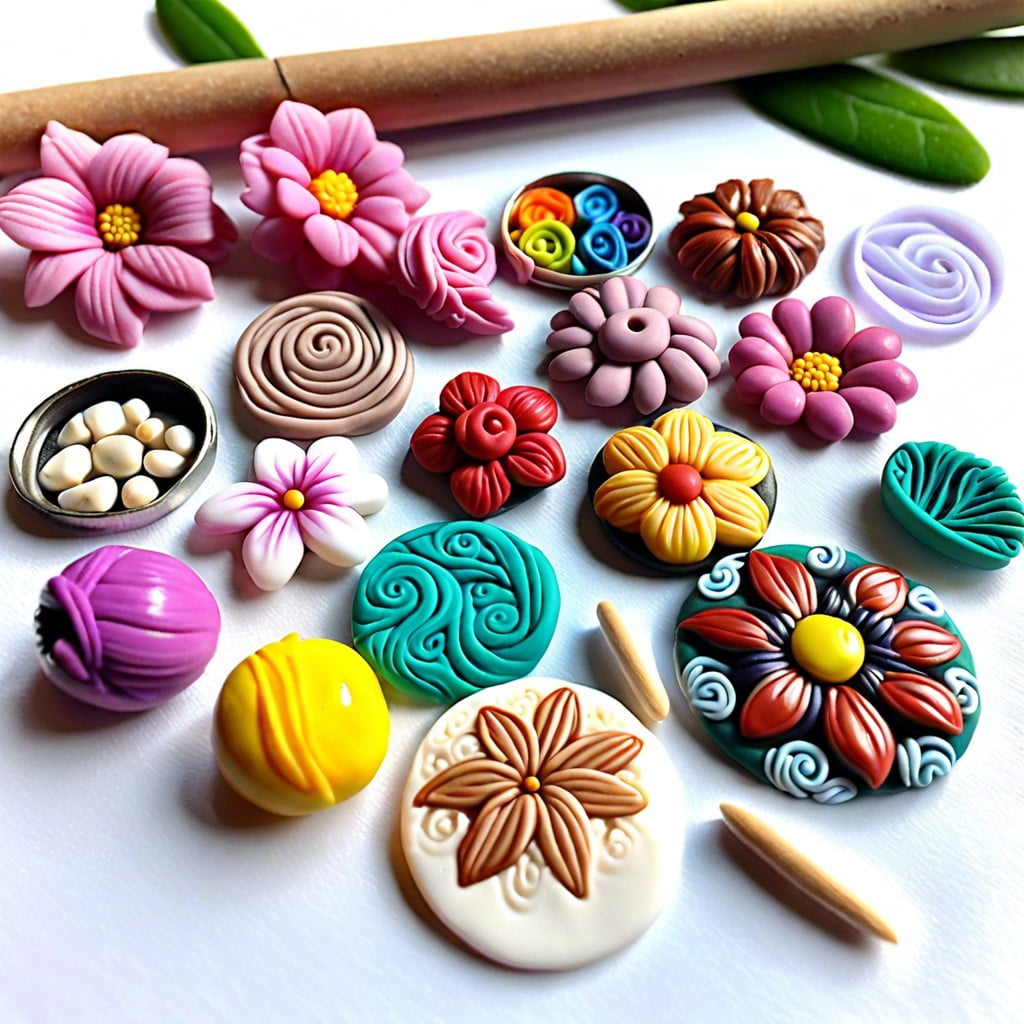
Unleash your creativity because in this tutorial, we dive deep into the fascinating world of crafting polymer clay charms for your DIY projects.
Key takeaways:
- Choosing the right polymer clay brand and type
- Preparing your work surface for clay crafting
- Properly conditioning polymer clay for optimal results
- Simple shaping techniques for creating unique charms
- Tips for baking and glazing your polymer clay charms
Materials & Supplies
To embark on creating polymer clay charms, you’ll need to gather a few essential items:
- Polymer clay: Available in a wide variety of colors, ensure you select a high-quality brand for the best results.
- Work surface: A smooth, non-porous surface like glass or marble is ideal for rolling and shaping clay.
- Roller or pasta machine: For flattening the clay to an even thickness.
- Blades and knives: A sharp blade is necessary for cutting and detailed work.
- Molds and shape cutters: These help to achieve consistent shapes and add intricate details.
- Oven: A standard kitchen oven is typically suitable for curing (hardening) the clay.
- Glaze: To give your charms a finished look and protect the surface.
- Findings: Such as jump rings and eye pins to turn your clay pieces into wearable charms.
Before diving in, make sure you have a dedicated space to store these tools to keep your workspace organized and your materials within reach.
Choosing the Right Polymer Clay
Selecting a suitable polymer clay is crucial for charm-making success. Clay quality can vary, influencing durability and workability. Brands matter, with some favorites being Sculpey, Fimo, and Kato Polyclay, each having unique properties.
For beginners, softer clays like Sculpey III or Fimo Soft are easy to mold and condition. These are great for basic projects. Those seeking more durability may prefer Premo! Sculpey or Fimo Professional, which are harder and require more conditioning but provide a firmer finish.
Consider color availability, too. If custom color mixing isn’t your preference, select a brand with a wide color range. Some brands also offer special effects like translucents, metallics, and glow-in-the-dark options, which can add a unique touch to your charms.
Finally, check the clay’s recommended baking temperature and compatibility with your home oven to ensure a perfect cure. Take note that some clays may emit fumes if baked incorrectly, so always follow the manufacturer’s instructions.
Work Surface Preparation
Before you dive into the creative process, it’s important to set up a suitable work surface. A smooth, flat area will ensure your polymer clay doesn’t pick up unwanted textures or debris. Glass or marble surfaces are ideal, but if you don’t have these, a simple ceramic tile or a piece of parchment paper can also do the trick.
Keep your work area clean; polymer clay tends to pick up dust and lint. Wipe down your surface with a damp cloth and allow it to dry completely before starting. Also, make sure your hands are clean to prevent transferring oils or dirt onto the clay.
For ease of cleaning and to protect your table or countertop, consider placing a craft mat or wax paper down first. Not only does it catch any mess, but it also helps when transferring your project to the oven for baking.
Lastlly, have your tools and accessories within reach. This includes sculpting tools, cutters, rollers, and any embellishments you plan to incorporate into your charms. Organizing them beforehand streamlines your workflow and keeps the creative process enjoyable.
Conditioning Your Polymer Clay
Before you dive into creating your charms, it’s essential to ensure your polymer clay is pliable and easy to work with. Here’s a quick guide to conditioning your clay:
1. Warm it up: If your clay feels stiff or crumbly, warm it in your hands by kneading it. The warmth makes the clay more flexible.
2. Flat Sheets: Use a rolling pin or a pasta machine to roll out flat sheets of clay. Fold and roll repeatedly to mix the plasticizers and make the clay uniform.
3. Twist and Roll: Twist the clay into ropes, then fold and roll them together. This method further mixes the clay and removes air bubbles.
4. Test the Texture: If the clay can be rolled into a thin coil without breaking, it’s conditioned. If it cracks, continue kneading or add a tiny bit of clay softener.
5. Avoid Stickiness: If the clay gets too sticky, let it rest or briefly put it in the refrigerator. It should be soft but not adhere too much to your fingers.
Conditioning is crucial since it affects the durability of your charms after baking, ensuring they don’t become brittle or break. Once the clay is conditioned, you’re ready to start shaping your charming creations.
Simple Shaping Techniques
Once your polymer clay is well-conditioned and pliable, you’re ready to dive into shaping. Starting with simpler forms is the key to mastering the craft before moving on to complex designs. Here are a few techniques to get you started:
Pinching and Pulling: This is as straightforward as it sounds. Just like working with dough, pinch off a piece of clay and use your fingers to pull and elongate it into desired shapes, such as petals or leaves.
Rolling: To create uniform spheres or tubes, roll a piece of clay between your hands or on a flat surface. Spheres can be the basis for beads, while tubes are perfect for forming limbs or stems.
Flattening: For flat shapes like circles or hearts, press the clay down with your fingers or use a rolling pin. This technique is ideal for creating the base of your charms or pendants.
Blending: If you’re using different colors, blend them together to create gradients or marbled effects. Gently twist or fold two colors together, then roll and manipulate until satisfied with the blend.
Cutting: Use a sharp blade or cookie cutters to cut precise shapes from flattened sheets of clay. It’s an efficient way to achieve symmetry and consistency in your designs.
Remember, these techniques can be combined to create a wide array of charming and intricate designs. The more you practice, the more confidence you’ll gain in your shaping skills.
Creating Charms: Step-by-Step
Begin by rolling and flattening your conditioned clay into a sheet of your desired thickness. Use cookie cutters, a knife, or custom tools to cut out shapes that will serve as the base of your charms.
If you’re aiming for a specific design like a flower or animal, separate colors for different parts. For instance, use pink for petals, green for leaves, and so on. Assemble these pieces on your base shape using gentle pressure to bond them.
For added texture or patterns, consider pressing a textured material against the clay or use sculpting tools to create fine details.
Pierce a hole at the top of your charm before baking using a needle or toothpick. This is where you will attach a jump ring later. Ensure the hole is slightly larger than needed as the clay might slightly shrink or change shape upon curing.
Once you’re happy with your design, it’s time to bake the charm according to the clay manufacturer’s instructions. Use an oven thermometer to ensure accurate temperature and set a timer to avoid over-baking.
Remember, patience and attention to detail are key components in creating beautiful polymer clay charms.
Adding Details to Your Charms
To bring your charms to life, adding fine details will make them stand out. Use a toothpick or a needle tool to etch lines, create textures or fashion facial features on characters.
Experiment with silicone-tipped tools to smooth edges and blend colors. Impress patterns with stamps, fabric, or textured tools for extra dimension. For color highlights, dust mica powders on the surface pre-baking, ensuring they adhere properly during the curing process.
Embed small stones, beads, or metal pieces into the clay before baking to incorporate unique design elements. Remember, subtle touches often result in the most striking effects, so apply enhancements with a gentle hand.
Always plan out your details before you start; this makes the process smoother and the outcome more consistent.
Curing Polymer Clay: Baking Tips
Proper curing is crucial for the durability of your polymer clay charms. Follow these baking tips to ensure optimal results:
- Temperature Accuracy: Use an oven thermometer to verify the temperature. Most clays cure well between 265°F and 275°F (129°C and 135°C). Overheating can cause discoloration or burning, whereas under-heating leaves your piece brittle.
- Oven Preheating: Always preheat your oven to guarantee a consistent temperature throughout the baking process.
- Timing is Key: Cure times can vary based on the clay brand and thickness. Start with the recommended time on the package, usually between 15 to 60 minutes.
- Baking Surfaces: Ceramic tiles or glass are ideal baking surfaces as they provide an even heat distribution. Avoid materials that can melt or emit fumes at high temperatures.
- Support for Your Charms: If your charm has delicate parts, support them with polyester batting or a bed of cornstarch to prevent slumping.
- Foil Tent: Cover your creations with aluminum foil during baking to protect from scorching and ensure even temperature distribution.
- Post-Baking: Once baked, let the charms cool down gradually in the oven or on a heat-resistant surface to reduce the risk of cracking.
By adhering to these points, your polymer clay charms will come out strong and beautifully cured.
Glazing and Finishing Charms
After your polymer clay charms have been baked and fully cooled, applying a glaze can enhance their appearance and durability. Here are some tips to ensure a smooth finish:
1. Choose the Appropriate Glaze: Opt for a polymer clay-compatible glaze to prevent interactions that can cause stickiness or cloudiness over time. Water-based varnishes are typically a safe choice.
2. Apply Thin Layers: Use a soft brush to apply thin, even layers of glaze. Thick applications can result in drips and an uneven surface.
3. Allow Adequate Drying Time: Follow the manufacturer’s instructions for drying times between coats. Rushing this process can result in tackiness.
4. Sanding (Optional): For an ultra-smooth finish, some crafters lightly sand their charms with fine-grit sandpaper before glazing.
5. Buffing (Optional): To achieve a natural shine without glaze, you can buff the surface of the charm with a soft cloth or a motorized buffer after sanding.
Remember, finishing your charms with glaze or polish is optional. Some artists prefer the matte look achieved right after baking. Whether shiny or matte, the right finishing touches can make your charms look professional and ready for use.
Attaching Findings to Polymer Clay Charms
After baking and cooling your charms, the next step is to transform them into wearable art by adding findings. Here are key points to ensure your charms have a professional finish:
- Choose Appropriate Findings: Select jump rings, eye pins, or bail backs based on your charm’s design and how you plan to use it (as a necklace, keychain, etc.).
- Insert Before Baking (Optional): For a secure hold, you can insert eye pins or jump rings into your clay before baking. Ensure they’re slightly embedded to prevent them from detaching later.
- Use Strong Adhesive: If attaching findings post-baking, opt for a strong adhesive like a two-part epoxy resin or super glue designed for use with plastic materials.
- Allow Proper Curing Time: Follow the adhesive’s instructions for curing time to ensure a strong bond. Do not rush this step.
- Close Jump Rings Securely: If using jump rings, close them with the proper technique to ensure there’s no gap for your charm to slip through.
By considering these points, your polymer clay charms will be both adorable and durable, ready to delight or make an impression as part of your handcrafted creations.
Advanced Techniques: Texturing and Mica Shift
Elevate your polymer clay charms with texture and mica shift to add depth and shimmer.
Texturing involves pressing materials against the clay to leave an imprint. Use textured sheets, stamps, or even household items like lace and leaves for unique patterns.
The mica shift technique creates a holographic effect. Start with metallic or pearl clay, which contains mica particles. After conditioning, roll the clay into a thin sheet. Stamp a design and gently shave the surface, revealing a ghost image with a striking 3D illusion without texture.
This skill requires practice, but the mesmerizing results are worth the effort. Experiment with different patterns and depths to find what works best for your charms.
Safety Tips for Polymer Clay Crafting
When crafting with polymer clay, prioritize your safety and the safety of others. Ensure good ventilation in your work area to avoid inhaling fumes, particularly when baking the clay. Use a dedicated oven or toaster oven for clay baking to prevent cross-contamination with food.
Always follow the manufacturer’s recommended temperature and baking time. Use an oven thermometer to ensure accuracy, as ovens can be unreliable. Let the clay cool inside the oven to avoid thermal shock and potential cracking.
Wear protective gloves to minimize skin contact with uncured clay, especially if you have sensitive skin or allergies. Also, keep your crafting space clean to prevent clay particles from spreading around your home.
Wash your hands thoroughly after handling polymer clay and before eating or touching your face. Store your materials out of children’s and pets’ reach, and remember that polymer clay is not edible.
By adhering to these safety measures, you can enjoy creating polymer clay charms while safeguarding your health and creating a pleasant crafting environment.
Project Tutorials: Cute Book Charm
To create a cute book charm from polymer clay, begin by selecting colors that represent the cover, spine, and pages of the book. Roll out a small rectangle for the cover, ensuring the edges are smooth and even.
Next, fashion a thinner rectangle in a lighter shade for the pages. Stack the ‘pages’ on top of the ‘cover’ and gently press together. For a realistic touch, use a needle or toothpick to create indents along the edges of the ‘pages’ to mimic the look of paper.
To represent the spine, roll out a thin strip and place it along the bound edge of your book charm.
Once assembled, make two small holes at the top of the spine with a needle tool—this is where you’ll attach the findings later. Bake according to the clay manufacturer’s instructions.
After cooling, apply a glaze to give your book charm a polished look, and once that’s set, attach a jump ring through the pre-made holes. You can now add your book charm to a bracelet or necklace, creating a personalized accessory for book lovers.
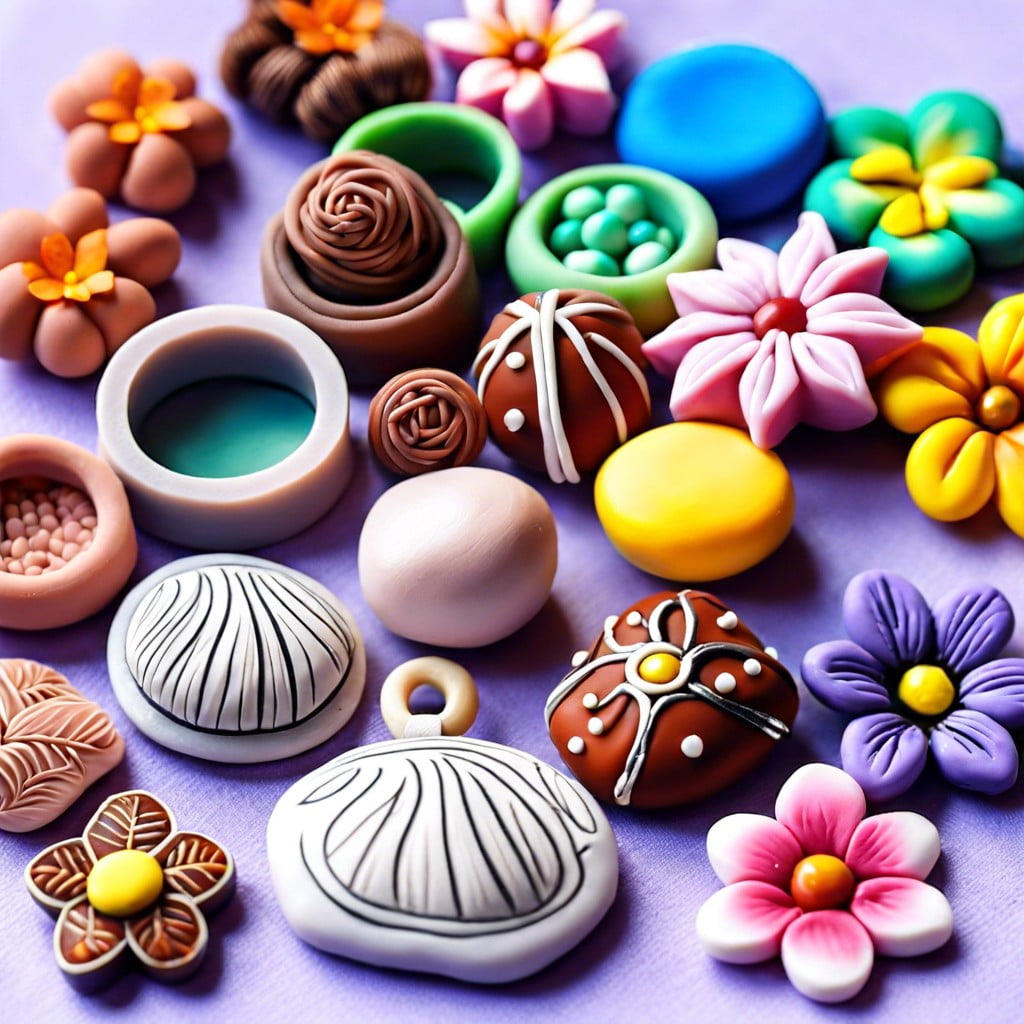
Polymer Clay Crafts for Beginners
Starting with simple shapes like balls, worms, and teardrops is ideal for those new to polymer clay; these forms are the building blocks for more complex designs.
Embellish these basic shapes with textures by using tools such as toothpicks or stamps to add interest to your charms.
Experiment with blending colors to create gradients or marble effects, which can be achieved by twisting together strands of different colored clays.
Practice making holes in your charms before baking by using a needle or skewer, ensuring they’re large enough for jump rings or string.
Remember, patience and practice are key – your skills and confidence will grow as you create more projects.
Questions?
When venturing into the world of polymer clay charms, it’s natural to encounter hurdles and have questions. Whether you’re curious about the right thickness for baking, the best finishes to use, or how to repair a cracked charm, guidance is available.
Here are some common queries and tips that might help:
- Baking temperatures and times can vary; always refer to the clay manufacturer’s instructions.
- To enhance the durability of your charm, apply a thin layer of glaze after baking.
- If a charm cracks during baking, apply liquid polymer clay as ‘glue,’ rebake, and then repaint if necessary.
- Experimenting with different textures? Use items like lace, stamps, or sandpaper before you bake.
- Unsure about attaching findings? Jewelry adhesive or embedding the finding into the clay before baking works well.
Remember, practice and patience are key in polymer clay crafting. For more specific questions, online forums and crafting communities offer a wealth of shared knowledge and experiences.
FAQ
What polymer clay is best for making charms?
The best polymer clay for making charms is Premo! Sculpey, due to its resilience and flexibility after curing, which ensures strong adhesion and added durability.
How can different colors or textures be incorporated into polymer clay charms creations?
Different colors or textures can be incorporated into polymer clay charms creations through techniques such as marbling, layering, texturing with tools, and the use of compatible inks or paints.
What are the best finishing techniques for a polished and professional-looking polymer clay charm?
The best finishing techniques for a polished and professional-looking polymer clay charm include smoothing with sandpaper prior to baking, polishing post-baking with a rotary tool, enhancing color using acrylic paints or chalk pastels, and sealing with a clear glaze for an added glossy finish.
Are there any special precautions to take when baking polymer clay charms to maintain their structure and integrity?
Yes, for preserving the structure and integrity of polymer clay charms during baking, it’s important to bake them at the manufacturer-specified temperature for the correct amount of time and to use a clean, nonreactive oven-safe container to prevent any contamination.
Related Reading
 Polymer Siding: A Durable Ally for Your Home
 Protein Polymer Example: Unlocking Nature’s Building Blocks
 Polymer Lipids: Revolutionizing Building Materials
 Polymer-Gel: The Secret Sauce for Durable Buildings
 Creative Polymer Solutions for Innovative Construction
Recap