Because polymer clay transforms from moldable material into a solid, durable form through baking, understanding the precise steps for this process is crucial to achieve optimal results.
Key takeaways:
- Use an oven thermometer for accurate baking temperature
- Follow manufacturer’s recommended temperature for each clay brand
- Adjust baking time for different clay thicknesses
- Use tin foil tent to prevent scorching
- Store polymer clay projects away from sunlight and in airtight containers
Essential Baking Tools and Materials
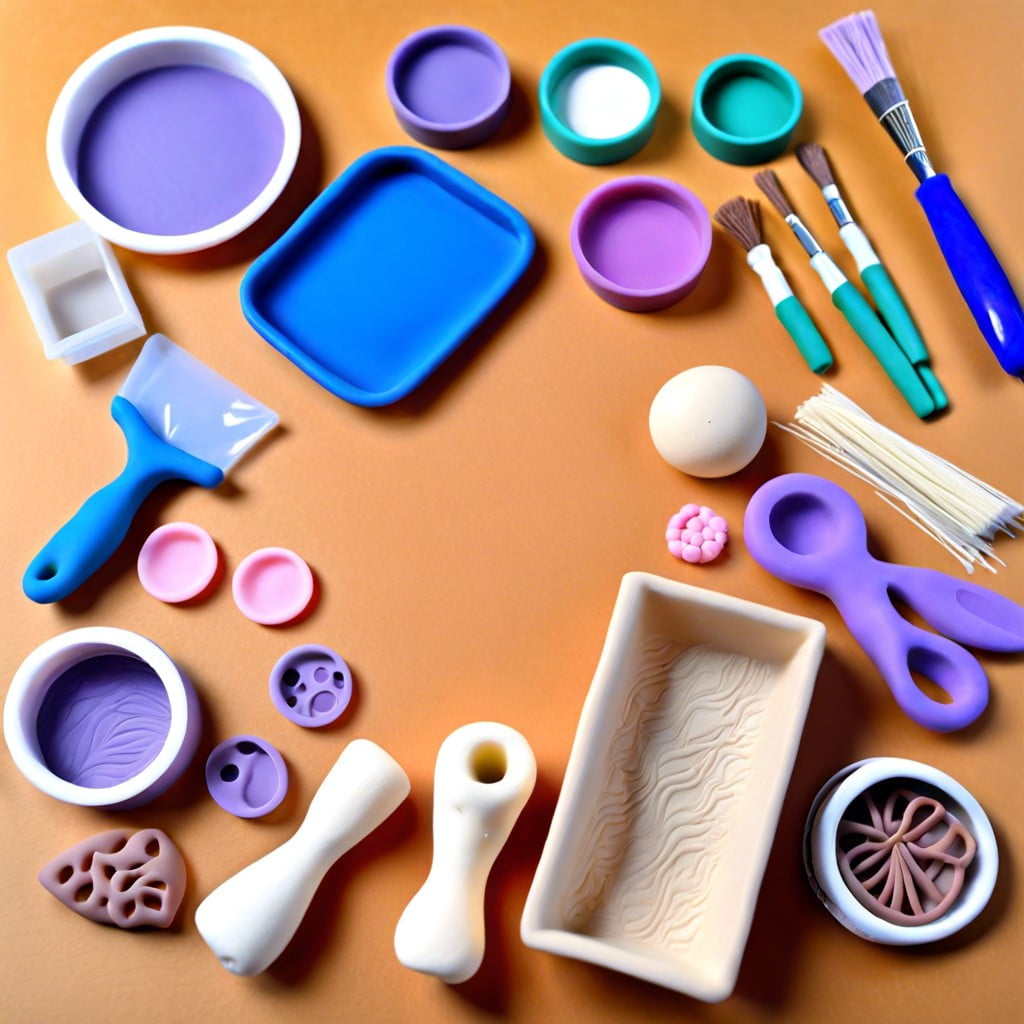
To start, gather a few key items to ensure a successful baking process for your polymer clay creations. You’ll need an oven that can accurately reach and maintain the required temperature. A kitchen oven works fine, but for smaller projects, a toaster oven is also suitable. Invest in an oven thermometer to monitor the temperature inside, as built-in oven thermostats are not always precise.
A non-stick baking surface, such as a ceramic tile, glass tray, or parchment paper, is needed to place your items on. For intricate pieces, use a piece of polyester batting or a bed of cornstarch to support the clay during baking. A timer is invaluable for tracking baking duration, helping to avoid over or under baking. Optionally, if the clay piece has parts that need protection from direct heat, have aluminum foil on hand to create a shield or tent. Lastly, always have proper ventilation in your baking area to remove any fumes produced during the process.
Preparing Your Polymer Clay for Baking
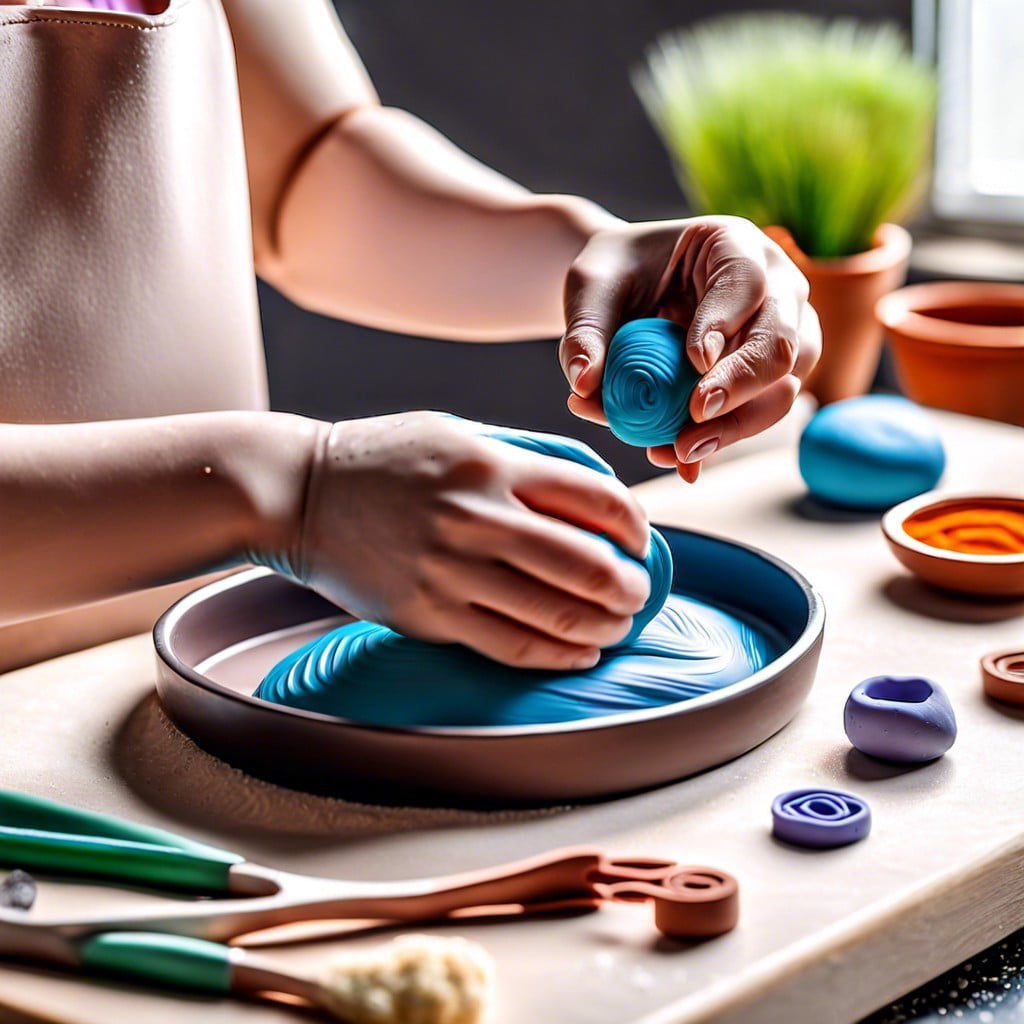
Before you begin baking, condition your polymer clay by kneading it until it’s soft and pliable. This process warms the clay, eliminating any air bubbles that could expand and cause cracks during baking.
Roll the clay into your desired shape, keeping the thickness consistent for even baking. Use an acrylic roller or pasta machine for uniformity. If you’re making a large piece, consider using an armature, like foil or wire, to maintain structure.
Ensure you smooth out fingerprints or marks unless they’re part of your design. Once your piece is shaped, clean the surface with a soft brush or cloth to remove any lint or dust. Place the item on a baking surface like parchment paper or a ceramic tile. It’s now ready for the oven.
The Importance of Oven Thermometers
Accuracy is key when baking polymer clay, as the right temperature ensures proper curing without burning your piece. Oven thermometers play a crucial role because built-in oven thermometers can often be inaccurate by several degrees.
- An external oven thermometer gives a precise reading, enabling you to adjust the oven’s temperature dial accordingly.
Regular checks on the thermometer can detect any fluctuations during the baking process, which often go unnoticed in ovens without a real-time temperature display.
Keeping the oven at a steady temperature is essential for consistent results, especially for delicate or detailed work where variations can lead to cracks or discoloration.
For those using toaster ovens or older kitchen models, which are prone to temperature swings, an oven thermometer is particularly beneficial in maintaining optimal baking conditions for polymer clay.
Determining the Correct Baking Temperature
Each brand of polymer clay often has its own recommended baking temperature, typically found on the packaging. This is because different formulations require specific heat settings to properly cure without burning. Generally, temperatures range from 215-300°F (102-149°C). It’s crucial to adhere to these recommendations to ensure the structural integrity and durability of your finished piece.
An oven thermometer is invaluable here, as built-in oven thermostats can be inaccurate. Measuring the actual temperature helps you avoid the common problem of your oven running hotter or cooler than the dial indicates.
It’s worth noting that variation in color or formulation, even within the same brand, could mean slight temperature adjustments. Transparent or lighter colors may require a lower temperature to prevent discoloration, while more robust or darker clays can sometimes tolerate higher heat.
If you’re working with multiple brands simultaneously, find a temperature that satisfies all instructions, erring on the side of the lowest common denominator. Remember, it’s better to bake longer at a lower temperature than shorter at a high temperature that could cause damage.
Calculating the Proper Baking Time Per Thickness
The successful curing of polymer clay relies on baking it for the right amount of time, which depends on its thickness. Here’s what you need to keep in mind:
- Manufacturer’s Instructions: Always start by checking the package for recommended times and temperatures.
- Rule of Thumb: As a general guideline, bake for 30 minutes for every 1/4 inch (6mm) of thickness.
- Consistent Thickness: Aim for uniform thickness to ensure even baking.
- Use an Oven Timer: Prevent over- or under-baking by setting a timer to help you track the duration.
- Scaling Up: For thicker pieces, increase the baking time proportionally, monitoring closely to avoid burning.
- Testing Doneness: After cooling, if the clay bends easily, it may need more time. Just be sure to let it cool between tests to avoid misjudging its firmness.
Following these points helps create robust and durable clay items.
Baking Flat Sheets Vs. Bulky Items
For even heating, place flat sheets on a baking surface like parchment paper or a ceramic tile. If they’re too thin, they may curl, so consider sandwiching them between two tiles.
Thicker items need to heat gradually to cure thoroughly without cracking. Position these pieces in the center of the oven where temperature fluctuation is minimal. To prevent the outside from hardening too quickly, you can tent a foil over them, ensuring the foil doesn’t touch the clay.
Remember that bulky items may require a longer baking time to ensure the middle cures fully. Always check the manufacturer’s recommended times and use an oven thermometer to ensure accuracy. Keep an eye on these pieces during baking since the longer they’re in the oven, the higher the chance for temperature variance.
The Tin Foil Tent Method to Prevent Scorching
Polymer clay can be sensitive to heat, which makes it prone to scorching if directly exposed to the oven’s elements for too long. This is where the tin foil tent comes in handy. It shields the surface of your creation from strong heat, spreading it more evenly and preventing those unwanted brown spots.
To construct a tin foil tent, simply shape a piece of aluminum foil over your clay item, ensuring that it doesn’t touch the piece. It doesn’t have to be elaborate – a simple dome or box-like structure will do. The air inside the tent circulates, moderating the temperature around the clay. Just make sure to leave some space between the foil and your piece to avoid impressing the foil’s texture onto the clay’s surface.
Additionally, while the tent reflects some heat, it also retains enough to bake the clay thoroughly. After your piece is properly encapsulated, carefully place it in the oven. This technique is especially useful for delicate or intricate designs where protecting the finer details from the direct heat is crucial.
Tips for Baking Polymer Clay Beads
When baking polymer clay beads, even heating is key to maintaining shape and color. Use a bead baking rack to suspend beads, which allows heat to circulate freely. If a bead rack is not available, pierce beads with a needle tool and rest them on a bed of cornstarch or batting to prevent flat spots.
To ensure the beads don’t stick, avoid placing them directly on metal surfaces. Consider using parchment paper or a silicone baking mat instead.
Rotate the tray halfway through the baking process to promote uniform curing, especially in ovens with uneven heat distribution.
If you’re baking beads of varying sizes, be mindful that smaller beads will cure faster. It might be more efficient to bake similar-sized beads together to prevent over or under-baking.
Lastly, if you’re adding finishes—like glaze or paint—after baking, ensure the beads are fully cooled to prevent fingerprints or smudging.
Post-Baking Cooling Process
After removing your creation from the oven, it’s crucial to let it cool down gradually. Rapid changes in temperature can lead to cracking or warping, so patience during this stage pays off.
Place the item on a heat-resistant surface away from drafts and give it time to cool naturally. This could take anywhere from a few minutes for thin pieces to several hours for thicker items.
Resist the urge to hasten the process with water or refrigeration, as this can weaken the structure of your piece. If you’ve used a baking tile or glass surface, you can leave your project right on it to cool for even, slow temperature decline.
Once the clay has cooled to room temperature, it’s fully cured and ready for any post-baking finishing touches.
Safety Precautions While Baking
Always bake polymer clay in a well-ventilated area to prevent the build-up of fumes. Open windows or use an exhaust fan to ensure proper air flow.
Use an oven thermometer to check that your oven is heating to the correct temperature, as oven dials can be inaccurate.
Never use a microwave oven, as it can cause the clay to burn or emit dangerous fumes.
Keep a close eye on the oven while your polymer clay is baking. Set a timer to avoid overbaking, which can release harmful substances.
Use oven mitts or protective gloves when handling hot trays and tools to prevent burns.
Avoid using kitchen utensils with polymer clay if you plan to use them for food again, to avoid contamination.
Store your polymer clay and finished projects away from pets and children, as polymer clay is not edible and can be a choking hazard.
Troubleshooting Common Baking Issues
Occasionally, the baking process does not go as smoothly as hoped, resulting in common issues such as cracking, burning, or insufficient hardening.
- Cracking: This often occurs due to rapid temperature changes. Ensure your oven preheats fully before placing your clay inside, and consider using an oven thermometer to avoid spikes or drops in temperature.
- Burning: If your clay is turning dark or emitting a burnt smell, it may be too close to the heating element or the temperature may be too high. Always confirm accurate oven temperature with a thermometer and position your creations in the center of the oven, away from the top and sides.
- Weak or Brittle Pieces: Underbaking can lead to fragile pieces. Follow recommended baking times, adjust for thickness, and if necessary, bake a bit longer.
- Unwanted Glossy Spots: These can form from contact with certain surfaces during baking. To prevent this, bake on parchment paper and flip your pieces halfway through baking, if possible.
If mistakes happen, don’t be discouraged. Polymer clay is forgiving and often allows for re-baking. Monitoring the process closely can prevent most issues and improve your outcomes with experience.
How to Fix Underbaked or Overbaked Polymer Clay
If your polymer clay is underbaked, it will likely be brittle or too flexible. To fix it, simply re-bake the item following the correct temperature and time guidelines. Place the piece back in the oven, making sure to monitor the temperature with an oven thermometer. Re-baking can often strengthen the clay and correct the underbake.
For overbaked polymer clay, the situation becomes slightly more complex. Overbaking can cause the clay to become discolored, burnt, or cracked. If the item is only slightly overbaked with minimal discoloration, applying a layer of varnish or paint can cover the blemishes effectively. In cases where the clay has darkened considerably, you might use the piece as a “distressed” element in a different project, embracing the imperfections for a unique look. If the clay has cracked due to overbaking, you cannot repair it by re-baking. However, you can use the pieces in mosaics or as inclusions in other polymer clay projects. Remember, preventing overbaking by using an oven thermometer and a timer can save you from having to make these adjustments.
Strategies for Baking Multiple Clay Brands Together
Combining different brands of polymer clay in a single bake can be challenging due to varying temperature and time requirements. To achieve a successful result:
1. Check individual package instructions: Each brand comes with specific baking instructions. Align your baking strategy by finding a common temperature range suitable for all included clay brands.
2. Test bake a sample: Create a small mixed-brand test piece. Bake it following your chosen parameters to check for any adverse reactions or discoloration before committing your entire project to the oven.
3. Monitor closely: Use an oven thermometer to ensure the temperature remains consistent. Since some clays are more sensitive, watching for signs of overbaking, such as darkening, can prevent ruining the piece.
4. Adjust baking time: When baking clays with different recommended times, opt for the longest common duration to ensure all clays polymerize properly without burning the clays requiring less time.
5. Provide proper support: Ensure that your piece’s structure is well-supported during baking. Use a bed of cornstarch, batting, or a folded paper card for items with protruding parts to prevent sagging or distortion.
By considering these points, you can successfully bake mixed-brand polymer clay projects without compromising the integrity of your artwork.
Adding Finishes or Paint Post-Baking
Once your polymer clay creation is cooled, you can enhance its appearance with paints, glazes, or varnish. Acrylic paints work well on polymer clay due to their flexibility and quick drying time. A thin coat is sufficient to avoid obscuring fine details. For a glossy or matte finish, apply a polymer clay glaze. It’s specially formulated to bond with the clay and won’t become sticky.
For durability, use a varnish designed for polymer clay. Always test the finish on a small piece of baked clay first to ensure compatibility and the desired effect. Apply finishes in thin layers, allowing adequate drying time between coats. If adding multiple layers, lightly sand with fine-grit sandpaper to ensure proper adhesion. Remember, finishes not only beautify but also offer additional protection to your artwork.
Storing Polymer Clay Projects Correctly
After your polymer clay creations are cooled and any desired finishes have been applied, proper storage ensures their longevity. Here are key points to remember:
- Avoid Direct Sunlight: To prevent colors from fading, store items out of direct sunlight.
- Control Temperature: Maintain a stable, room-temperature environment. Extreme cold or heat can make your pieces brittle or soft.
- Prevent Dust Accumulation: Use airtight containers or clear plastic bags to keep dust and lint at bay.
- Separate Delicate Parts: For items with delicate parts or protrusions, wrap them in tissue paper or bubble wrap to avoid breakage.
- Avoid Stacking: If pieces are stacked, place parchment paper between them to prevent sticking or damage.
Keep in mind that while your polymer clay projects are hard and durable, they still require gentle care in storage for the best preservation of your artistic efforts.
FAQ
What temperature do you bake polymer clay?
The recommended baking temperature for most polymer clay is 275 degrees Fahrenheit for 15 minutes per quarter-inch of thickness, with thicker pieces potentially requiring additional five-minute baking intervals.
Can you overbake polymer clay?
Yes, polymer clay can be overbaked, leading to darkening and bubbling, but these effects can be mitigated by applying another layer of clay or paint and then rebaking it.
Can I bake polymer clay on parchment paper?
Yes, you can bake polymer clay on parchment paper to maintain the consistent sheen throughout your creations.
What safety measures should be practiced while baking polymer clay?
Safety measures when baking polymer clay include using a toaster oven specifically dedicated to polymer clay baking, avoiding overheating, ensuring a well-ventilated area and using protective equipment like oven mitts and eye protection.
How does the thickness of polymer clay affect baking time?
The thickness of polymer clay directly influences baking time, with thicker pieces requiring more time to fully harden than thinner ones.
Can polymer clay be baked in a microwave instead of an oven?
No, polymer clay should not be baked in a microwave as it requires steady, controlled heat found in conventional ovens for proper curing.
Related Reading
 Polymer Siding: A Durable Ally for Your Home
 Protein Polymer Example: Unlocking Nature’s Building Blocks
 Polymer Lipids: Revolutionizing Building Materials
 Polymer-Gel: The Secret Sauce for Durable Buildings
 Creative Polymer Solutions for Innovative Construction
Recap