Explore this guide because the intricacies of shaping, baking and decorating polymer clay pendants shouldn’t be a mystery.
Key takeaways:
- Polymer clay pendant materials: clay, rolling pin, cutters, texture tools, oven.
- Important tools: roller, cutter, texture tools, needle, oven.
- Conditioning clay and shaping techniques.
- Applying patterns and textures to clay pendants.
- Adding color and baking tips for polymer clay pendants.
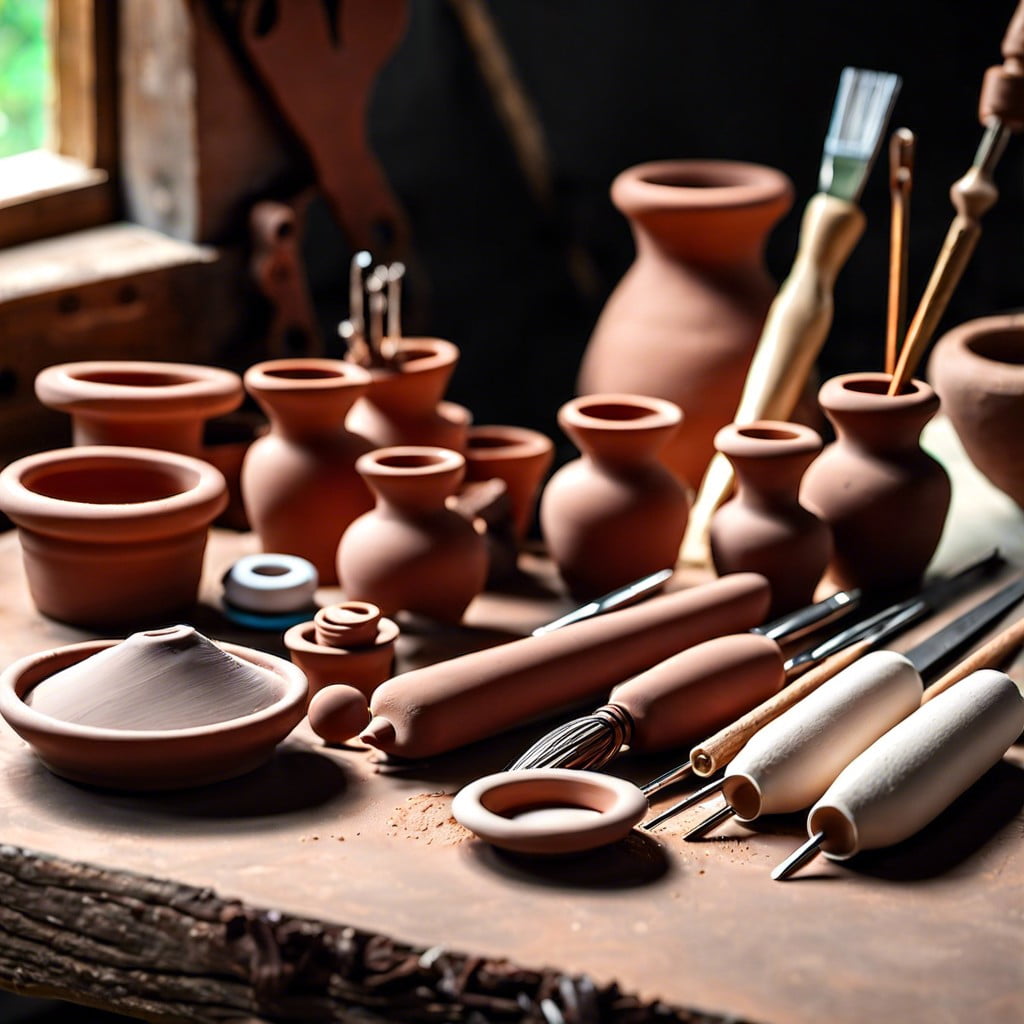
Materials Needed for Clay Pendants

To embark on crafting clay pendants, gather the following materials:
- Polymer clay: The primary medium, available in a variety of colors.
- Roller or pasta machine: For flattening and conditioning the clay.
- Shape cutters: To achieve precise and consistent pendant shapes.
- Texture tools: Stamps, rollers, or found items to emboss designs.
- Craft knife: For trimming and detailed cutting.
- Oven: A home oven suffices to cure polymer clay.
- Work surface: Acrylic or glass surfaces are ideal for a smooth finish.
- Foil or parchment paper: For lining the baking surface.
- Jewelry findings: Including bails, jump rings, and chains for assembling the pendant.
Understanding how each material plays a role in the creation process ensures a successful pendant-making experience. For instance, polymer clay must be properly conditioned to increase flexibility and prevent cracking, while texture tools imbue your pendant with a unique fingerprint.
Tools and Equipment for Pendant Making
To embark on your journey of crafting a clay pendant, you’ll require a few key items:
- Rolling Pin or Pasta Machine: Achieving a uniform thickness of your clay is crucial for a professional look. A rolling pin or a pasta machine is perfect for this.
- Cutter: Whether you use a knife, blades, or cookie cutters, these tools help you cut out your desired pendant shape.
- Texture Tools: Add intrigue to your piece with items like stamps, textured sheets, or even household items (like lace or leaves) for imprinting patterns.
- Needle or Toothpick: A simple needle or toothpick is ideal for creating the hole through which you’ll thread your pendant.
- Oven: A conventional kitchen oven will suffice for curing polymer clay.
- Work Surface: A smooth, non-porous surface such as glass, ceramic, or acrylic is best for working with clay to avoid sticking.
- Oven Thermometer: To ensure your oven is at the correct temperature for curing, an oven thermometer is vital for avoiding burnt or under-baked pieces.
- Jewelry Findings: Items like jump rings and bails are the small hardware pieces that you’ll attach to your pendant to connect it to a chain or cord.
With these tools at the ready, you’re well on your way to creating a unique clay pendant.
Preparing Polymer Clay for Shaping
Before diving into the creative process, ensure your polymer clay is ready for shaping. Begin by kneading the clay to warm it up, making it more pliable and easier to work with. If it’s too firm, consider using a clay conditioner or a small amount of baby oil to soften it.
Flatten the clay into a rough shape using your hands or a rolling pin, aiming for even thickness to prevent any weak spots. Once you’ve achieved a smooth, workable consistency free of air bubbles, you’re all set to mold and sculpt your pendant into any shape you desire.
Remember to clean your workspace and tools beforehand to prevent any unwanted dirt or lint from getting into your clay.
Shaping the Clay Into a Pendant Form
To transform your polymer clay into a pendant, you’ll begin with a flattened piece of clay, which can be rolled out using a rolling pin or pasta machine. Aim for a uniform thickness for even baking—about 1/4 inch is ideal.
Next, choose cookie cutters, a knife, or crafting blades to cut the clay into your desired shape. Popular pendant shapes include circles, squares, hearts, or more intricate forms like leaves or stars.
Once your basic shape is cut, use smaller tools, such as a needle or toothpick, to make a hole near the top. This will be where the bail, or pendant hanger, will eventually be attached. Ensure the hole is large enough to fit your chosen stringing material but not so close to the edge that it weakens the pendant.
If your design calls for layered elements or 3D embellishments, now is the time to add them. Small pieces of clay can be sculpted and gently pressed onto the base shape. Smooth any seams or rough edges with your fingers, a tool, or by lightly brushing with water.
Remember, before baking, any textures or embossed designs should be carefully imprinted onto the surface. Once your pendant is shaped to your satisfaction, it is ready for the next steps: adding colors, patterns, and ultimately, baking to harden.
Pattern and Texture Application Techniques
Imprinting textures onto your pendant can transform a simple piece into an eye-catching accessory. A variety of household items or specialized tools can be used to create patterns. For instance:
- Stamps and rollers yield consistent, repeatable designs and are perfect for achieving intricate details.
- Textured fabrics or lace pressed into soft clay leave unique, delicate patterns suited for vintage-themed pendants.
- Use pointed tools to draw freehand designs directly onto the clay surface, allowing for complete creative freedom.
- Found objects, like leaves or coins, create organic or personalized textures and can imbue your pendant with special meaning.
Remember, whatever technique you choose, it’s crucial to apply even pressure for a uniform pattern and assure the depth is appropriate – deep enough to make an impression but not so much as to pierce the clay. With the right texture, your pendant will stand out as a miniature work of art!
Adding Color to Clay Pendants
Incorporating color into your clay pendants can transform them from simple to stunning. Here are a few methods to achieve vibrant and lasting hues:
1. Color Mixing: Polymer clay is available in numerous colors, but the creative possibilities expand when you mix pieces of different colors. Knead them together until a uniform shade emerges or create marbling effects with less mixing.
2. Surface Techniques: Apply mica powders, chalk pastels, or acrylic paints on the surface of the shaped pendant for a quick color addition. These can be applied before or after baking, but ensure that the method complements your chosen clay type.
3. Inclusions: Tiny bits of colored clay, glitter, or small foils can be added into the raw clay before shaping to add specks of color and visual interest.
4. Canes: Create a polymer clay cane with intricate designs and slice it thinly to apply onto the pendant surface. This can produce detailed patterns and consistent designs across multiple pieces.
5. Stamps and Stencils: Use ink pads designed for polymer clay to stamp designs directly onto the clay. Alternatively, stencils can help apply acrylic paints in specific patterns.
6. Transfers: Image transfer sheets or rice paper can be pressed onto the surface and sealed in place with a layer of translucent clay.
Always ensure that the colors are well-integrated or adequately sealed to prevent them from wearing off with use. Experimentation is key; don’t hesitate to mix and match techniques to achieve the desired effect on your clay pendants.
Baking Polymer Clay Pendants: Time and Temperature
Properly curing your polymer clay pendants is crucial to ensure they harden and maintain durability. Each brand and type of polymer clay has its specific temperature range, usually between 215°F to 275°F (102°C to 135°C). Always check the packaging for the manufacturer’s recommended baking temperature.
The thickness of your pendant dictates the baking time, ranging from 15 minutes for thin pieces to 30 minutes or more for thicker ones. To prevent burning, consider tenting the clay with aluminum foil.
Remember to preheat your oven for a consistent temperature, and use an oven thermometer to verify accuracy. Uneven heating can lead to cracking or burning, compromising your pendant’s integrity.
After baking, let the pendants cool gradually to avoid thermal shock, which can also lead to cracking. Once cooled, your pendants will be strong and ready for finishing touches.
Finishing and Polishing Clay Pendants
Once baked, your clay pendant requires finishing touches to achieve a professional and aesthetically pleasing look. Sanding begins this process; start with coarse grit sandpaper and progressively move to finer grits for a smooth surface.
Wet sanding is recommended to minimize dust. After sanding, apply a thin coat of polymer clay varnish to protect the pendant and enhance its shine.
For an even glossier finish, a buffing machine can be used, which polishes the pendant to a high shine through rapid, gentle abrasions. If a machine isn’t available, a soft cloth can also work; firmly rub the surface until the desired gleam is achieved.
Always handle your pendant with care during finishing, as this determines the final quality.
Attaching the Bail to the Pendant
Selecting the right bail for your clay pendant ensures that it hangs correctly and securely. Bails come in various designs, such as pinch bails, screw eyes, and cup bails.
Pinch bails are great for a professional finish and require you to gently open the bail, insert the prongs into the pendant, and then close it to secure it in place. Ensure your clay thickness can accommodate the prongs without causing damage.
Screw eyes can be twisted into the clay before baking. To do so, make a small hole where you want the top of the pendant to be, slightly smaller than the screw eye’s diameter. After baking, twist the screw eye into the hole with a dab of strong adhesive for additional security.
For cup bails, use a strong adhesive to attach the pendant post-bake. Apply a small amount to both the bail and the pendant, press together, and allow it to cure according to the adhesive manufacturer’s instructions.
No matter which bail type you use, be gentle to prevent any distortion or damage and ensure a firm hold for your pendant to be worn with confidence.
Themed Clay Pendant Projects
Dive into a world of creativity with specific motifs that aim to inspire and refine your skills. The Rainbow Pendant Skinner Blend tutorial will guide you through a color mixing technique that results in a stunning gradient effect, ideal for capturing the essence of a rainbow in your design.
If you’re fond of floral patterns, the Daisy Chain Polymer Clay Project offers an approach to crafting intricate petals and assembling them into a charming, blossom-inspired accessory.
For a more regal touch, the Queen of Hearts Polymer Clay Tutorial delves into using cut-out shapes and layered techniques to create a pendant with a bold, statement look, encapsulating the grandeur of royal symbolism.
Each theme not only enhances your craft but also provides a distinct narrative for your handmade creation.
Rainbow Pendant Skinner Blend Tutorial
To create a rainbow pendant with a skinner blend, start by selecting colors that span the spectrum: red, orange, yellow, green, blue, and violet.
Condition each color of polymer clay until it’s pliable. Roll out sheets of each color using a pasta machine or a rolling pin to get a uniform thickness.
Next, stack the sheets in order of the rainbow, and trim the edges to make a neat rectangle. Press the layers together gently.
Now, fold the rectangle in half from the red end to the violet, ensuring that the colors are on the inside. Pass the folded clay through the pasta machine at the thickest setting.
Repeat the folding and rolling process multiple times until the colors blend smoothly, creating a gradient effect.
Once satisfied with the blend, shape the clay into your desired pendant form, whether it’s a simple circle, a heart, or any other shape. Cut out the pendant with a cutter or craft knife.
After creating the pendant shape, don’t forget to make a hole with a needle tool for hanging before baking.
Remember, the skinner blend technique may require practice to perfect the gradient transition. Don’t rush the process, and enjoy the unique patterns you can create with each attempt.
Daisy Chain Polymer Clay Project
Embark on a floral adventure by creating a daisy chain pendant from polymer clay. Begin by selecting white and yellow clay for the petals and flower center. Roll out the white clay to an even thickness, and use a small, round cutter for the petals. Lay them in a circular pattern, slightly overlapping at the base, to form the daisy.
Condition a small ball of yellow clay and press it into the middle of the white petals, ensuring it adheres well. This will be the core of your flower. Add texture using a needle tool or toothpick, creating tiny indents to mimic the center of a real daisy.
To heighten the design and make it unique, consider adding a green clay leaf or two at the side, giving the impression of a daisy plucked straight from the garden. Roll a thin coil of green clay for the stem and shape it into a loop at the top of the daisy to act as the hole for threading your chain through after baking.
Ensure your creation is free of fingerprints and debris before baking it according to the clay manufacturer’s instructions. After cooling, you may choose to seal the pendant with a clear varnish to protect the colors and add a professional touch to your botanical-inspired piece.
Queen of Hearts Polymer Clay Tutorial
Embarking on the Queen of Hearts pendant project, start by selecting red, black, and white polymer clay. Roll the red clay into a flat sheet to serve as the heart-shaped base. Utilize heart-shaped cutters for precision and uniformity.
For the intricate crown design, mold thin strips of gold-colored clay and shape them into a regal crown atop the heart. Accentuate the crown with small spheres of clay to mimic jewels.
Next, fashion a small white clay oval for the recognizable face of the queen and use black clay or a fine-tip paint pen for the facial features. Remember to keep the face simple; too much detail can overwhelm the small space.
Incorporate traditional playing card elements using thin black clay rolls or a stamping technique to create an ornate border around the heart.
Before baking, ensure the pendant’s thickness is uniform for even curing. Finally, create a small hole at the top for the bail, keeping it centered to maintain the pendant’s balance when worn.
Care and Maintenance of Clay Pendants
To ensure your clay pendant retains its beauty over time, follow these simple care guidelines:
- Clean with a soft cloth: Gently wipe the surface with a soft, lint-free cloth to remove dust and fingerprints. If needed, slightly dampen the cloth with water, but avoid using harsh chemicals.
- Avoid prolonged exposure to sunlight: Polymer clay can fade with too much sun exposure, so store your pendant in a shaded area when not in use.
- Keep away from extreme heat: High temperatures can soften or warp the polymer clay, therefore, it’s best not to leave your pendant in a hot car or near heat sources.
- Limit contact with water: While polymer clay is water-resistant after baking, frequent contact with water can wear down the finish over time. Remove your pendant before showering or swimming.
- Apply a protective coating: For added protection, you can apply a thin layer of clear varnish or nail polish. This not only adds shine but also helps to shield the clay from scratches and moisture.
- Handle with care: Although polymer clay is durable, it can still crack or chip if dropped or pressed too hard against a surface. Treat your pendant like any cherished jewelry piece.
By adhering to these straightforward steps, your clay pendant will continue to look as stunning as the day you created or received it.
Troubleshooting Common Polymer Clay Pendant Issues
Encountering issues with polymer clay pendants can be frustrating, but most problems have simple solutions. If you’re noticing cracks in your baked pendants, this often indicates that the clay wasn’t conditioned thoroughly enough or the baking temperature was too high. Be sure to knead your clay until it’s pliable before shaping, and use an oven thermometer to verify the oven’s accuracy.
Sometimes the color of the clay may darken more than expected after baking. To prevent this, tent a piece of aluminum foil over your pendants as they bake to shield them from direct heat. If the issue persists, consider lowering the baking temperature and extending the time slightly.
If the pendant feels brittle post-bake, it might have been under-cured. Remember that baking times can vary depending on the thickness of the clay. Use the manufacturer’s recommended time as a starting point, but if your pendant is particularly thick, it may require extra time. Conduct a test bake with a similar size piece to dial in the perfect duration.
Adhesion issues with the bail can also arise. This often occurs if the surface wasn’t clean before attaching, or if the wrong type of glue was used. Ensure the clay and bail are free of dust and oils by wiping them down with a little rubbing alcohol, and always use a strong adhesive designed for metal to polymer clay.
Lastly, fingerprints are a common annoyance. To minimize them, handle the clay with clean hands and lightly smooth fingerprints out before baking using a piece of smooth plastic or a dedicated clay smoothing tool. After baking, fine-grit sandpaper can help remove any remaining imperfections.
By addressing these common issues, your clay pendants will have a professional and polished outcome.
FAQ
What is the best clay for making pendants?
The best clay for making pendants is the Premo! Sculpey polymer clay due to its softness, suppleness, and ease of sculpting.
Is clay good for jewelry?
Yes, clay, particularly types like Sculpey Souffle, is excellent for jewelry making due to its strength, lightweight nature, and ability to hold intricate details.
What is clay jewelry made of?
Clay jewelry is composed of either precious metals like silver or non-precious materials such as FIMO clay, which is available in a variety of colors.
How does the curing process affect the durability of clay pendants?
The curing process significantly enhances the durability of clay pendants by hardening the clay, thereby making it resistant to breaking or chipping.
Can clay pendants be embellished or painted, and which materials are best suited for this?
Yes, clay pendants can be embellished or painted, ideally with acrylic paints or ceramic glazes for durability and vibrant color.
What are some of the common mistakes to avoid when crafting clay jewelry?
Some common mistakes to avoid when crafting clay jewelry include improper conditioning of the clay, not cleaning tools and work surface, rushing the baking process, applying paint or glaze before baking, and neglecting the proper sanding and finishing.
Related Reading
 Polymer Siding: A Durable Ally for Your Home
 Protein Polymer Example: Unlocking Nature’s Building Blocks
 Polymer Lipids: Revolutionizing Building Materials
 Polymer-Gel: The Secret Sauce for Durable Buildings
 Creative Polymer Solutions for Innovative Construction
Recap