Discover how to master the technique of varnishing air dry clay because it significantly enhances its durability and aesthetic appeal, making your pottery or sculptures look professional and last longer.
Key takeaways:
- Applying varnish to air dry clay enhances durability and aesthetic appeal.
- Types of varnish suitable for air dry clay include acrylic, polyurethane, Mod Podge, and spray sealers.
- Sealing air dry clay with varnish improves durability, prevents stains, and reduces cracking.
- Varnishing air dry clay provides water resistance, making it suitable for outdoor projects.
- Choose between permanent and removable varnishes based on intended use and desired flexibility.
Why Varnish Air Dry Clay?
Applying varnish to air dry clay serves multiple purposes. Firstly, it provides a protective layer that shields the clay from moisture and contaminants, substantially extending the lifespan of the finished piece. Sealing clay with varnish can also enhance its aesthetic appeal; it brings out deeper colors and can add a desired level of shine, from matte to glossy. Additionally, varnish helps to prevent the clay from scuffing and can make painted surfaces less likely to chip.
In projects requiring additional sturdiness, such as jewelry or functional items, varnish adds a level of structural integrity. Lastly, for items handled frequently, the varnish reduces the transfer of oils and dirt from skin to clay. In summary, varnishing is a key step to ensure that air dry clay creations last and maintain their beauty over time.
Types of Varnishes Suitable for Air Dry Clay
Choosing the right varnish for your air dry clay project is crucial to achieve the desired finish and durability. Here’s what you need to know:
Acrylic Varnish: This water-based sealer is easily accessible and versatile. It dries clear, enhances color, and is available in different sheens such as gloss, satin, and matte.
Polyurethane Varnish: Known for its tough finish, polyurethane protects your creations from scratches and moisture. It’s available in both oil-based and water-based formulas, but the latter is easier to clean up and has a lower odor.
Mod Podge: While not a traditional varnish, Mod Podge is a popular sealant for crafts. It’s non-toxic, dries clear, and can be used as a glue and sealer.
Spray Sealers: These are a convenient option, providing a smooth, even coat without brush strokes. They’re quick to apply and come in various finishes.
For each type, always follow the manufacturer’s instructions for the best results, and ensure proper ventilation when applying any varnish.
Advantages of Sealing Air Dry Clay
Sealing your air dry clay creation enhances its durability, protecting it from moisture, dust, and wear over time. This process also intensifies the colors of painted surfaces, giving them a more vibrant appearance.
Additionally, a well-applied varnish can provide a professional finish, whether matte, satin, or gloss, depending on the desired aesthetic. It prevents the clay from becoming stained, making it easier to clean and maintain.
Importantly, varnishing can also prevent potential cracking by helping to seal any small surface imperfections, thereby extending the life of your clay pieces.
Waterproofing Air Dry Clay
Applying varnish to air dry clay significantly enhances its resistance to water. This treatment prevents moisture absorption which can weaken or ruin the clay structure. For outdoor projects or items expect to experience exposure to the elements, this step is critical.
When considering waterproofing options:
- Choose a varnish labeled as waterproof or water-resistant for the best protection.
- Ensure the clay is thoroughly dry before applying varnish to avoid trapping moisture.
- Apply multiple thin coats rather than a single thick one to build up a strong barrier.
- Allow adequate drying time between coats as recommended by the varnish manufacturer.
- Consider using a marine varnish for items that require the highest level of waterproofing.
By following these points, your air dry clay projects can withstand moisture and continue to look great over time.
Choosing Between Permanent and Removable Varnishes
Selecting the right varnish depends largely on the intended use of your clay piece and personal preference.
Permanent varnishes provide a durable, protective coat that’s resistant to damage from water and UV light. Once applied, they create a lasting finish, ideal for items that will be handled frequently or exposed to the elements. However, this type of varnish cannot be easily removed, so any application mistakes or future desire to repaint will be problematic.
Removable varnishes, on the other hand, offer the flexibility to revise the finish. They’re particularly useful for artistic works where you might want the option to alter the appearance later. They provide a protective layer that can be taken off with the appropriate solvent, making future restorations or changes possible.
Keep in mind, though, removable varnishes might not offer the rugged protection that permanent ones do. It’s essential to weigh the need for durability against the desire for flexibility when making your selection.
Spray Vs. Brush-On Varnish Application
Choosing between spray and brush-on varnishes comes down to personal preference, application ease, and the specific project requirements.
– Spray varnishes offer a quick and even application, ideal for getting into the nooks and crannies of intricate pieces without leaving brush strokes.
– Brush-on varnishes allow for more controlled application thickness and are often the go-to for larger or flat surfaces.
– Spray options can be more convenient for outdoor projects due to fumes but require good ventilation and a dust-free environment.
– Brush-on types work well for indoor settings and give the user more control over the application speed and varnish layering.
– When using spray varnishes, several light coats are preferable to prevent drips; brush-on varnishes can be applied in fewer, thicker coats but require smooth, careful strokes.
– It’s imperative to wait for the correct drying time between coats, which is typically longer for brush-on varnishes.
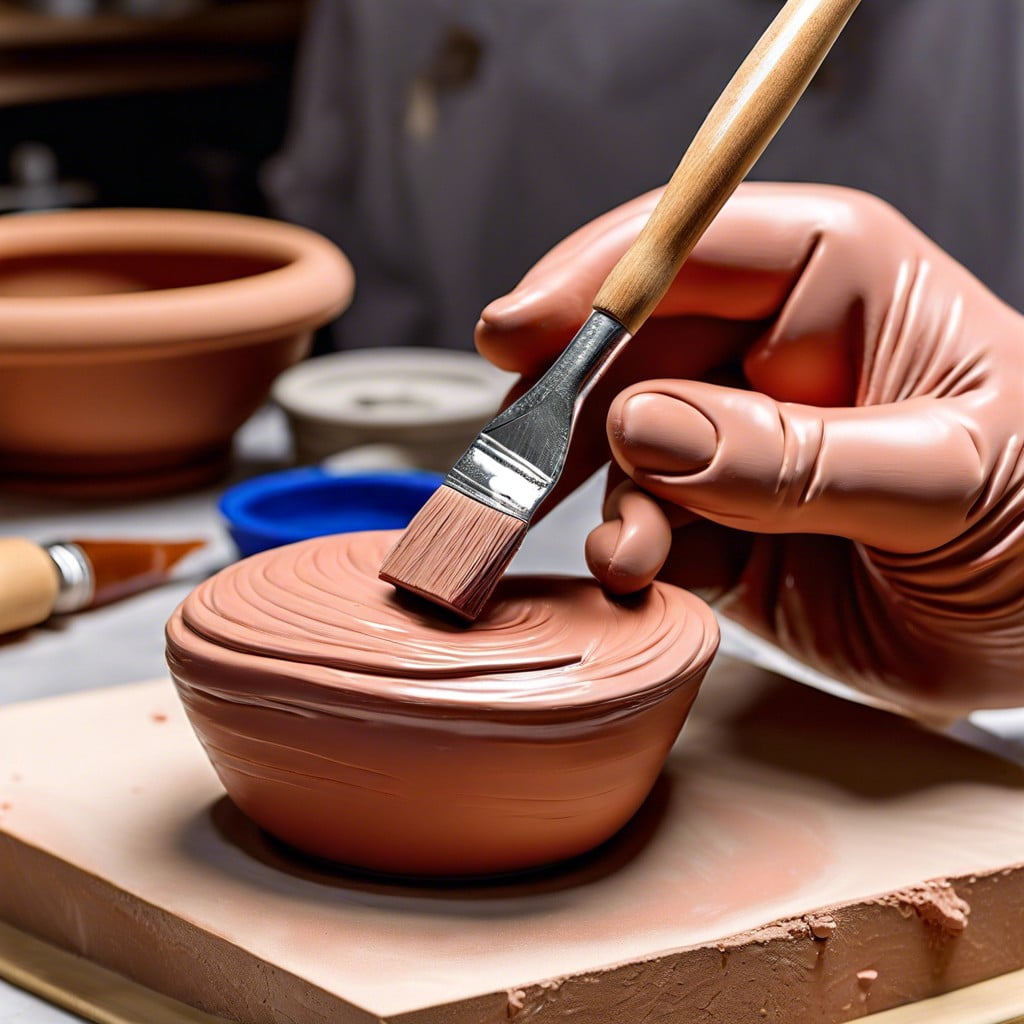
Technique for Brushing On Varnish
Begin with a smooth, clean surface by ensuring your air dry clay piece is free from dust and debris. Use a soft brush or a lint-free cloth to wipe it down gently.
Pour a small amount of varnish into a separate container to avoid contamination of the entire bottle in case clay particles get onto your brush.
Select a soft-bristled brush that will glide over the clay surface without leaving brush marks. Synthetic brushes work well for this purpose.
Apply the varnish in thin layers rather than thick coats to avoid drips and uneven application. Thin layers dry faster and result in a smoother finish.
Move the brush in one direction for a uniform coat. Overlapping strokes should be feathered lightly to blend together without visible lines or marks.
Allow each layer to dry completely before applying the next coat. This prevents tackiness and preserves the integrity of your clay piece.
Ensure proper ventilation in your workspace, as some varnishes can release strong fumes.
Clean your brush immediately after use with the appropriate solvent, such as mineral spirits or soap and water, depending on the type of varnish used.
Varnishing Tips and Tricks
Before diving into the varnishing process, ensure your air dry clay piece is thoroughly dry. This can take up to 24 hours or longer, depending on thickness.
Work in a well-ventilated area or outdoors. Varnish fumes can be harmful if inhaled in confined spaces.
Test your varnish on a small, inconspicuous area of your clay object first or on a separate test piece to ensure it dries clear and doesn’t react adversely with the clay.
Consider using a flat brush for an even application. This helps avoid brush strokes, which can become visible after the varnish dries.
Apply varnish in thin coats to prevent drips and uneven texture. Multiple thin coats are better than one thick coat.
Allow each coat to dry fully before applying the next. Consult the varnish’s instructions for specific drying times, which can vary by product.
If applying multiple coats, lightly sanding between layers with fine-grain sandpaper can smooth out any imperfections and create a more professional finish.
For spray varnishes, hold the can at a distance as directed on the label—usually around 10 to 12 inches away—and use sweeping motions to coat the piece evenly.
Rotate your piece as you work to cover all sides evenly. Avoid focusing the spray or brush in one area for too long.
Always seal your varnish container tightly after use to prevent it from drying out or forming a skin that could contaminate future applications.
Supplies Needed for Varnishing Air Dry Clay
To begin varnishing your air dry clay pieces, ensure you have the following supplies on hand:
- Varnish: Choose a varnish compatible with air dry clay, such as an acrylic sealer, which can be either matte or glossy based on the desired finish.
- Brushes: Use soft-bristle brushes to apply varnish smoothly and avoid streaks. Have various sizes to accommodate different project dimensions.
- Clean cloth: A lint-free cloth is essential for wiping down the surface before application to remove any dust or debris.
- Sandpaper: Fine-grit sandpaper may be needed to lightly sand the clay after it dries and before applying varnish, ensuring a smooth base.
- Disposable gloves: Wearing gloves will keep your hands clean and prevent fingerprints on your clay piece during the varnishing process.
- Protective workspace: Cover your work area with newspapers or a plastic sheet to protect surfaces from drips or spills.
- Respiratory mask (optional): If using a spray varnish, a mask can help avoid inhaling fumes, especially in a less ventilated space.
Gathering these supplies in advance will streamline your varnishing process and contribute to a more professional finish on your air dry clay creations.
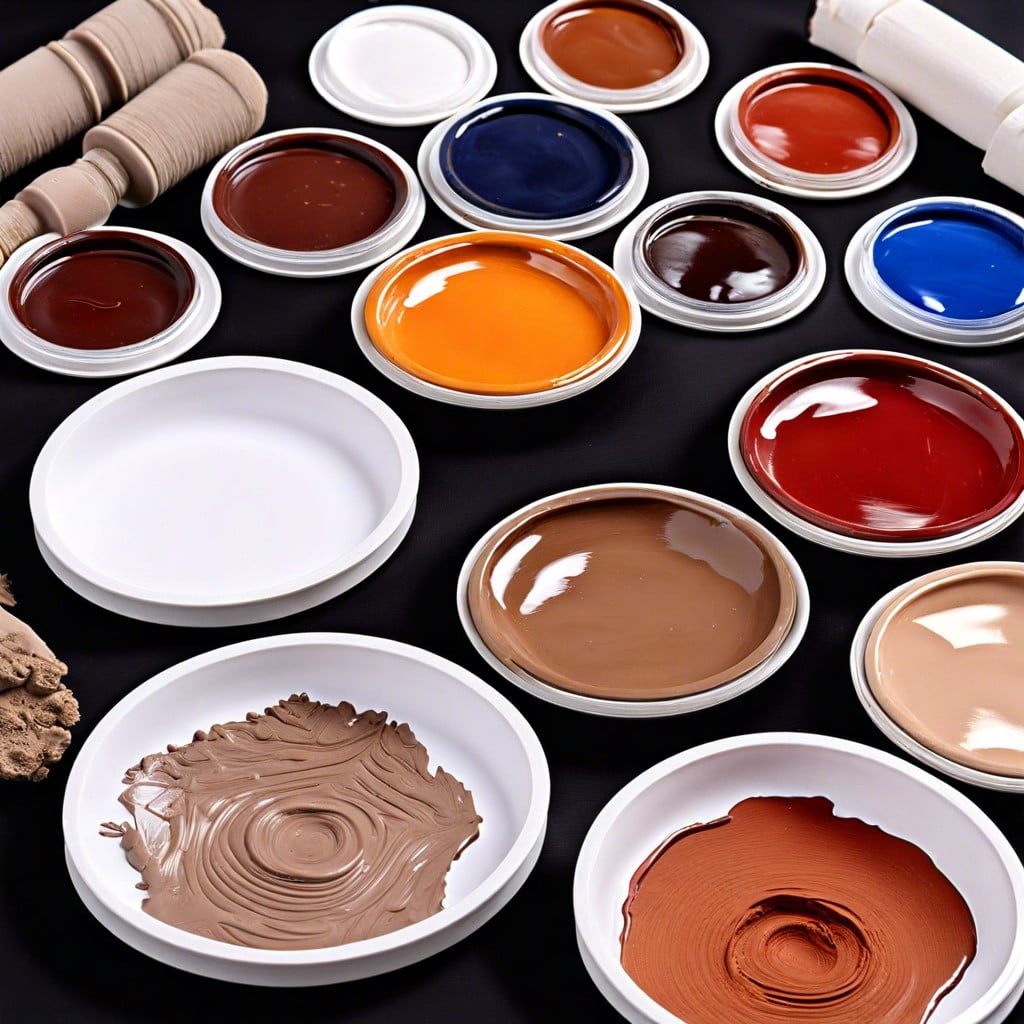
Recommended Varnishes and Acrylic Sealers
When selecting a sealer for your air dry clay pieces, choose products that offer protection while enhancing the appearance of the clay. Varnishes come in glossy, satin, and matte finishes, allowing for a range of aesthetics from shiny to understated.
Water-based acrylic sealers are a popular choice due to their ease of use and low toxicity. They dry clear and can be cleaned up with water. Polyurethane varnishes, on the other hand, are more durable and provide a harder finish, which is excellent for items that will be handled frequently or subject to wear.
For a spray-on option, acrylic spray sealers deliver an even coat and are ideal for intricate or delicate designs where brush strokes might be problematic. Whether in aerosol or pump bottles, ensure you use these in a well-ventilated area.
Some trusted brands to consider are:
- Mod Podge: Known for its versatility, Mod Podge can be used as a glue and sealer with a variety of finishes.
- Scotchgard: While primarily a fabric protector, Scotchgard can also serve as a moisture-resistant sealer for clay.
- Krylon and Rust-Oleum: Both brands offer spray sealers that provide durability and are well-suited for outdoor pieces.
- Minwax Polycrylic: This water-based protective coat is clear, dries quickly, and is available in multiple sheens.
Before using any product, always perform a patch test on a small, inconspicuous area to ensure it reacts well with the clay and delivers the desired result.
Creating a Glazed Ceramic Look With Varnish
Achieving a shiny, glazed ceramic appearance on air dry clay projects can elevate their look, giving them a professional and polished finish. This faux ceramic effect is possible through the careful application of a gloss varnish. Here are key considerations and steps to take:
1. Surface Preparation: Ensure the clay is completely dry and free of dust. A smooth surface is vital for an even glaze-like finish.
2. Varnish Selection: Choose a high-gloss varnish specifically designed for use on clay to mimic the sheen of glazed ceramics. Acrylic-based varnishes are commonly used due to their clarity and durability.
3. Application Technique: Apply thin, even layers with a soft brush to avoid brush marks. For spray varnishes, hold the can at the recommended distance to achieve a thin, drip-free coat.
4. Number of Coats: Multiple thin coats, rather than one thick coat, will help build up a glass-like gloss without causing cloudiness or drips.
5. Drying Times: Adhere to the varnish manufacturer’s instructions for drying times between coats to ensure a hard, clear finish.
By following these points, one can create a visually appealing glazed effect, enhancing the overall aesthetic of air dry clay pieces.
When to Varnish: Timing for Optimal Results
The timing of the varnishing process is critical for achieving the best finish on your air dry clay projects. Here are a few guidelines to ensure optimal results:
- Allow the clay to dry completely. This can take anywhere from 24 to 72 hours, depending on the thickness of the piece and the humidity of the environment. A fully dried piece will no longer feel cool to the touch.
- Check for any surface moisture. If the piece feels damp, allow more drying time as varnish applied too early can lead to cloudiness or an uneven finish.
- Inspect for cracks or imperfections. These should be filled or sanded before applying varnish to achieve a smooth, seamless surface.
- Ensure there’s no dust or debris. Clean your work with a soft brush or damp cloth and allow it to dry before proceeding.
Proper timing not only enhances durability but also the aesthetic appeal of the final piece. Patience during the drying phase pays off, leading to a satisfactorily varnished air dry clay creation.
Application Process for Varnishing Air Dry Clay
Before applying varnish on air dry clay, ensure the piece is completely dry to avoid trapping moisture. Work in a well-ventilated area to safeguard against fumes, especially if using a spray varnish.
Begin with a clean brush or a spray can held at the recommended distance if you’re opting for spray varnish. Apply a thin, even coat to avoid drips and brush marks. Let the first coat dry thoroughly, as per the varnish manufacturer’s instructions, before considering a second layer.
If brush strokes are visible or if the surface appears uneven, lightly sand the piece with fine-grit sandpaper once the first coat is dry. Wipe off any dust before applying the next coat.
For pieces that will be handled frequently, a final coat may be necessary for added durability. Remember to let each layer cure completely before the piece is put to use.
Post-Varnishing: What to Do Next
After the varnish has fully dried, assess your clay piece for any missed spots or uneven textures. If necessary, apply a second coat to ensure a consistent finish.
Store it in a safe place away from direct sunlight to prevent fading or discoloration. If the varnished item is functional, like dishware, test it with gentle use first to ensure the varnish cures properly.
Regular dusting with a soft cloth helps maintain its shine without scratching the surface. If you’ve used a removable varnish, keep in mind that it may require reapplication over time to preserve the clay’s appearance and durability.
Maintaining Your Varnished Air Dry Clay Creations
To keep your varnished air dry clay creations in top condition, handle them with care and place them in locations where they won’t be exposed to excessive heat or direct sunlight, which can cause the varnish to deteriorate over time.
Dust them gently using a soft brush or a lint-free cloth. For items that require cleaning, use a slightly damp cloth and avoid harsh chemicals or abrasives.
If your creation is a wearable piece like jewelry, keep it away from water and put it on after applying makeup or perfume to prevent chemical reactions with the varnish.
Store your creations in a dry and cool place to preserve their finish and structural integrity. Regular inspections can help catch any damage early, ensuring that minor issues can be addressed before they become significant problems.
FAQ
What varnish is best for clay?
The best varnish for clay is often considered to be an artist-grade sealant, water-based varnish, or diluted PVA glue, with polyurethane water-based varnish demonstrating effectiveness for both polymer and air dry clays.
How do you varnish clay?
To varnish clay, you need to mix and thoroughly blend a bottle of clear nail varnish, two tablespoons of clear glue, and three tablespoons of water in a small container, then apply the mixture to your air-dried clay item, with the optional addition of acrylic paint for colored glaze effect.
Is Clay Varnish waterproof?
Yes, Clay Varnish is waterproof and it dries hard, making it suitable for a range of projects.
How do you make clay shiny?
To make clay shiny, you can use epoxy resin, clear spray paint, Mod Podge, or a high-gloss clay varnish, which not only adds a lustrous, glossy sheen but also enhances durability.
Can you use polyurethane varnish on clay structures?
Yes, you can use polyurethane varnish on clay structures to provide a protective, glossy finish.
Does acrylic varnish provide a durable finish for clay?
Yes, acrylic varnish does provide a durable finish for clay.
What steps are necessary to properly prepare clay for varnishing?
To properly prepare clay for varnishing, one must first ensure it is fully dried and then thoroughly clean its surface to remove any remaining dust or dirt.
Related Reading
 Polymer Siding: A Durable Ally for Your Home
 Protein Polymer Example: Unlocking Nature’s Building Blocks
 Polymer Lipids: Revolutionizing Building Materials
 Polymer-Gel: The Secret Sauce for Durable Buildings
 Creative Polymer Solutions for Innovative Construction
Recap