Discover the perfect polymer clay for your next creative project with this straightforward buying guide that helps you pick the right type at Hobby Lobby.
Key takeaways:
- Polymer clay is a versatile material that can be transformed into various creations.
- Essential tools for working with polymer clay include blades, rollers, sculpting tools, stamps, and an oven thermometer.
- Beginners should start with simple shapes, pay attention to proportion, and take breaks while sculpting.
- When baking polymer clay, follow the instructions on the package and use an oven thermometer for accuracy.
- Finishing techniques such as sanding and buffing can give polymer clay creations a smooth and shiny finish.
Understanding Polymer Clay
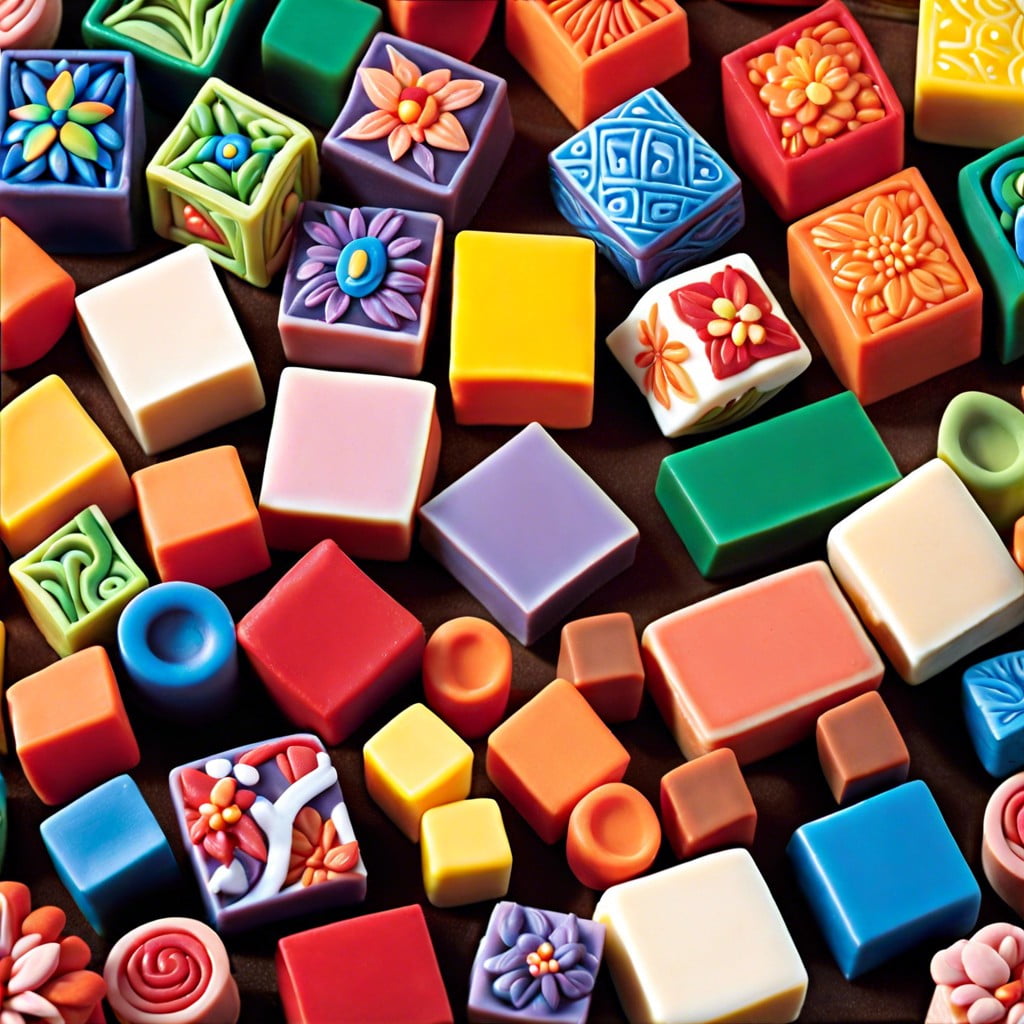
Picture polymer clay as a chameleon in the crafting world – it can morph into virtually anything you desire. At its core, this material is a type of pliable plastic, but until you bake it, it’s as malleable as dough. That flexibility allows your imagination to run wild, transforming a simple lump into jewelry, figurines, or home décor.
First off, it’s vital to know that polymer clay comes in a kaleidoscope of colors which you can blend, much like paints, to create your own custom shades. It’s like being a chef – with color as your spice, you can whip up endless recipes for eye-catching creations.
Remember, this isn’t a solo act; the clay’s composition is designed to bond firmly with other pieces when cured, so you can build complex structures in stages. Also, unlike traditional earthen clays, it doesn’t dry out when exposed to air. You could take a coffee break, and your project would still be ready to sculpt where you left off.
So go ahead, get your hands dirty – metaphorically speaking, of course; this stuff is surprisingly clean! Each project is a journey from pliable to permanent, and once you bake your piece, it’s there to stay, boasting impressive durability. Just keep in mind that while polymer clay is tough, it prefers to stay out of direct sunlight to avoid a sunburn – fading and brittleness are real bummers in the vibrant world of polymer crafts.
Essential Tools for Working With Polymer Clay
Diving into the polymer clay journey can feel like opening a treasure chest of endless creativity. But before you set sail, you’ll need a trusty map of tools to navigate these crafty waters.
First, lay your hands on some clay blade sets. Sharp and flexible, these are your go-to for slicing and dicing clay with precision. Imagine painting with a dull brush – that’s working clay without a sharp blade!
Next, consider your work surface. Acrylic rollers and pasta machines are like the trusted sidekick in every polymer clay adventure, ensuring your creations are smooth and even – because nobody wants a bumpy treasure map.
Now, don’t overlook sculpting tools. From ball tools to dental probes, these mini wands help you add magical details that breathe life into your ideas. They’re the pinch of salt that makes a good meal great.
Texture is the secret spice of polymer clay art. Stamps and texture sheets can turn the smooth canvas into a tactile masterpiece – it’s like the difference between a handshake and a warm hug.
Lastly, grab an oven thermometer. Baking clay isn’t like searching for hidden treasure – you need the temperature just right. Think of an oven thermometer as your trusty compass guiding your project to perfection.
Equipped with these tools, you’re set to embark on a thrilling odyssey of polymer clay creativity. Just remember, the true magic lies in the hands of the artist.
Sculpting Tips for Beginners
Diving into polymer clay sculpting is like learning to dance — it’s all about finding the right steps and rhythm. Keep your motions light; too much pressure can turn your masterpiece into a pancake. Start with simple shapes — spheres, snakes, and pancakes themselves — to build your dexterity.
Keep an eye on proportion. If you’re crafting a character, for example, a large head on a tiny body could be comedic gold or an unintended mismatch. Imagine you’re a chef — just as they taste their dishes, you should step back and “taste” your work visually.
Mixing colors can be as delightful as blending a milkshake. Blend two shades to get a custom hue, but be careful not to overwork it, or you might end up with a murky soup. Tools are your best pals here – a toothpick can be your miniature chisel, and a plastic knife, your sculpting blade.
If fingerprints in your clay make you feel like you’re in a crime scene, smooth them over with a rub of your finger or a gentle brush of alcohol. Remember, patience is the secret ingredient here. Rushing your project is like skipping the oven preheat — the results always fall flat.
Lastly, take breaks. Your hands need rest too. Return to your work with fresh eyes, and you’ll spot details you may have missed the first go-around. Sculpting should be joyous, not a hand-cramping marathon.
Baking Polymer Clay: Best Practices
Cooking up your creations is a pivotal moment: get this right, and your project solidifies into a lasting work of art. Preheat your oven to match the instructions on the package of polymer clay you’re using. Temperatures can vary slightly between brands, so eyeballing it just won’t do. A dedicated oven thermometer is your secret weapon here to avoid any temperature-related mishaps.
Thin or delicate pieces may need a tent of aluminum foil to fend off any direct heat that could leave your masterpiece with a suntan. Lay your items on parchment paper or a ceramic tile. This setup will provide a uniform heat distribution and prevent the dreaded clay-meets-metal sticking scenario.
Timing is everything – no more guesswork. Set that kitchen timer because every second counts. Overbaking might turn your piece into a mini Pompeii, and underbaking will leave it as vulnerable as a house of cards. After the timer dings, let your artwork cool down naturally. Remember, patience is more than a virtue in this craft – it’s practically a requirement.
Remember, this isn’t a TV cooking show – no poking or prodding fresh out of the oven. Your piece will harden as it cools, so resist the temptation to test it while it’s still warm. That’s a surefire way to add unintended fingerprints or a smushed feature to your sculpture – and I don’t mean smushed in a good way.
Finishing Techniques: Sanding and Buffing
After your polymer clay creation is fully baked, it’s time to give it a smooth finish. Sanding begins this process. Start with coarser sandpaper and work your way up to finer grits; think of it like climbing a ladder—each step makes the surface smoother. Dip the sandpaper in water to reduce dust and ease the friction, moving in gentle circular motions to avoid gouging your piece.
Once you’re satisfied with the sanding, buffing adds that final touch of shine. Manual buffing with a soft cloth requires a bit of elbow grease but rewards you with a subtle sheen. For a high-gloss finish, a buffing wheel can turn your creation into a gleaming masterpiece. Always Buff carefully, with a light touch, so as not to overheat and potentially warp your piece.
Remember, patience during these finishing steps pays off. It turns a simple baked clay object into a polished work of art.
Related Reading
 Polymer Siding: A Durable Ally for Your Home
 Protein Polymer Example: Unlocking Nature’s Building Blocks
 Polymer Lipids: Revolutionizing Building Materials
 Polymer-Gel: The Secret Sauce for Durable Buildings
 Creative Polymer Solutions for Innovative Construction
Recap