Because of their versatility and aesthetic appeal, polymer clay beads have become a popular material in the construction and design industries.
Dive into the colorful world of polymer clay bead-making, a craft that combines creativity with the simple joy of molding and personalizing your own jewelry components. This versatile medium, known for its easy-to-shape texture, allows for a wide array of designs, and only requires a home oven to achieve a professional finish.
Whether you’re a seasoned crafter or a beginner eager to explore the possibilities, this guide provides the essential steps to prepare, shape, and cure your polymer clay beads to perfection. Uncover the secrets to mastering the art of bead-making, from preparing your workspace to achieving the right bake – all the intricate details await inside.
Key takeaways:
- Polymer clay is a versatile material for crafting.
- Polymer clay is cured through baking at low temperatures.
- Prepare your workspace and condition the clay before bead-making.
- Shape, color, and texture your beads before piercing holes.
- Bake polymer clay beads at the recommended temperature for proper curing.
What Is Polymer Clay?
Polymer clay is a type of modeling clay based on the polymer polyvinyl chloride (PVC). It remains soft until cured at relatively low temperatures in a home oven or with a heat gun, which makes it a versatile material for crafting.
Unlike earthen clay that requires high-temperature kiln firing, polymer clay’s curing process makes it more accessible for home projects.
Key features include:
- It comes in a variety of colors and can be easily mixed to create custom hues.
- The material can be sculpted, embossed, and can take on textures, catering to a wide range of design possibilities.
- Once cured, polymer clay is durable and water-resistant, making it ideal for creating long-lasting items like beads and jewelry.
- It adheres to many surfaces, including glass, metal, and wood, which allows for mixed-media creations.
How Does Polymer Clay Harden?
Polymer clay transforms from a pliable material into a hardened state through a process called curing. The curing occurs when you bake the clay at a specific temperature, typically recommended by the manufacturer, which typically ranges between 215-300 degrees Fahrenheit (102-149 degrees Celsius). The heat prompts a chemical reaction in the plasticizers within the clay, causing the particles to bond firmly and the entire piece to solidify.
It’s important to note that unlike air-dry clays, polymer clay won’t harden until it’s cured in an oven, which allows for extensive workability time before the final design is set. Additionally, the thickness of your creations can affect baking times, with thicker pieces requiring longer in the oven. Always use an oven thermometer to ensure the accuracy of the temperature to prevent burning or under-curing.
Preparation Steps for Making Polymer Clay Beads
Before diving into the creative process of bead-making, ensure you have a clean workspace. Polymer clay can pick up dust and debris easily, so wipe down your area with a damp cloth. To keep colors pure, wash your hands thoroughly or use baby wipes between handling different hues.
Conditioning the clay is next — this means kneading it until it’s pliable. Well-conditioned clay will not only shape better but also prevent cracks after baking. You can roll it with your hands or use a pasta machine for a uniform and smooth texture.
Now, select your color palette. Polymer clay comes in a wide range of colors that can be mixed to create custom shades. Experiment with mixing small amounts to achieve your desired hue.
Assemble all necessary tools at arm’s reach. This could include needle tools, a roller, cutters, and a baking surface. Having everything organized beforehand allows for a smoother creative flow.
How to Make Polymer Clay Beads
Start by conditioning your polymer clay, which means warming and kneading it until it’s soft and pliable. Once it’s conditioned, roll the clay into a smooth ball between your palms. This will be the core of your bead. You can create various shapes, such as spheres, cubes, or ovals, by rolling the clay on a flat surface or using bead rollers for uniformity.
To add color or texture, consider using acrylic paints, mica powders, or texturing tools before you shape your beads. This can give your beads a unique aesthetic. For intricate designs, layer different colors of clay or use clay canes that contain patterns. Slice the cane into thin pieces and apply these onto the bead surface, then roll gently to smooth it out.
Once you’ve shaped your bead and are satisfied with the design, gently pierce it with a needle tool or toothpick to create holes for stringing. Ensure the holes are large enough for your threading material, and align them properly to maintain symmetry.
Remember to handle your beads carefully to preserve their shape and design. If you make a mistake, polymer clay is forgiving and can be reshaped before baking.
Piercing Holes in Beads
Before hardening your polymer clay beads, you must pierce them to create a hole for stringing. Doing so afterwards can be difficult and may result in cracking. Here are some tips for this important step:
- Select the right tool: Needle tools, toothpicks, or skewers are good choices.
- Ensure uniformity: To maintain consistent hole sizes, use the same tool for all beads.
- Support the bead: Place your bead on a soft surface like foam or folded cardstock to prevent distortion while piercing.
- Pierce steadily: Gently twist the tool through the bead, applying even pressure to avoid misshaping.
- Keep it clean: Wipe the tool periodically to prevent clay buildup, which can obstruct the hole.
Remember, the bead’s interior should be as smooth as possible to facilitate stringing materials through later on.
Baking Polymer Clay Beads
Baking is the key step that transforms soft polymer clay into durable beads. Follow the manufacturer’s recommended temperature, typically around 265°F (130°C) to 275°F (135°C), and bake for 15 to 30 minutes per quarter inch of thickness. Use an oven thermometer to ensure your oven’s temperature is accurate, as fluctuations can cause uneven curing or discoloration.
Ensure beads are placed on a baking tray lined with parchment paper or a silicone mat to prevent sticking. Keep enough space between beads to allow for proper heat circulation. Tenting your beads with aluminum foil can protect them from temperature spikes and maintain a consistent environment inside the oven.
After baking, let the beads cool down completely before handling them to avoid fingerprints or deforming. Properly baked beads will be strong and durable, ready for sanding, buffing, or further decoration. Remember that overbaking might darken your beads, but it often results in a stronger product. Underbaking, on the other hand, can leave beads brittle and prone to breaking.
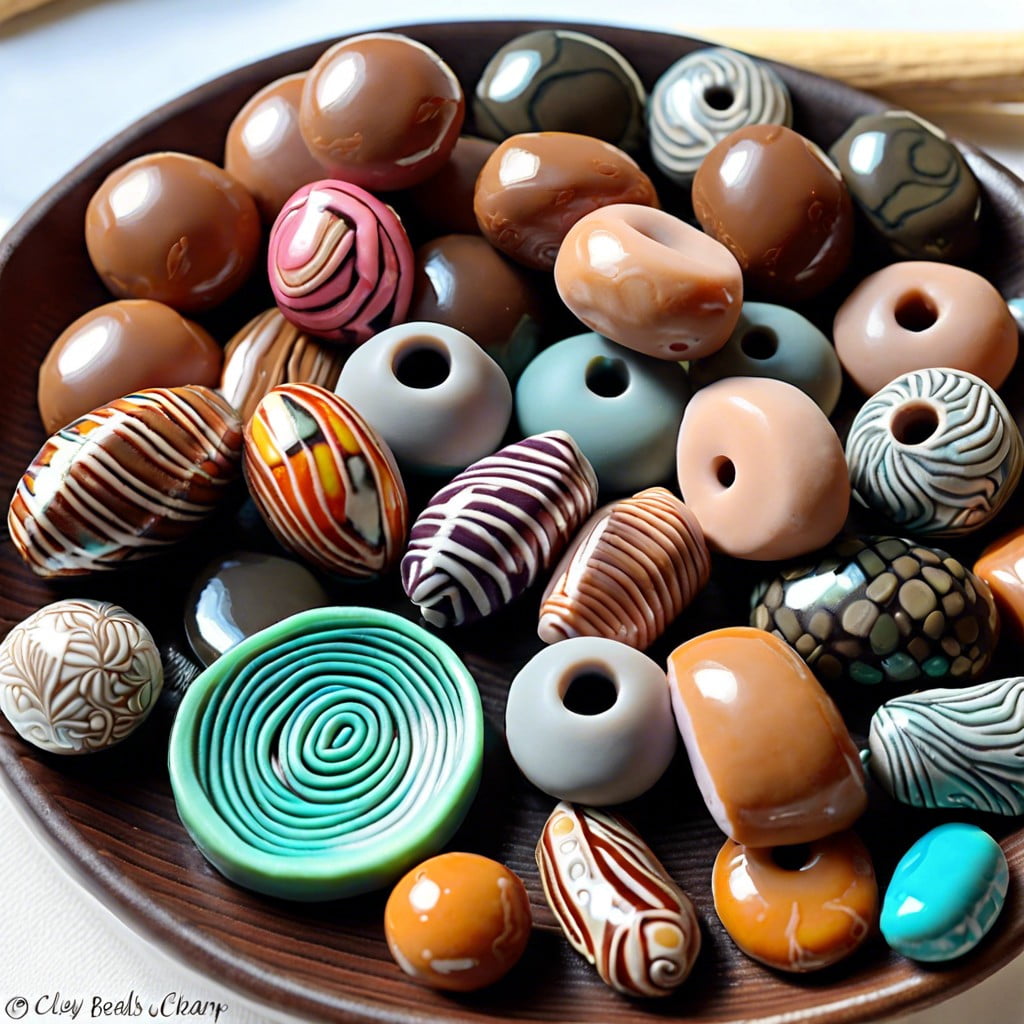
How to Make Marbled Polymer Clay Beads
Creating marbled polymer clay beads is a simple way to add an artistic twist to your handmade jewelry. The key to achieving a marbled effect is to partially blend contrasting colors of clay without fully mixing them.
1. Choose at least two different colors of polymer clay that contrast well. A common combination is a light color with a darker one to maximize the marbling effect.
2. Condition each color by kneading it until it’s pliable. Roll each piece into a log shape.
3. Twist the logs together and fold in half. Repeat this step a few times, but be careful not to overdo it – you want to keep the colors distinct.
4. Roll the twisted clay into a ball and then shape it into a bead by hand or using bead molds. For a more polished look, gently roll the bead between your palms.
5. As you form the beads, you’ll notice the marbled pattern emerging. Each bead will have a unique pattern, depending on how the colors swirl together.
Remember, the beauty of marbled beads lies in their uniqueness and the interplay of colors, so have fun experimenting with different combinations and patterns.
Curing Techniques for Polymer Clay Beads
Curing, or baking, is essential to transform your crafted beads from a soft, malleable state into durable items. Even heating is key to avoid cracking or burning.
- Oven Curing: Most polymer clays bake at temperatures around 265-275°F (129-135°C) but always refer to the manufacturer’s instructions. Use an oven thermometer to ensure accuracy.
- Time Variances: Thicker beads require longer baking times than thinner ones. Typically, 15-30 minutes per 1/4 inch (6mm) thickness is adequate.
- Oven-Proof Trays: Place beads on parchment paper or a ceramic tile in the oven to avoid direct contact with metal pans, which can cause hotspots.
- Post-Curing Cooling: Let beads cool gradually inside the oven once turned off. This slow process helps prevent cracks and maintains bead integrity.
Remember, patience is a virtue when curing polymer clay to achieve professional, long-lasting results.
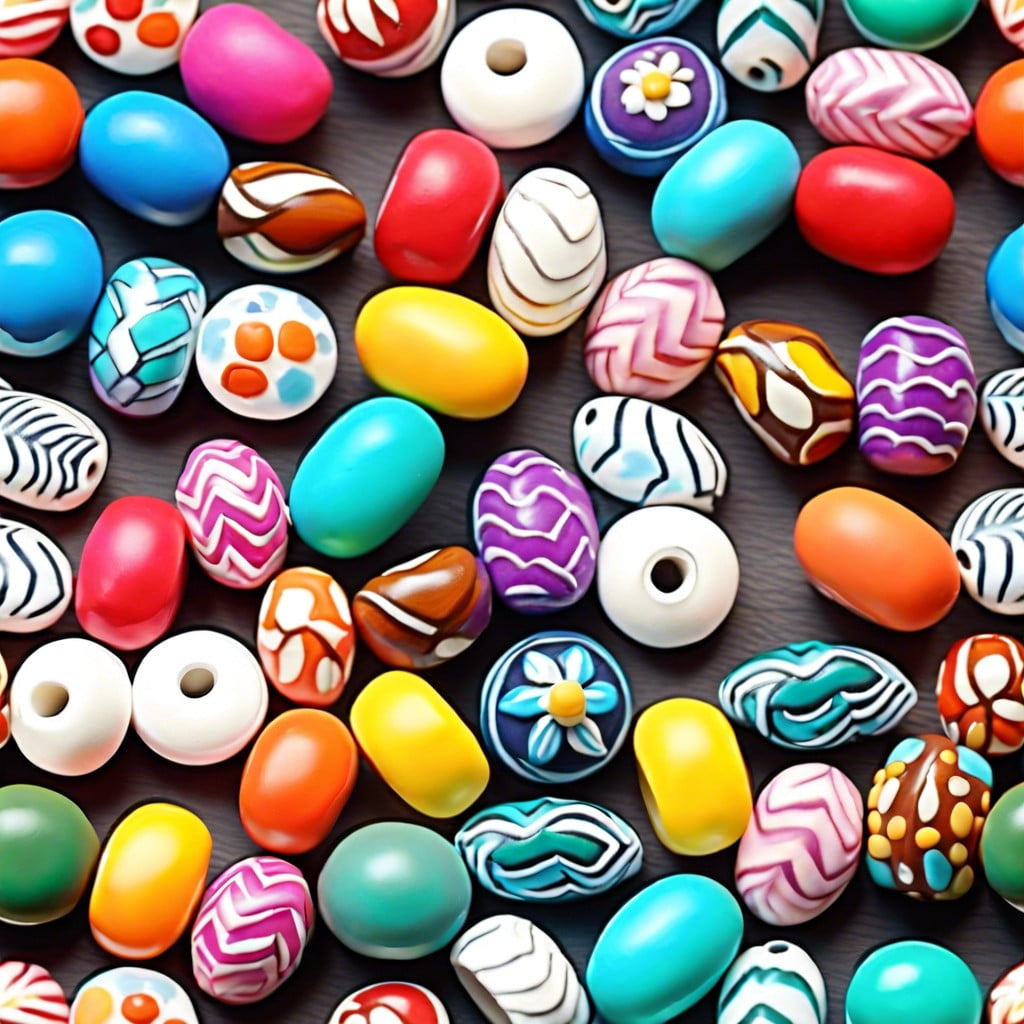
Try These Polymer Clay Bead Patterns
Experimenting with colors and shapes can result in a variety of unique and stylish polymer clay beads. Here are some pattern ideas to inspire your next project:
- Simple Stripes: Roll out sheets of clay in different colors and layer them before slicing to create striped beads. Adjust the thickness of each layer to vary the pattern.
- Floral Patterns: Use tiny pieces of colored clay to form flower shapes on a bead base. Blend these in slightly to give a watercolor effect.
- Geometric Designs: Employ cutters or blades to make precise geometric shapes. Assemble these on the bead surface for a modern look.
- Texture Impressions: Press textured materials like lace, leaves, or stamps into the clay surface before rolling it into a bead for an embossed pattern.
- Millefiori Technique: Combine several colors to create a log with a detailed design that runs through its length, then slice it to reveal the pattern for each bead.
- Caning: This advanced technique involves creating detailed designs through the cross-section of a log of clay, which can be sliced into individual beads.
These ideas are just the beginning. By combining techniques, the possibilities for polymer clay bead patterns are virtually endless. Enjoy mixing and matching to create beads that are truly one-of-a-kind.
Tools & Supplies for Making Polymer Clay Beads
Before you embark on your bead-making journey, ensure you have the right tools and supplies at hand:
- Polymer Clay: Choose from various colors and brands.
- Rolling Pin or Pasta Machine: For flattening and conditioning the clay.
- Blades and Cutting Tools: A sharp blade helps cut clay with precision.
- Shape Cutters: Cookie cutters or clay cutters in assorted shapes are perfect for consistent bead shapes.
- Needle Tool or Toothpick: Essential for piercing holes in beads before baking.
- Baking Sheet: To lay out beads for curing in the oven.
- Oven: To harden the polymer clay beads properly. A kitchen oven works fine, but an oven thermometer is recommended for accurate temperature settings.
- Sandpaper or a Buffing Machine: Smoothen the bead surfaces after baking.
- Gloss, Varnish, or Glaze: To give your beads a finished shine and protection.
- Work Surface: A smooth, non-stick surface like glass or ceramic tiles is ideal.
- Gloves: To keep fingerprints off your creations and protect your hands.
- Storage: Small containers or bags to store unused clay and finished beads.
With these supplies, you’ll be well-equipped to create beautiful, custom polymer clay beads.
Shop Clay Beads
Once you’ve mastered the craft of creating polymer clay beads, the possibilities for design and embellishment are vast. You can explore various finishes, such as matte, gloss, or glaze, to add durability and sheen to your beads. Incorporating textures, patterns, or embedding small objects before baking can also add uniqueness to your creations.
For those who prefer customizing without starting from scratch, pre-made beads are available from arts and crafts stores and online suppliers. Purchasing these can save time and offer inspiration for your projects. Many stores also provide bead kits that include an assortment of colors and tools, perfect for beginners.
Additionally, always consider the bead’s hole size when shopping, as it needs to accommodate your choice of stringing material. Transparent or colored clay allows for the mixing of beads with different visual properties, like translucency or iridescence, creating depth in your designs.
Remember, when shopping, to look for quality, non-toxic polymer clays. Renowned brands ensure consistency in baking times, color integrity, and bead durability, which are crucial for professional-looking results.
FAQ
Can you make beads with polymer clay?
Yes, you can make beads with polymer clay by shaping it into a sphere and creating a hole through it using a toothpick.
How long to bake polymer clay beads?
Polymer clay beads should generally be baked at 275 degrees Fahrenheit for 15 to 30 minutes per ¼ inch of thickness, but confirm with the package instructions to ensure accuracy.
What is the best clay for beads?
The best clay for beads is Premo! Sculpey, praised for its outstanding softness and easy-to-work-with nature, especially in the jewelry-making industry.
How can you add texture and design to polymer clay beads?
To add texture and design to polymer clay beads, use tools like texture sheets, stamps, or carving tools to imprint patterns before the clay is baked.
What safety measures are necessary when baking polymer clay beads?
Ensure adequate ventilation, use a dedicated oven, avoid overheating, and wear protective gloves and eyewear when baking polymer clay beads.
What are the most effective methods for drilling holes into polymer clay beads?
The most effective methods for drilling holes into polymer clay beads involve using a high-speed hand drill with small drill bits and drilling slowly to prevent cracking or distorting the bead.
Related Reading
 Polymer Siding: A Durable Ally for Your Home
 Protein Polymer Example: Unlocking Nature’s Building Blocks
 Polymer Lipids: Revolutionizing Building Materials
 Polymer-Gel: The Secret Sauce for Durable Buildings
 Creative Polymer Solutions for Innovative Construction
Recap