Dive into the captivating world of translucent polymer clay, because understanding this versatile material can profoundly change your approach to constructing atypical yet visually striking structures.
Key takeaways:
- Translucent polymer clay has a semi-transparent quality, resembling frosted glass.
- Thickness affects the level of transparency, thin sheets are more transparent.
- Proper baking temperature and time preserve clarity, overbaking can cause discoloration.
- Different brands have different characteristics, such as firmness and finish.
- Translucent polymer clay can be colored with opaque clay or alcohol inks for unique effects.
Overview of Translucent Polymer Clay
Translucent polymer clay is a versatile crafting medium with a semi-transparent quality that allows light to pass through, resembling the effect of frosted glass. Unique among polymer clays, its translucency can give depth and realism to projects, such as imitating gemstones or creating layered effects.
It is available in various brands, each with its own level of transparency and characteristics, which can be modified or enhanced through different techniques.
One of the key factors in working with this clay is the careful control of baking conditions. Proper curing can preserve the translucency, while overbaking might cause discoloration. Mastery of mixing colors with translucent clay allows crafters to achieve an array of subtle tints, contributing to the artistic potential of the medium.
When thin sheets of translucent polymer clay are used, the result is a higher degree of transparency compared to thicker pieces, which are more opaque yet maintain a sense of depth.
For optimal results, experienced crafters often finish their creations with sanding and polishing, which can significantly improve the clarity and quality of the final piece. With its distinct properties and multiple finish possibilities, translucent polymer clay serves as an essential component for a broad range of creative projects.
Properties of Translucent Polymer Clay
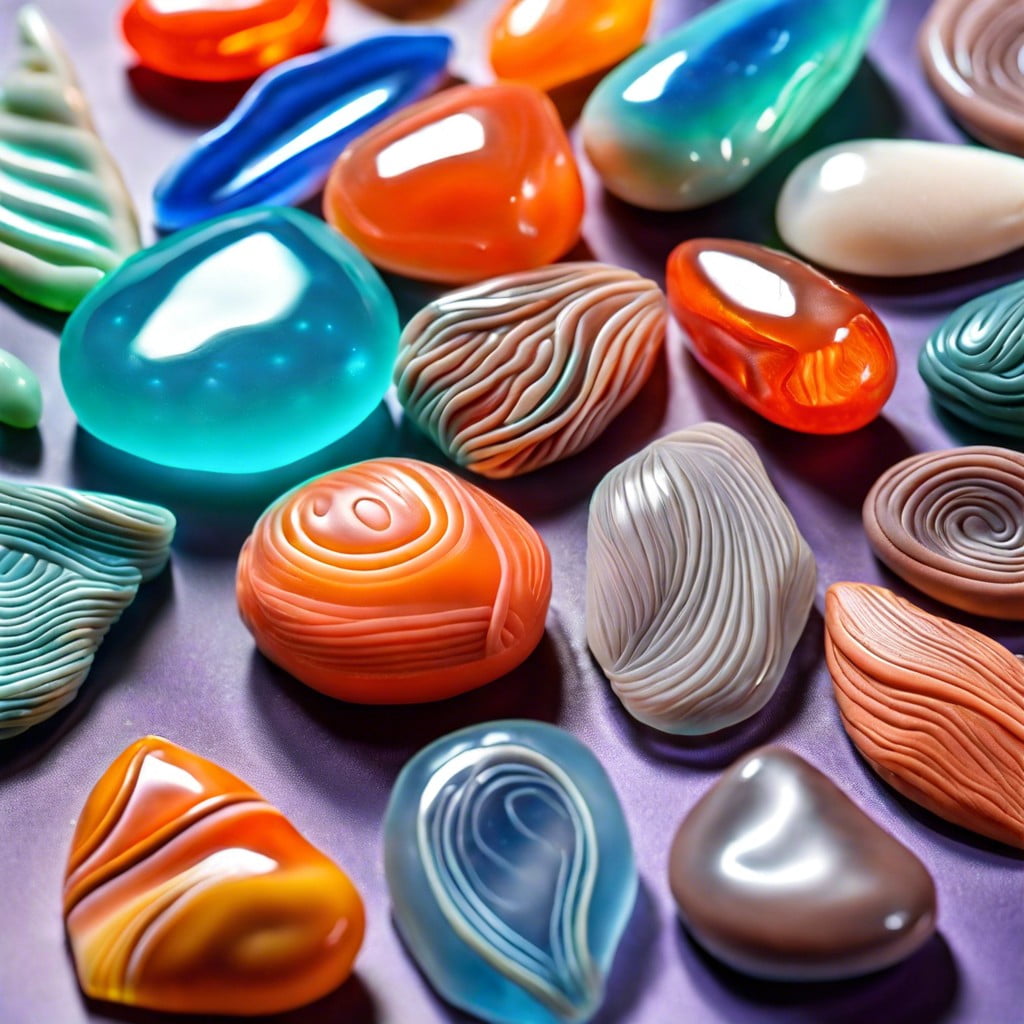
Translucent polymer clay has a semi-transparent quality that allows light to pass through, creating a distinctive, sometimes glass-like effect. This effect becomes more pronounced when the clay is rolled thin or when added as a delicate layer over other colors. The level of translucency can vary depending on the brand and the specific formulation used.
During the curing process, the appearance of the clay can change. Proper baking ensures optimal clarity, whereas overbaking can cause discoloration or a reduction in translucence. The final hardness and strength are comparable to opaque polymer clays, allowing for versatile applications in creating jewelry, miniature decor, and other intricate crafts.
The clay’s manipulation characteristics are similar to other polymer clays: it can be molded, carved, and extruded to achieve desired shapes and designs. However, users should note that fingerprints and dust are more visible on translucent polymer clay surfaces, necessitating a clean workspace and careful handling.
To preserve the unique quality of translucent polymer clay, it’s essential to condition it thoroughly to eliminate any microbubbles that could impact the finished product’s clarity. Through skillful usage, artists and crafters can harness its properties to add depth and dimensionality to their creations.
Comparing Translucency: Thin Vs. Thick Sheets
The thickness of your polymer clay plays a crucial role in how translucent the finished product will appear. Thin sheets allow more light to pass through, enhancing the transparency effect. This makes them ideal for applications such as lampshades or window panes in miniature projects.
In contrast, rolling out thicker sheets results in less light transmission and a more opaque finish, suitable for creating jewelry pieces or sculptural elements where you may desire a hint of translucency.
To achieve uniform thinness, use a pasta machine or acrylic roller, and consider the following:
- Consistency is key: Aim for an even thickness throughout the sheet to ensure a uniform translucency.
- Preventing fingerprints: Handle thinly rolled sheets with care, as they can easily pick up impressions.
- Support during baking: Place thin sheets on a flat baking surface to prevent warping or bending.
While experimenting with sheet thickness, remember that thinner pieces are more delicate and may require additional support or a gentle touch when working with them. Experimentation is your best friend here; finding the sweet spot between too thin and just right will unlock the full potential of translucent polymer clay in your projects.
Baking Translucent Polymer Clay: Tips to Avoid Browning
To ensure your translucent polymer clay remains clear and free from browning during baking, precise temperature control is key.
Most ovens have fluctuations that can affect delicate polymer projects. Here are some tips to help you achieve the best results:
- Use an oven thermometer to monitor the baking temperature closely, making sure it is consistent with the clay manufacturer’s recommended range.
- Place a piece of parchment paper or a tile underneath the clay to help distribute the heat more evenly.
- Tent the clay loosely with aluminum foil to protect it from direct heat and reduce the risk of browning.
- Consider using a dedicated clay oven or a digital convection oven for better temperature regulation.
- If the clay does start to darken, reduce the temperature slightly and extend the baking time to compensate for the lower heat.
- Post-baking, some artists submerge the hot clay in ice water, a technique known as quenching, which may enhance the clay’s clarity.
Remember, patience and practice are your best tools when working with translucent polymer clay.
Materials and Methods for Handling Translucent Polymer Clay
When working with translucent polymer clay, it’s essential to maintain its pristine condition for the best results. Use dedicated tools to avoid contamination with other colors or particles. Tools like rollers, blades, and work surfaces should be clean and free from debris.
Condition the clay with care, using gentle and consistent motions to avoid introducing air bubbles, which can affect its clarity after baking. While conditioning, handle the clay minimally to prevent the transfer of oils from your skin, which can also cloud the transparency.
Thinly rolling out the clay often enhances its translucency. Employ pasta machines or acrylic rollers to achieve uniform thickness, and consider using two sheets of parchment paper to aid in this process.
For intricate designs, utilize tools such as sculpting instruments, cutters, and molds that are free from dust and residual clay. Silicone tools are preferred, as they do not stick to the clay, reducing distortion and preserving your design’s integrity.
Store the prepared pieces in a dust-free environment while waiting to bake, which helps maintain their clarity. Consider using airtight containers or clear plastic wraps to protect them.
Finally, bake your pieces according to the manufacturer’s recommendations for temperature and time, adjusting accordingly for your oven’s peculiarities to achieve the desired level of translucency. Use an oven thermometer to ensure accuracy.
Results By Brand Name
Kato offers a firm texture and is known for maintaining sharp detail, making it an excellent choice for projects requiring precision. Its translucency increases after baking, achieving a glass-like appearance.
Premo, while slightly softer than Kato, still retains fine detail well. It boasts a waxy finish and is less prone to becoming overly translucent, which can be beneficial for certain designs.
Cernit stands out with its porcelain-like finish. It is remarkably translucent even before baking, and the translucency further intensifies after curing, making it ideal for delicate work.
Pardo’s translucency is comparable to Cernit with a slightly different tone. It has a high-wax content and is known for its gem-like clarity and strong after-bake translucency.
Fimo’s version is well-respected for evenness in baking and a smooth finish. However, it may require thinning for enhanced transparency, making it suited for experienced users who don’t mind the extra work.
Each brand offers unique characteristics. Your project’s needs—be it clarity, firmness, or finish—will guide your choice. Experimentation can unveil which brand’s properties best align with your creative vision.
Kato Translucent Polymer Clay
Kato Polyclay is a favorite among artists seeking a translucent clay with a porcelain-like finish. Due to its unique formulation, it maintains a clear, glassy appearance after baking, especially when rolled thin.
To achieve its best clarity, cure Kato clay at a slightly higher temperature, around 300-325°F, but be sure to closely monitor it to prevent overheating. This brand stands out for its durability, which makes it ideal for making thin and delicate pieces that are less prone to breakage.
Additionally, its firm texture benefits those who engage in detailed sculpting as it holds fine details well and resists fingerprints during handling. Remember, Kato’s properties may result in a slight color shift towards a more neutral tone when cured, an aspect to consider when planning your project.
Premo Translucent Polymer Clay
Premo, a popular brand among artists and hobbyists, produces a translucent polymer clay known for its flexibility and strength. It maintains a good balance of firmness and malleability, which makes it ideal for both delicate and sturdy projects. This brand stands out because it is less likely to become brittle after baking.
Here are a few key points about Premo Translucent Polymer Clay:
- Baking Properties: Premo is designed to minimize the risk of discoloration with proper baking. For the best results, follow the recommended temperature of 275°F (135°C) and use an oven thermometer to ensure accuracy.
- Mixing with Colors: Adding color to Premo translucent clay is easy and does not significantly diminish its translucent quality. Small amounts of opaque colors or alcohol inks blend well and can create a variety of tints and effects.
- Conditioning: Although firmer than some other brands, it conditions smoothly with minimal effort, which is helpful when preparing the clay for intricate work.
- Clarity After Baking: The clarity of the finished product is excellent, especially when the clay is rolled thin. Thicker pieces may have a slightly cloudy effect, which can be desirable for certain designs.
Premo’s translucent clay is also praised for its buffing capabilities, allowing finished pieces to reach a glass-like shine. Overall, it is a versatile choice for projects requiring a balance of transparency and durability.
Cernit Translucent Polymer Clay
Cernit’s version of translucent polymer clay offers a remarkable balance of strength and clarity. This Belgian brand is respected for delivering a finish that is closest to the look of real glass or semi-precious stones when properly cured.
Even when rolled into thin sheets, it maintains a high level of transparency, with minimal cloudiness. For optimal results, condition the clay thoroughly until it’s pliable to ensure an even distribution of plasticizers, which enhances the transparency.
Keep in mind that Cernit translucent clay tends to have a firmer consistency compared to other brands, which might require more conditioning time.
When baking Cernit clay, follow specific temperature guidelines—usually around 110-130°C (230-266°F), depending on the thickness of your piece—to prevent discoloration. If the clay appears translucent while raw but turns opaque after curing, the temperature may be too high.
Additionally, artisans often leverage the sanding and buffing process post-baking to bring out a glass-like finish, capitalizing on Cernit’s superior post-cure clarity.
Remember that the clarity of the translucent effect varies between Cernit’s different lines, such as Cernit Number One or Cernit Nature, to meet diverse creative needs.
Pardo Translucent Polymer Clay
Pardo Translucent Polymer Clay stands out for its high degree of clarity and strength after curing, which makes it a favorite among artists seeking a glass-like finish for their creations. This German-made clay boasts a beeswax base, which contributes to its unique properties.
When working with Pardo Polymer Clay, conditioning is smooth and easy, often requiring less effort to manipulate compared to other brands. For achieving the best possible transparency, roll the clay into thin layers before baking. The thinner the layer, the greater the translucency once cured.
Curing Pardo requires attention to temperature; it should be baked at the recommended temperature of 120°C (248°F) to prevent any discoloration. Monitor the baking process closely to ensure the clay does not overheat, as maintaining the ideal temperature is crucial for clarity.
Due to its composition, Pardo Translucent Polymer Clay also holds inclusions well, such as glitters or leaf metals, without losing translucency, providing ample opportunities for artistic expression and innovation.
Fimo Translucent Polymer Clay
Fimo, a well-recognized brand in the polymer clay community, offers a translucent option that bakes to a somewhat milky appearance. Its consistency is firm, which requires thorough conditioning to make pliable for intricate work. The advantage of this firmness is the fine control over shape and detail it affords artists.
When thin layers are used, Fimo’s translucent clay reaches a higher degree of translucency, ideal for creating realistic miniature foods or delicate flowers.
For optimal results, cure Fimo translucent clay at the recommended temperature of 110°C (230°F) for 30 minutes per 6mm thickness. Keep in mind that to preserve the clarity of the clay, it’s crucial to avoid overheating during the baking process. Covering your creation with aluminum foil or a ceramic tile during baking can help prevent it from darkening.
After baking, some crafters choose to sand and buff their Fimo pieces to a high shine, further enhancing the glass-like quality. It pairs nicely with alcohol inks and mica powders for a range of versatile finishes from muted to vibrant.
And while Fimo’s translucency may not be as clear as some other brands, it remains a popular choice for professional polymer clay artists and hobbyists for its durability and ease of handling.
Coloring Translucent Polymer Clay
Incorporating color into translucent polymer clay opens a world of creative possibilities. Adding a small amount of opaque colored clay can tint your translucent base without overwhelming its unique light-passing property. Alcohol ink is another option; a few drops can create deep, vivid hues or subtle shades, depending on the amount used. Mica powders and foil leaf also provide a way to give your project a shimmering, ethereal effect. When using pigments or powders, remember that a little goes a long way—too much can muddy the clarity you’re aiming for. Mixing inclusions like glitter can add sparkle but maintain the translucent nature, especially if you use iridescent or transparent glitter.
Always test colors and inclusions on a small piece before committing to your entire project to ensure the desired outcome. Keep in mind the color may change slightly after baking, often becoming more pronounced, so adjust your mix accordingly.
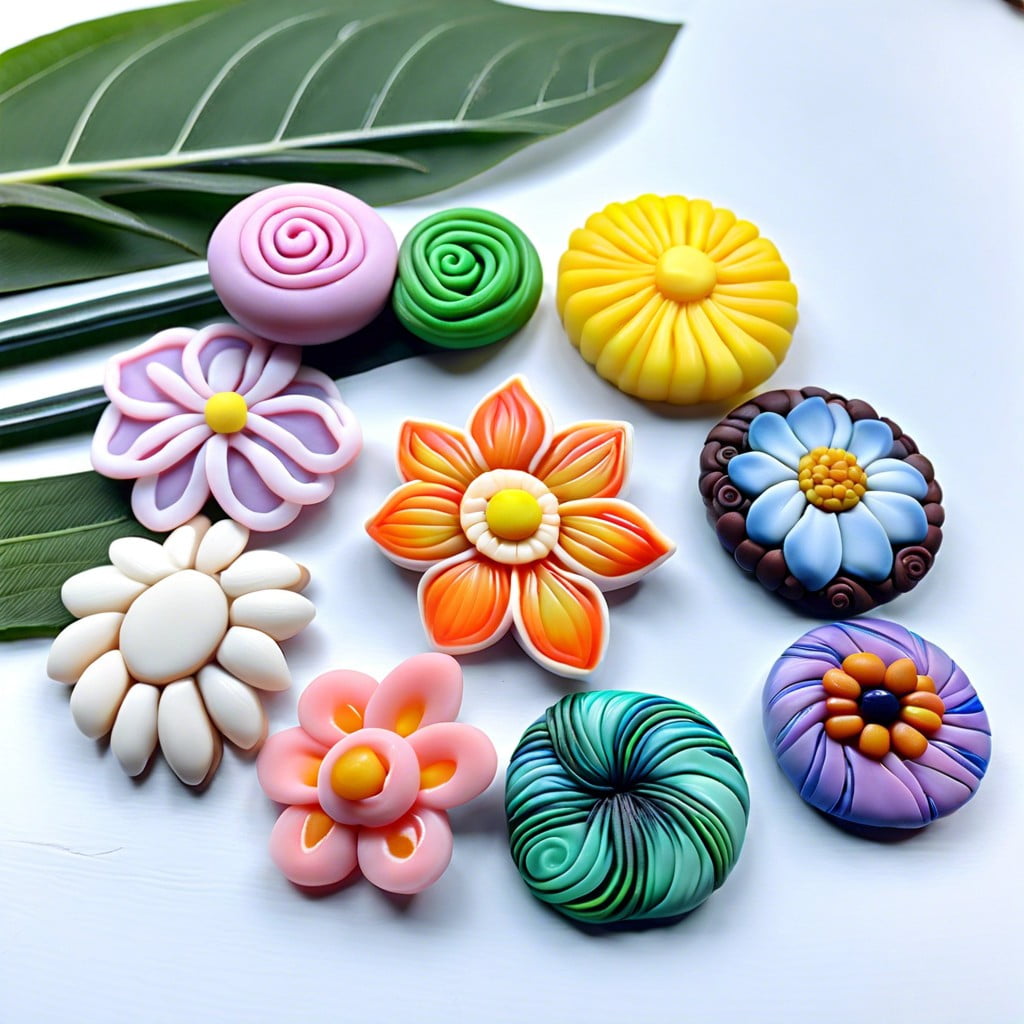
Creative Uses for Translucent Polymer Clay
Translucent polymer clay offers a unique set of possibilities for artists and crafters. With its semi-transparent properties, it is perfect for mimicking glass, water, or precious stones in miniature creations.
Here are several inventive ways to incorporate this versatile material into your projects:
- Layering: By stacking thin layers, one can achieve depth and complexity in designs, creating a 3D stained glass effect.
- Mixed media art: Incorporate translucent clay with other materials, such as metal foils or inks, to create interesting textures and appearances.
- Jewelry: Construct ethereal, light-catching earrings, pendants, and beads that resemble frosted glass or gemstones.
- Miniature food: Apply it to mimic transparent items like a pitcher of lemonade or a bowl of gelatin.
- Lighting: Build small lampshades or candle holders, letting light filter through to emit a soft, warm glow.
- Sculpture: Use it in sculptures to simulate certain features like ghostly apparitions, waterfalls, or ice.
- Caning: Create complex canes with a translucent component—when sliced, each pattern will reveal a delicate translucency.
By manipulating the translucency of polymer clay through these various applications, crafters can achieve astonishing visual effects that add a level of sophistication and beauty to their works.
Quenching Technique for Enhanced Clarity
The quenching technique is a simple yet effective method to improve the clarity of your baked polymer clay creations. By immediately placing your hot, freshly baked translucent clay into ice water, the sudden temperature drop enhances transparency. This is because the rapid cooling prevents the formation of micro-bubbles that can cloud the clay.
To achieve the best results, follow these steps:
- Prepare a bowl of ice water before you begin baking.
- Once your polymer clay piece is fully baked, remove it from the oven carefully.
- Immediately submerge the item in the ice water for a few minutes.
- Remove from the water and dry gently with a soft towel.
This method is particularly beneficial for thin pieces where clarity is most desirable. Remember that thicker pieces may require longer baking and cooling times to optimize transparency. Experiment with test pieces to find the right balance for your project.
Discussion On the Clearest Translucent Polymer Clay
When searching for the clearest polymer clay, consider that the level of clarity can depend on several factors including the brand and the user’s technique. Some hobbyists argue that Pardo Art Clay outshines others for its transparency after baking, often described as having a glass-like appearance.
Factors that affect clarity:
- Thickness of the piece: Thinner sheets tend to allow more light to pass through, enhancing clarity.
- Baking temperature and time: Proper curing as per instructions is critical; overbaking can cause discoloration and reduce clarity.
- Conditioning: Thoroughly conditioned clay ensures even distribution of plasticizers, contributing to a more translucent finish.
- Finishing: Sanding and buffing post-bake can substantially improve the transparency of the cured clay.
By paying attention to these elements, even clays that are not as inherently clear can offer improved translucency with the right technique. Additionally, experimenting with different brands may help identify the one that meets your specific needs for transparency in projects.
FAQ
Which polymer clay is translucent?
The polymer clay that is translucent is the Pardo translucent.
Can you make polymer clay translucent?
Yes, polymer clay can indeed be made translucent, with several brands such as Pardo, Premo, Kato, Cernit, Fimo, and Sculpey offering such options.
How do you make polymer clay look like clear glass?
To make polymer clay appear like clear glass, you should sand it and subsequently polish it using a high-speed buffing wheel.
How long to bake translucent polymer clay?
Translucent polymer clay typically requires baking at 275 degrees Fahrenheit for 15 to 30 minutes per quarter-inch of thickness.
What are the uses of translucent polymer clay in construction?
Translucent polymer clay is used in construction primarily for decorative accents, model making, and light fixtures due to its lightweight, moldable, and light-transmitting properties.
How does the temperature affect the translucency of polymer clay during baking?
The temperature during baking can affect the translucency of polymer clay, with higher temperatures generally making the clay more transparent.
Can translucent polymer clay be combined with other materials for unique effects?
Yes, translucent polymer clay can be combined with other materials like metal leaf, dyes, and inks to achieve unique visual effects.
Related Reading
 Polymer Siding: A Durable Ally for Your Home
 Protein Polymer Example: Unlocking Nature’s Building Blocks
 Polymer Lipids: Revolutionizing Building Materials
 Polymer-Gel: The Secret Sauce for Durable Buildings
 Creative Polymer Solutions for Innovative Construction
Recap