Discover the versatility and creative possibilities of polymer clay techniques, from basic conditioning to intricate caning and millefiori designs.
Key takeaways:
- Conditioning clay ensures pliability and consistent color.
- Create intricate designs with clay canes and slice for patterns.
- Use stamps for detailed designs on clay, enhance with paint.
- Add powder pigments for unique color effects on clay.
- Varnish clay creations for protection and enhanced appearance.
Conditioning Polymer Clay
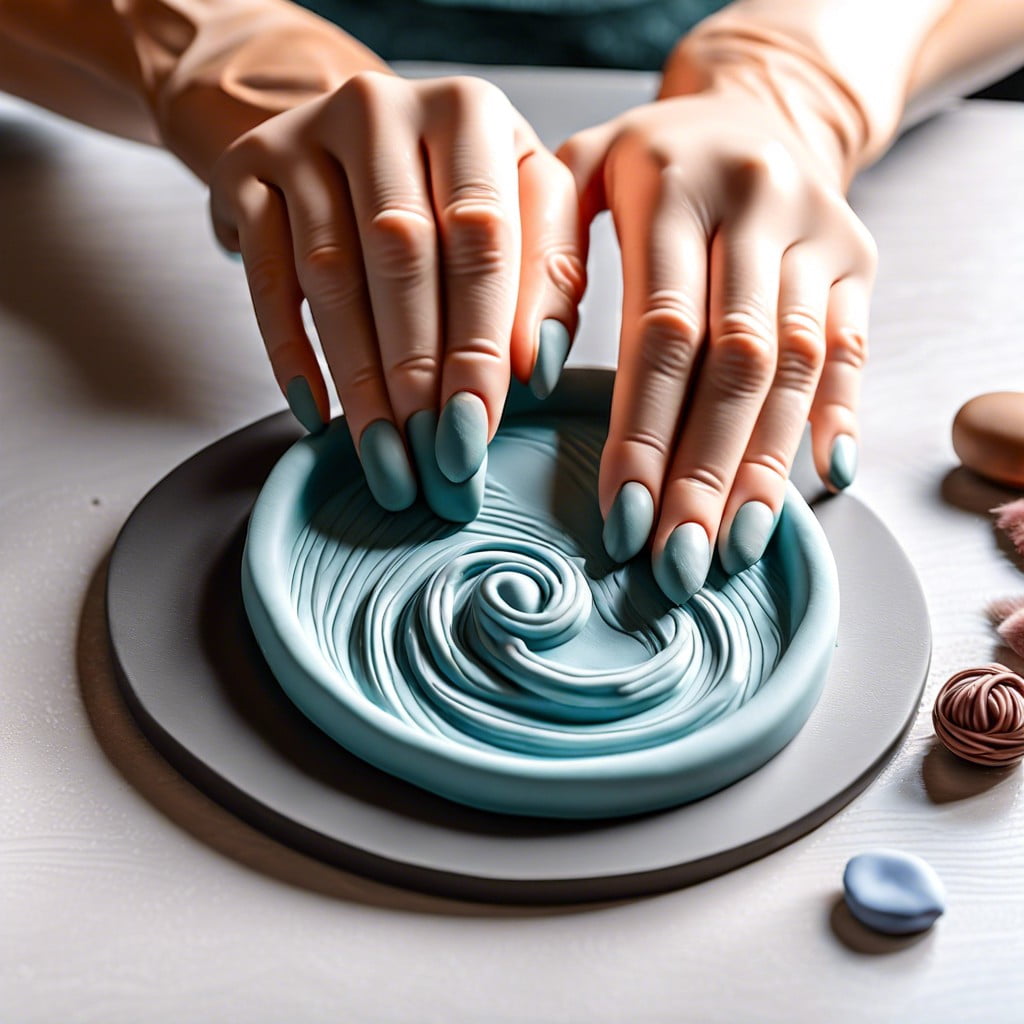
Before diving into the exciting world of polymer clay crafting, it’s crucial to prepare the clay, which ensures ease of use and optimal results. This process is known as conditioning, which makes the clay pliable, reduces the risk of cracking, and mixes the pigments evenly for a consistent color.
Start by warming the clay in your hands, kneading and stretching it until it becomes soft and flexible. Rolling pins or pasta machines can speed up this process, particularly for larger amounts or harder clay. If the clay is extremely stiff, a small amount of clay softener or mineral oil can be worked into it to make it more malleable.
It’s worth noting that overworking the clay can make it too soft and sticky. If this happens, let it rest or place it in a cooler environment to firm up slightly before use. Properly conditioned clay will leave you with a smooth, supple medium ready to be transformed into your creative designs.
Creating Clay Canes
Clay canes are a cornerstone of polymer clay artistry, offering endless possibilities for intricate designs. Imagine creating a detailed pattern or image within a log of clay that can be sliced to reveal the design in cross-section, much like a loaf of bread.
To start, choose a simple motif, such as a flower or geometric shape. Assemble different colored clays to represent various components of the design. Roll these out into individual ‘logs’ that you’ll assemble into the larger cane.
Precision is key when combining these logs. Ensure they’re firmly joined to avoid air pockets which can distort the design. You can reduce the size of the cane by rolling it gently, compressing it and elongating the pattern uniformly.
The beauty of canes is their versatility. Once you’ve created one, you can slice it thin to create veneers for covering objects or thicker to form beads. Always slice with a sharp blade to maintain the integrity of the pattern.
Experimentation is encouraged. Blend colors, play with patterns, and explore symmetries. With each cane, you’ll refine both your skill and your personal artistic style.
Stamping Techniques
Stamping onto polymer clay is a straightforward and creative way to add intricate designs to your projects. To start, you’ll need a flat piece of conditioned clay and your choice of stamps—these can be purchased designs or everyday items with interesting textures.
Press the stamp firmly into the clay to make a clear impression. For a deeper effect, apply even pressure across the stamp or roll it with a brayer. If the clay sticks to the stamp, a light dusting of cornstarch can help.
Experiment with overlaying different stamps to create unique patterns. The clay can then be cut into shapes or left as a textured sheet to be used as a part of a larger piece.
After baking, the stamped impressions can be highlighted with acrylic paint or metallic waxes applied to the raised areas to enhance the textured effect. This technique can transform simple polymer clay pieces into detailed works of art with minimal effort.
Adding Powder Pigments
Powder pigments offer a way to add a burst of color and unique effects to your polymer clay creations. By lightly brushing these powders onto the clay before baking, you can achieve a variety of finishes, from metallic to pearlescent.
To apply, you can use a soft brush to dust the pigment onto the surface of your unbaked clay. It’s important to use a gentle touch to avoid embedding the powder too deeply, which could diminish the effect. For more control, tap off any excess pigment from the brush before applying, or mask off areas with tape for a clean, sharp design.
Experimentation is key to discovering the full potential of powder pigments. Layering different colors, using stencils, or combining them with other techniques like stamping can lead to stunning, multi-dimensional results. Just remember to work in a dust-free environment to keep your pigments from scattering, and always seal your finished piece with a clear varnish after baking to protect the pigment and keep it from rubbing off.
Varnishing Polymer Clay Creations
Applying a layer of varnish to your polymer clay projects can enhance their appearance and protect the surface. Here are some key points to remember when varnishing:
- Choose the right varnish: Water-based varnishes are preferable as they are less likely to react with the clay compared to solvent-based options. Additionally, look for varnishes specifically designed for use with polymer clay.
- Prepare the surface: Before applying varnish, ensure your clay piece is clean, free of dust and fingerprints. Wipe it with a damp cloth if necessary and let it dry completely.
- Apply thin coats: It’s best to apply multiple thin coats rather than a single thick one. Thin coats dry faster and are less likely to create drips or brush marks. Use a soft brush and apply the varnish evenly.
- Drying time matters: Allow each coat to dry thoroughly before applying the next one. Rushing this process can result in tackiness or cloudiness.
- Test for compatibility: Always test the varnish on an inconspicuous area or a scrap piece of the same clay to ensure there is no adverse reaction.
Remember, varnishing is not mandatory, but it can add durability and a professional finish to your projects. Choose the finish that suits the aesthetic you’re aiming for, whether it’s matte, satin, or glossy.
Related Reading
 Polymer Clay Flowers: Crafting Delicate Blooms for Any Occasion
 Polymer Clay Christmas Ornaments: Craft Your Own Festive Decor
 Polymer Clay Earring: Creating Fashion Statements with Your Own Hands
 How to Make Polymer Clay Beads for Stunning DIY Jewelry
 Water Balz Jumbo Polymer Ball: The Ultimate Guide to Fun and Utility
Recap