Learn how to create and use polymer clay molds to bring intricate designs to life in your next crafting project.
Key takeaways:
- Types of polymer clay molds: Silicone, plastic, push, and DIY.
- Choose the right polymer clay: Consider softness and bake times.
- How to use polymer clay molds: Press clay evenly, freeze briefly, and coax out gently.
- Tips for demolding without breaking: Chill, be gentle, and use a release agent.
- Cleaning and maintenance: Use mild soap, dry thoroughly, and use rubbing alcohol for stubborn residue.
Types of Polymer Clay Molds
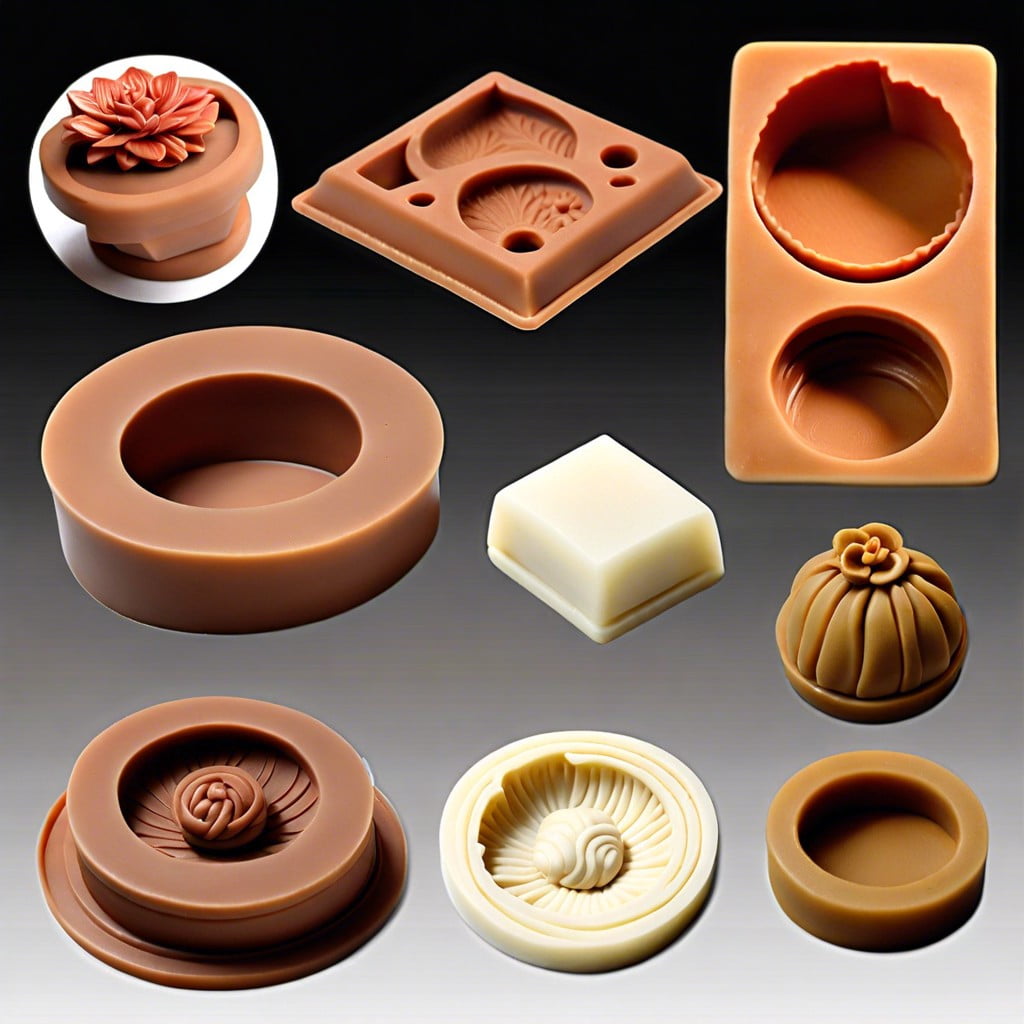
Polymer clay molds come in an amusing array of shapes and sizes, making them perfect for everything from detailed jewelry designs to large decorative items. Broadly, they can be divided into several categories:
Silicone molds reign supreme for their flexibility and ease of use. They are soft and pliable, allowing creators to pop out their designs without a fuss, and they can capture intricate details beautifully.
Plastic molds are another popular choice, especially for those on a budget. They are harder than silicone, so getting your creations out without altering the shape might need a bit of a gentle touch.
Push molds are specifically designed for quick and easy replication. Just push the clay in, smooth it out, and you’re ready to go. They’re great for beginners who want to practice their skills without worrying too much about precision.
Lastly, many creative souls venture into DIY molds by using ordinary household items or even food! Think cornstarch or silicone putty to create custom shapes tailored to their project’s needs.
No matter which type tickles your fancy, there’s a mold out there that’s just right for turning your polymer clay visions into tangible treasures.
Choosing the Right Polymer Clay for Molds
Selecting the ideal polymer clay for your mold is a bit like choosing the perfect partner for a dance-off: compatibility is key! Here are some helpful pointers:
First, consider softness. Softer clays, often easier to manipulate, are your go-to for detailed or intricate designs. They press into molds more readily, capturing those tiny details that make your heart skip a beat—without the extra arm workout!
On the other hand, firmer clays, while they might require a bit more elbow grease, hold their shape better once cured. This is particularly favorable for larger or structural pieces, where you don’t want your art slumping like a teenager on a couch.
Also, keep an eye on the bake times and temperatures. Each type of clay has its own requirements, and mismatching these can lead to disastrous dance moves—think the baking equivalent of stepping on toes! Ensure the clay you choose matches your needs in terms of final strength and flexibility.
By taking these factors into account, you can ensure a smooth and successful crafting session that ends in a standing ovation, rather than a sculptural mishap!
How to Use Polymer Clay Molds
First up, grab your polymer clay—making sure it’s well-conditioned and soft. A stiff clay can feel like a workout you didn’t sign up for! Roll it into a smooth ball, and gently press it into the mold. Push evenly to avoid air pockets that are as unwelcome as a mosquito at a barbecue.
Next, give it a good, firm press. Imagine you’re trying to make an impression on your in-laws! This step ensures every intricate detail of the mold is captured. Don’t rush—patience is key, much like waiting for your favorite cake to bake.
Once you’ve checked that the clay fills every nook and cranny, it’s chill time—literally. Pop the mold into your freezer for about 10 minutes. This step is a game-changer; it’s like magic, making the clay firm up just enough to make your demolding hassle-free.
After the brief freeze, gently flex the mold and coax the clay out. Treat it like coaxing a cat out from under the bed—gentle and persuasive, not forceful. There you have it! With practice, you’ll be popping out masterpieces faster than popcorn on movie night.
Tips for Demolding Polymer Clay Without Breaking
Demolding polymer clay can be as nerve-wracking as defusing a time bomb, but fear not! With a few simple tips, you’ll have your artwork out in no time, intact and looking sharp.
* Chill out! Literally, place your filled mold in the freezer for about 15 minutes. Cold helps the clay contract slightly, making it easier to pop out without sticking or distorting.
* Gentle does it. When removing the clay, press gently from the back of the mold. Imagine you’re coaxing a cat out from under the bed rather than yanking it out—patience is key!
* Use a release agent. A thin layer of cornstarch or a light spritz of water can act as a barrier between the clay and mold, reducing the suction effect that leads to breakages.
Remember, it’s not about brute force but the delicate art of persuasion!
Cleaning and Maintenance of Polymer Clay Molds
Keeping your polymer clay molds in tip-top shape not only extends their life but also ensures your next creative venture isn’t a sticky mess. Think of it as self-care for your molds!
Firstly, always let the clay completely cure or harden before attempting any cleaning. Yanking soft clay out is a no-go—it’s the fast track to damaging your detailed designs.
For regular cleanup, mild soap and warm water are your best friends. Gently scrub with a soft toothbrush to get into all the nooks and crannies. For those stubborn clay residues, soaking the mold in soapy water for a few hours can work wonders. It’s like a spa day for your molds!
After washing, dry thoroughly. Moisture is the arch-nemesis of longevity in molds. Imagine tiny water droplets throwing a party and inviting mold and mildew—definitely not the guests you want.
Occasionally, you might notice a thin layer of residue that just won’t budge. In such cases, rubbing alcohol can be gently applied with a cotton swab. It’s like magic eraser for your molds!
By keeping your molds clean and dry, you’re setting yourself up for endless successful demolding parties, where every figurine is a guest of honor!
Related Reading
Polymer Lower: Understanding Its Uses and Benefits in Modern Applications Polymer Molding: Understanding the Process and Its Applications
 How to Find Plastic Extrusion Clients: A Comprehensive Guide to Acquiring Business Leads
 How to Make Plastic Fence Extrusion: A Comprehensive Guide for Beginners
 How to Remove Masking from Plastic Extrusion: Simple & Effective Techniques
Recap