Learn how to create realistic polymer clay food replicas with simple techniques and tools.
Key takeaways:
- Gather essential supplies: polymer clay, sculpting tools, rolling pin, texture tools, blade, oven, glaze, work surface.
- Condition clay and choose realistic colors.
- Pay attention to dimensions and add realistic textures.
- Follow curing instructions specific to your clay brand.
- Expand collection with fruits, vegetables, pizza, pastries; use texturing tools and finishes.
Supplies You Need
To begin crafting polymer clay food, gather the following essentials:
- Polymer clay: Available in various colors, pick shades that best mimic the food you’re creating.
- Sculpting tools: These can range from a simple toothpick to a set of professional sculpting tools for detailing your creations.
- Rolling pin or pasta machine: Useful for flattening clay to an even thickness.
- Texture tools: Items like a stiff brush, sponge, or even a piece of fabric can imprint realistic textures.
- Blade or craft knife: For clean cuts and shaping pieces of clay.
- Oven: Polymer clay requires baking to harden, so a home oven or a dedicated clay oven is necessary.
- Glaze or varnish: This is optional, but it gives a finish to your work and can make it look more realistic or appetizing.
- Work surface: A smooth, clean area such as ceramic tile or glass is ideal as it won’t stick to the clay and is easy to clean.
Keep in mind that the quality and variety of these tools can influence the level of detail and realism in your miniature food creations.
Step-by-step Directions
Begin by conditioning your polymer clay; knead it until it’s soft and pliable, ensuring an even consistency. Choose colors that closely resemble real food – browns, yellows, and reds often work well for baked goods and vegetables.
Roll out the clay to an even thickness. A rolling tool or pasta machine can help achieve a uniform layer. If you’re aiming for realism, pay attention to the dimensions – tiny food requires a delicate touch.
For textured items, like bread or cookies, use a toothbrush or a needle tool to create realistic surfaces. Alternatively, other household items like sponges or aluminum foil can create interesting patterns.
To assemble components, like sandwich layers or pie fillings, apply slight pressure to adhere pieces together. Avoid using too much force, which can distort shapes and details.
Once your miniature food item is assembled, you’ll need to follow the curing instructions specific to your brand of polymer clay. This typically involves baking it in an oven at a low temperature. Be sure to use an oven thermometer to maintain accuracy, as overheating can lead to discoloration or burning.
After baking, allow your creation to cool completely before handling. This step is crucial for the polymer to set and harden properly, ensuring durability.
Miniature Sugar Cookies Instructions
To create miniature sugar cookies using polymer clay, begin by selecting a light beige or tan color for an authentic cookie look. Soften the clay by kneading it gently in your hands.
Roll out the clay evenly to a thickness that mimics a real cookie, roughly 1 to 2 millimeters thick. Use a miniature round cutter, or a suitable alternative, to punch out the cookie shapes from the sheet of clay.
Give the cookies a realistic texture. You can use a toothbrush or a piece of fabric to lightly press onto the surface of each cut-out to mimic the slight roughness of baked sugar cookies.
To add color, lightly brush the edges and tops of the cookies with a small amount of chalk pastel shavings in a golden brown color. This simulates the baked coloration sugar cookies acquire around the edges and offers a more lifelike appearance.
Next, bake the clay cookies according to the polymer clay package instructions. Typically, this will be at a low temperature for a short period. Ensure you’re working in a well-ventilated area and always use an oven thermometer to avoid overheating, which can cause discoloration.
Once the cookies have cooled, you can optionally decorate them. Use a fine-tipped tool or toothpick to apply tiny dots of white liquid polymer clay or 3D paint to emulate icing. Allow any decorations to dry or cure as necessary.
Remember these tips to help maintain the illusion of real miniature sugar cookies: keep proportions consistent, use color sparingly to ensure natural shading, and handle the clay with care to avoid fingerprints that might disrupt the scale and texture.
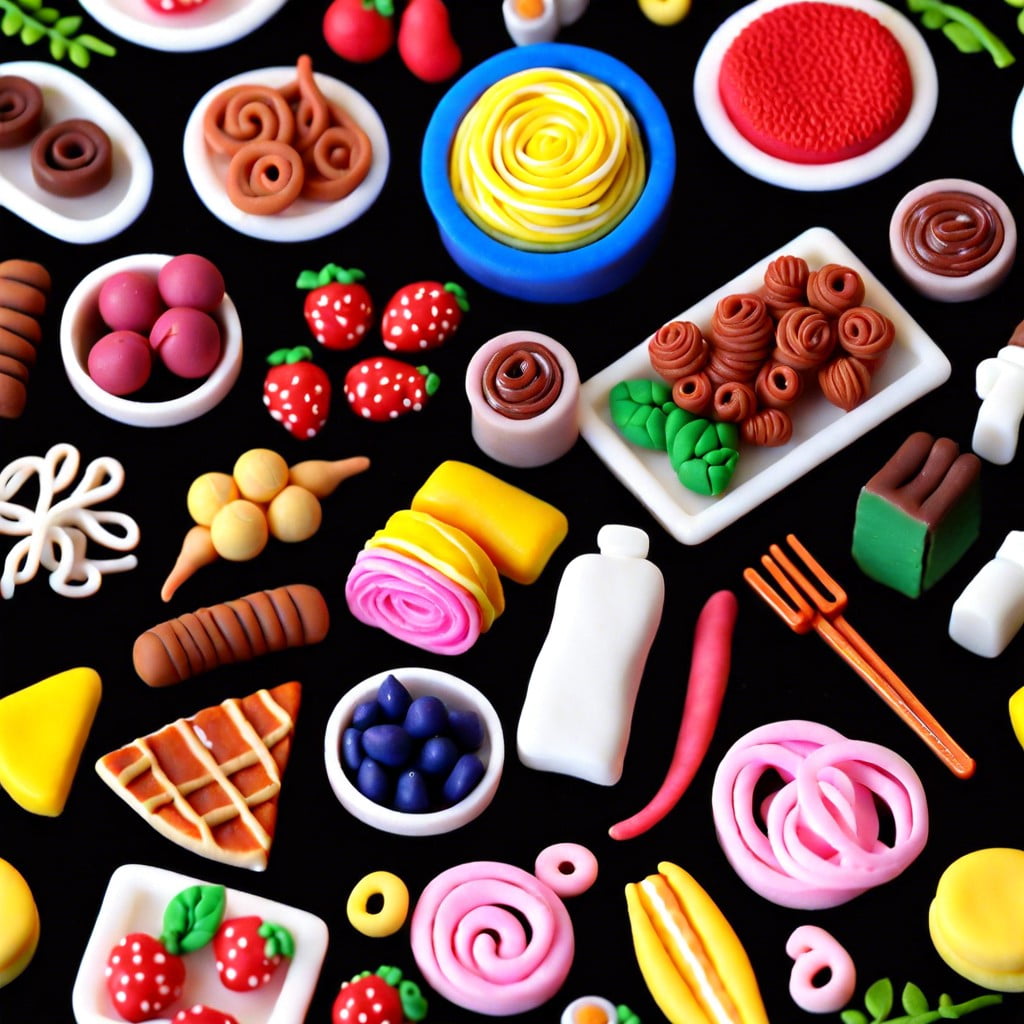
More Mini Food
Expanding your miniature food collection can be incredibly engaging. Beyond sugar cookies, you can craft a variety of treats and meals to create a full spread. Consider sculpting tiny fruits and vegetables, like apples or carrots, which can add a pop of color and variety to your collection. Next, perhaps, make a miniature pizza, with customizable toppings that allow for creativity. Don’t overlook tiny pastries, such as croissants or tarts, which can showcase impressive detailing work. To increase realism, use texturing tools to mimic the surface of various foods and blend colors judiciously to replicate natural shades. Remember that the use of gloss or matte finishes can enhance the appearance of different food items, giving them an authentic look. Finally, keep scaling consistent among your pieces to maintain a cohesive collection.
Related Reading
 Polymer Clay Flowers: Crafting Delicate Blooms for Any Occasion
 Polymer Clay Christmas Ornaments: Craft Your Own Festive Decor
 Polymer Clay Earring: Creating Fashion Statements with Your Own Hands
 How to Make Polymer Clay Beads for Stunning DIY Jewelry
 Water Balz Jumbo Polymer Ball: The Ultimate Guide to Fun and Utility
Recap