Find out everything you need to know to choose the perfect polymer clay earrings kit for your crafting adventures.
Key takeaways:
- Kit contents: clay, tools, hardware, instructions – essential for crafting.
- Beginner tips: choose colorful clay, quality tools, clear instructions, avoid budget pitfalls.
- Baking advice: preheat oven, check temperature, use parchment, monitor time.
- Customization ideas: mix colors, add texture, cut shapes, embellish, paint.
- Maintenance tips: store carefully, clean gently, avoid sunlight, maintain metal parts.
What’s Included in the Kit
Inside your polymer clay earrings kit, you’ll find a treasure trove of goodies to unleash your inner artist. It’s pretty much a crafter’s paradise in a box.
First up: the clay itself. Typically, you’ll get a variety of colors, often neatly packaged in small blocks. Think of it as a rainbow, but without the rain.
Next, the tools. Expect essentials like shaping and cutting tools. These may resemble dental instruments, but trust us, they are a lot more fun.
Then we have the earring hardware. Hooks, posts, and jump rings, oh my. This kit has all the bits and bobs needed to turn your clay masterpieces into wearable art.
Lastly, don’t forget the instruction booklet. While it might not be as riveting as the latest bestseller, it’s handy for tips, tricks, and avoiding rookie mistakes—like baking your clay at the temperature of a thousand suns.
Every kit might differ slightly, but these items are the bread and butter. Or should we say clay and tools?
How to Select the Best Kit for Beginners
First things first, consider the variety of clay colors in the kit. Go for one with a range of colors to spark your creativity. More colors, more fun!
Next up, check if the kit includes essential tools like rolling pins, cutters, and earring backings. You don’t want to be stuck using your mom’s baking roller, trust me.
Look for comprehensive instructions or even online tutorial support – hand-holding is okay when you’re starting out.
Also, make sure the clay is a good quality, non-toxic, and easy to handle. You don’t want it crumbling into pieces like a failed science experiment.
Lastly, stick to a budget but be wary of kits that seem too cheap. You want value, not a box of regret.
Tips for Baking Polymer Clay Earrings
Preheat your oven. Just like warming up before a workout, polymer clay needs a consistent temperature to bake evenly. Set your oven to the temperature recommended on the clay package, usually around 265-275°F (129-135°C).
Avoid the burnt cookie disaster. Use an oven thermometer to make sure your oven isn’t lying to you. It might say 275°F, but it could secretly be at 290°F and then, poof, burnt earrings.
Don’t go straight to the baking tray. Place your earrings on parchment paper or a ceramic tile. This helps distribute heat evenly and reduces the chance of shiny spots or burned bottoms.
Time it right. Follow the baking time on the package instructions, but remember: small pieces bake faster. Check on them halfway through to avoid over-baking.
Let them cool naturally. Resist the urge to touch, poke, or prod. Let your earrings cool completely before handling. This makes them stronger and less likely to break.
Turn up the ventilation. Bake in a well-ventilated area or use a dedicated toaster oven in a separate space. Polymer clay can release fumes that you don’t want lingering in your kitchen.
There you have it, your clay masterpieces await their grand unveiling!
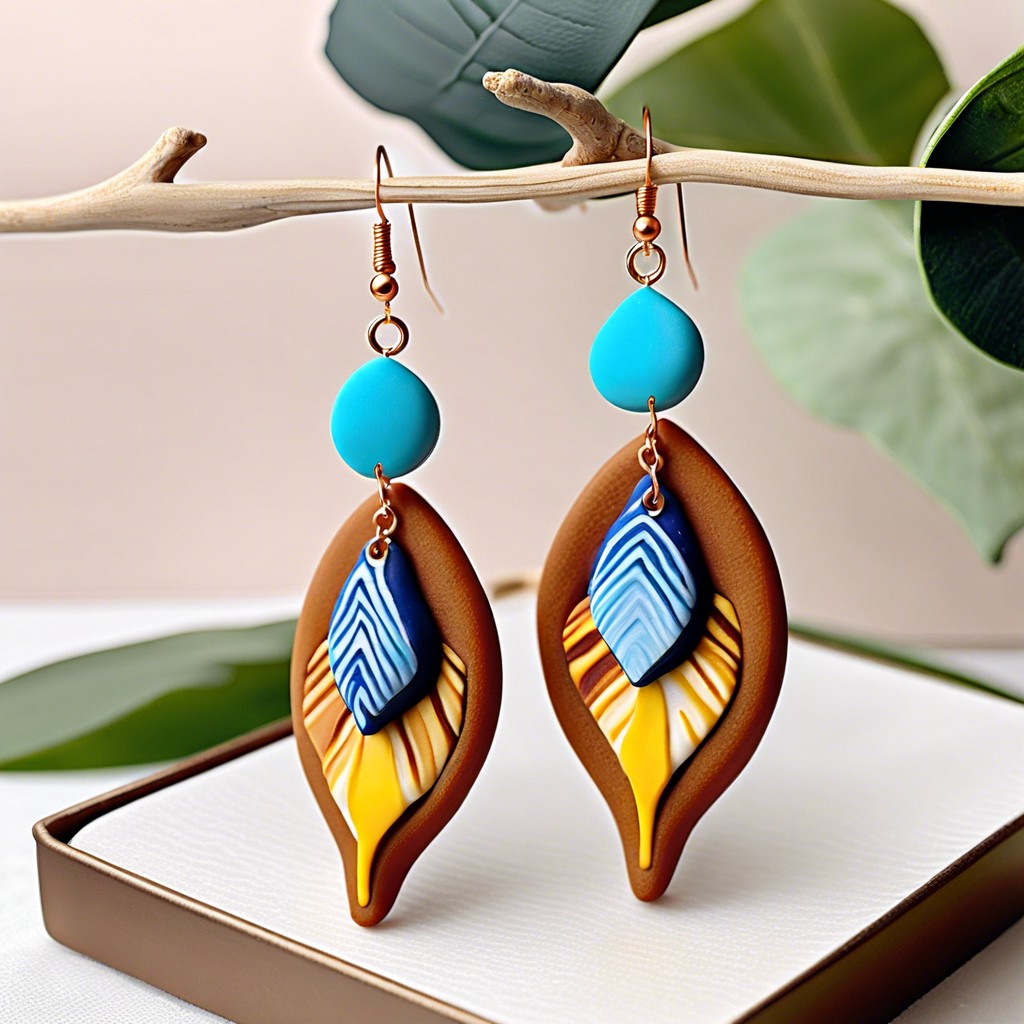
Customizing Your Earrings
Now comes the fun part—making your earrings pop with a personal touch!
Mix and Match Colors: Polymer clay comes in a wild array of colors. Blend them like you are making a smoothie. Swirl hues together or layer them for a marbled effect. Go Picasso on those bad boys!
Texture Tools: Small household items can add unique textures. Use a toothpick for intricate designs or a piece of lace for delicate patterns. Voilà, instant sophistication!
Cut and Shape: Cookie cutters, anyone? These little angels can create perfect circles, hearts, or teardrop shapes. For more intricate designs, try stencils or get creative with freehand cutting.
Add Embellishments: Think glitter, beads, or tiny charms. Embed them into the clay before baking or attach with a strong adhesive post-bake. Bling it up, make it sing!
Paint and Seal: Post-baking, a little acrylic paint can go a long way. Add fine details or highlight textures. Finish with a gloss varnish to protect your masterpiece and give it a professional shine.
Hooks and Backings: Attach earring hooks or studs after baking. You’ll need some jewelry pliers and a steady hand. Secure them tightly; losing an earring is like losing a tiny piece of your soul!
Maintenance and Care for Longevity
Once you’ve crafted your stunning polymer clay earrings, you’ll want them to sparkle like new for as long as possible. Here’s how to keep them in top shape:
First, store your earrings in a cool, dry place, ideally in a jewelry box or a ziplock bag to protect them from dust and moisture. Polymer clay is durable but not invincible.
Second, clean them gently. A soft cloth or a q-tip dampened with a bit of water and mild soap works wonders. Remember, polymer clay and abrasive cleaners are like cats and water—they just don’t mix.
Also, avoid prolonged exposure to direct sunlight. Just like humans, polymer clay can get sunburned, which might cause discoloration over time.
Lastly, if any metal components are attached, make sure they are also well-maintained. Tarnished metal can ruin the look of your fabulous earrings. A quick polish now and then will do the trick.
Taking these simple steps ensures your unique creations stay as fabulous as the day you made them!
Related Reading
 Polymer Clay Flowers: Crafting Delicate Blooms for Any Occasion
 Polymer Clay Christmas Ornaments: Craft Your Own Festive Decor
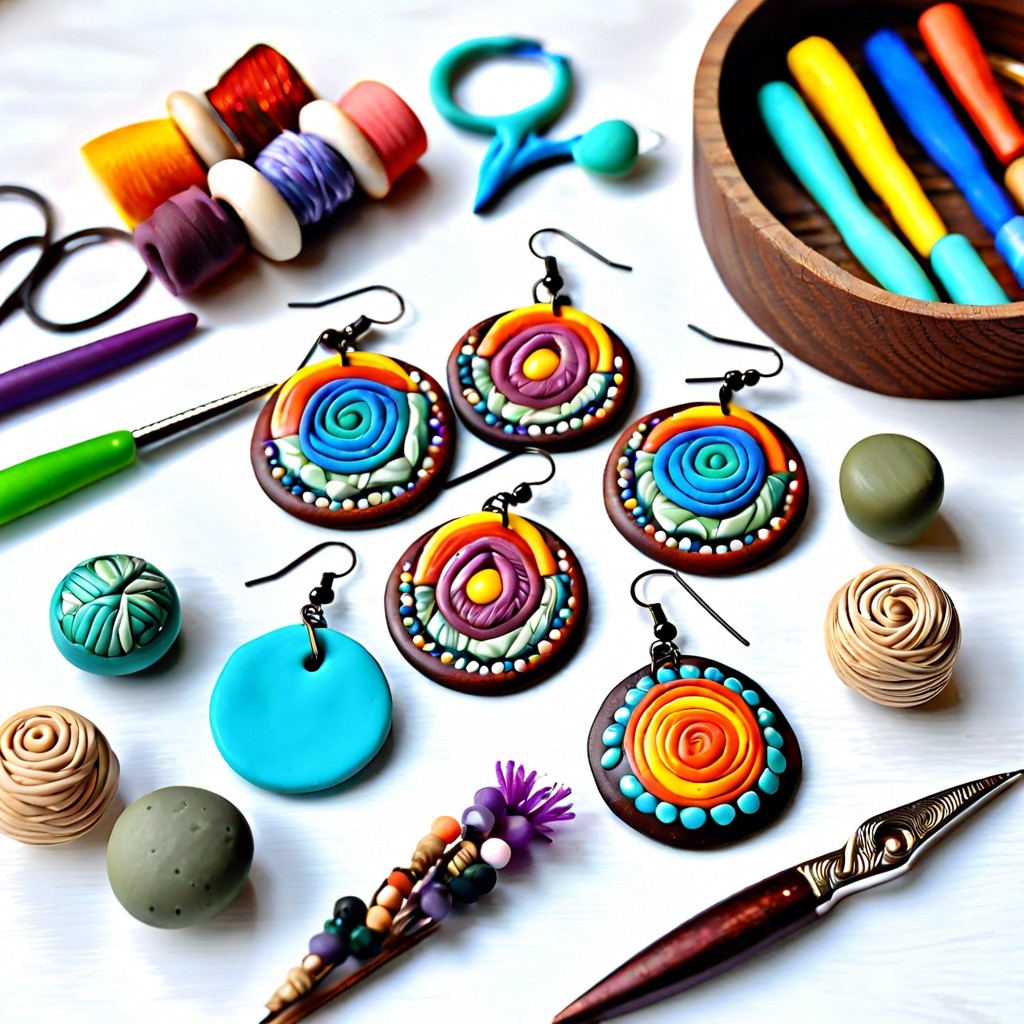 Polymer Clay Earring: Creating Fashion Statements with Your Own Hands
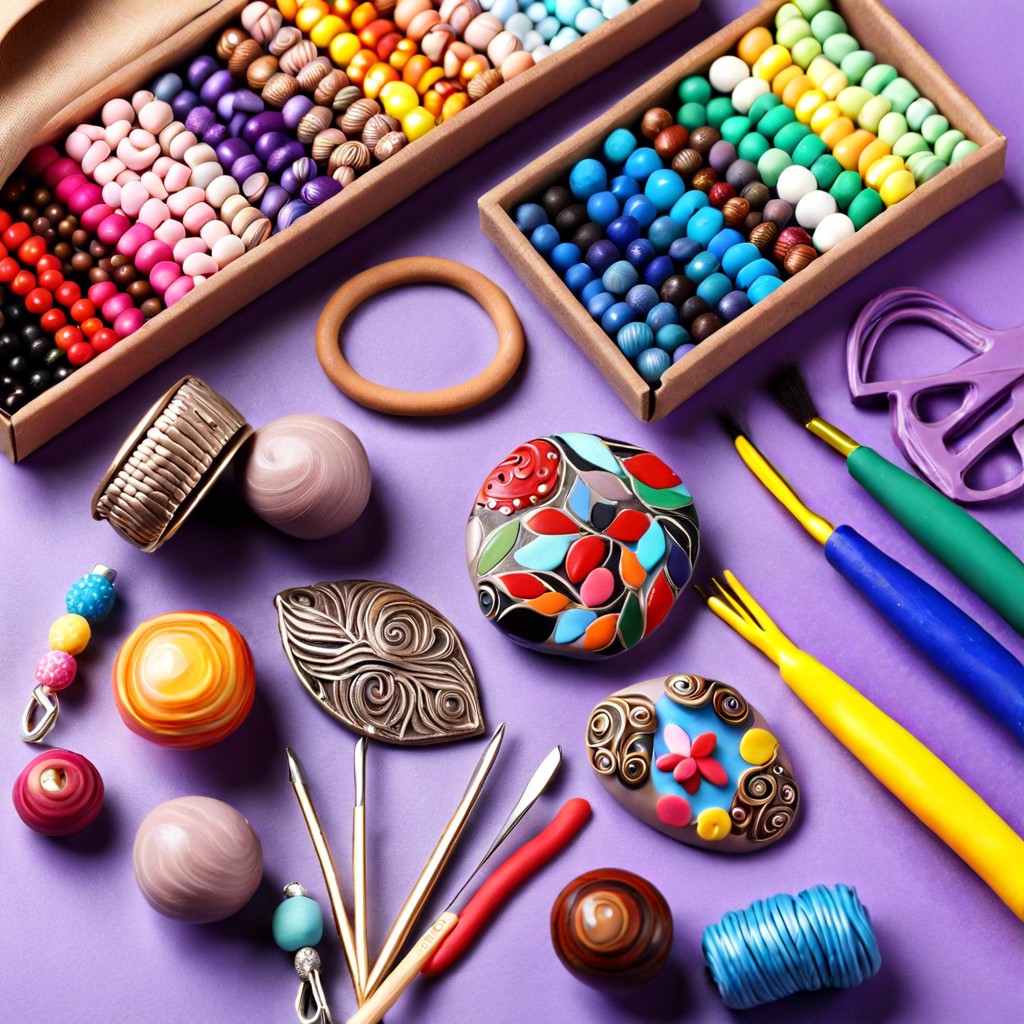 How to Make Polymer Clay Beads for Stunning DIY Jewelry
 Water Balz Jumbo Polymer Ball: The Ultimate Guide to Fun and Utility
Recap