Create striking and durable polymer clay earrings because this versatile material allows for endless design possibilities and variations in color.
Dive into the world of crafting with polymer clay, a perfect medium for creating stunning and unique earrings that reflect your personal style. Whether you’re a beginner or an experienced artisan, working with polymer clay offers a rainbow of possibilities to make beautiful, lightweight jewelry.
This article guides you through each step, from selecting the ideal clay brand to the final touches on your baked and polished statement pieces. Alongside, you’ll find tips on setting up your creative space, a checklist of essential supplies, and techniques for shaping and decorating your earrings. By the end, you’ll possess the know-how to transform simple polymer clay into eye-catching accessories.
Key takeaways:
- Polymer clay is a versatile and colorful material for making earrings.
- Choose a reputable brand with the right consistency, strength, and color options.
- Prepare your workspace by organizing tools, cleaning surfaces, and separating colors.
- Gather all necessary supplies, including clay, tools, baking supplies, and earring hardware.
- Shape and cut the clay, bake it according to the instructions, and sand and smooth the finished earrings.
What Is Polymer Clay?

Polymer clay is a type of modeling clay based on the polymer polyvinyl chloride (PVC). It remains soft and malleable until cured through baking at a low temperature in a home oven.
With its versatility and wide range of colors, it is a favorite material for crafting, including jewelry making. Unlike earthen clays, it doesn’t dry out over time, allowing for extended work periods.
One of its key advantages is that you can mix it to create custom colors and can be finished with various techniques to achieve different effects, such as polishing, sanding, or adding a glaze post-bake.
Choosing the Right Brand
The selection of a polymer clay brand can greatly influence the outcome of your earrings. Key factors to consider include the clay’s consistency, strength post-baking, and color options.
- Consistency: Some clays are firmer and more suited for detailed work, while others are softer, ideal for quick shaping.
- Strength: For durable earrings you’ll want a brand known for its strength after baking. Research the brand’s reviews and see what other crafters have experienced.
- Colors: Look for a brand with a wide range of colors that maintains vibrancy after curing.
Popular brands such as Sculpey, Fimo, and Kato have established reputations for quality and variety. Sculpey III is known for its softness, Fimo Professional for detailed work, and Kato Polyclay for its exceptional strength and durability. Explore and experiment with different types to find the perfect fit for your style and design needs.
Prepping Your Workspace
Begin by selecting a flat, smooth surface in a well-ventilated area to ensure a safe crafting environment. Cover your chosen workspace with wax paper, parchment paper, or a silicone mat to protect the surface and prevent the clay from sticking.
Ensure that all your tools and materials are within reach for an efficient workflow. This includes clay, rolling and cutting tools, baking supplies, and any embellishments.
To prevent contamination, wipe down your workspace and tools with a damp cloth to remove any dust and debris. Clean hands are also essential to avoid transferring oils and dirt onto the clay.
Maintaining a dedicated space for different colors can help to prevent them from blending accidentally. Use separate tools for different color families if possible.
Lastly, set out a small bowl or container to store any scraps and small pieces of clay, which can be reused or mixed to create new colors. Keeping your workspace organized will make the creative process smoother and more enjoyable.
Gather Your Supplies
Before diving into your creative process, ensure you have everything needed:
- Polymer Clay: Select a few colors or a kit for a variety of options.
- Rolling Tool: A small acrylic roller or pasta machine for flattening clay.
- Cutters: Cookie or clay cutters in shapes you like, plus a blade for trimming.
- Work Surface: A smooth tile, glass cutting board, or dedicated craft mat.
- Parchment Paper: To line your baking tray without sticking.
- Oven: Pre-calibrated to bake the clay according to its specific instructions.
- Earring Hardware: Earring posts, hooks, jump rings, and backings based on design preference.
- Jewelry Pliers: For opening and closing jump rings and attaching components.
- Glaze or Varnish: If desired, to give the finished earrings a shine or matte finish.
- Other Decorative Elements: Textures, stamps, powders, or paints for added flair.
Having these essential tools and materials at arm’s reach streamlines the crafting process, letting you focus on the art of creating your earrings.
Softening Clay and Mixing Colors
When your polymer clay feels tough, it’s time to soften it. Warm it in your hands and roll it into a ball or a snake shape, then fold and twist until it’s pliable. If it’s particularly stubborn, you can use a clay conditioner or mix in a softer clay.
Color blending is part art, part science. To create custom hues, start with primary colors—red, blue, and yellow—and blend them together in small portions to achieve the desired shade. Use a pasta machine or acrylic roller to uniformly mix the colors. Remember, mixing two complementary colors (opposites on the color wheel) will give you a shade of brown or grey, so blend carefully to maintain the vibrancy of your colors. Experiment with different combinations to expand your color palette and add a unique touch to your earrings.
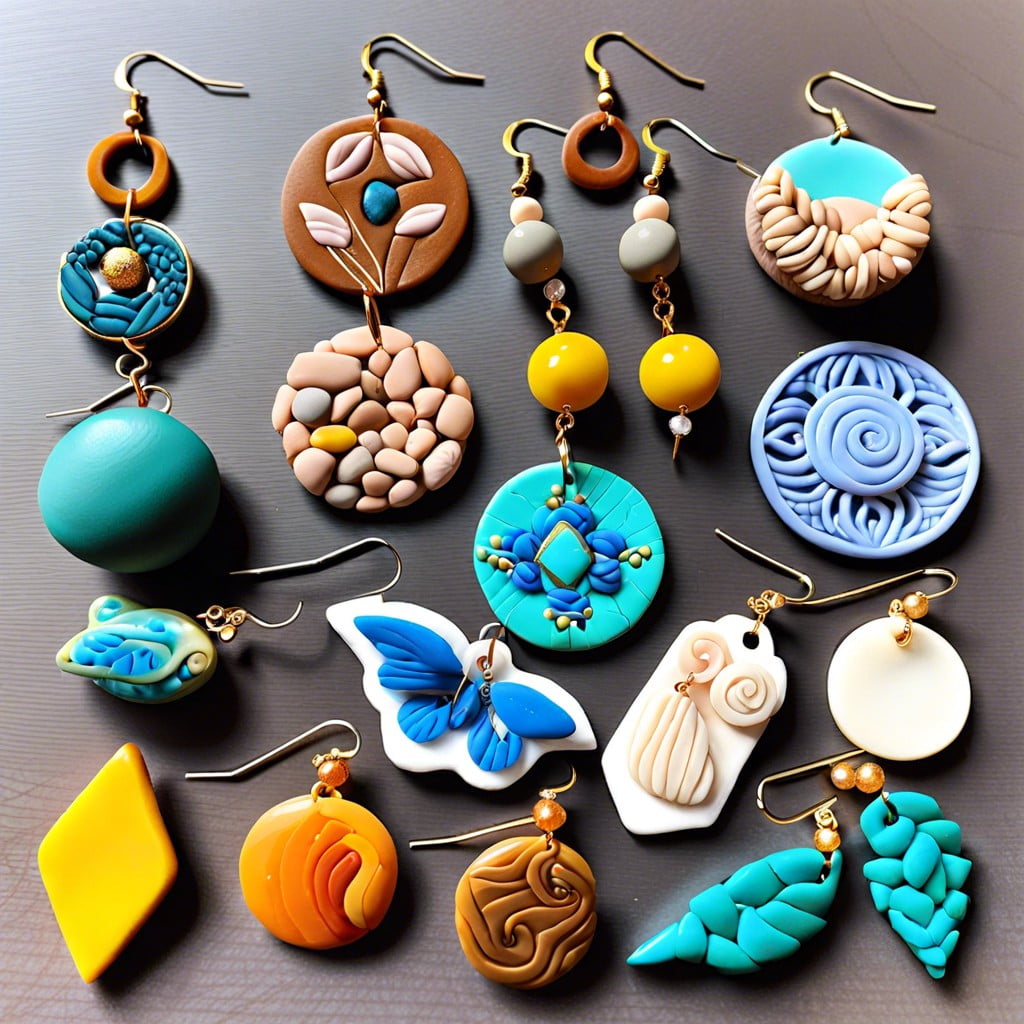
Polymer Clay Earring Ideas
Exploring shapes and designs can unlock a world of creativity when crafting polymer clay earrings. Geometric patterns, like circles, squares, and triangles, are a great starting point for beginners. Organic shapes, such as leaves or flowers, offer a naturalistic appeal and can be quite stunning with added textures.
Experiment with modern art styles by using abstract forms; these can be anything from irregular shapes to interlocking pieces. Marbling techniques create unique, one-of-a-kind patterns, while incorporating metallic leaf or foil can add a luxe touch.
Think about themes – if you’re making gifts or selling your creations, consider popular motifs such as celestial bodies (stars, moons), seasonal icons (snowflakes for winter, suns for summer), or trendy items like succulents and cacti.
Don’t shy away from pop culture inspiration either; favorite characters or symbols from movies, TV shows, and books can be quirky and personalized options.
Play with textures by using stamps, carving tools, or everyday objects to press patterns into your clay. Choose colors that complement each other and consider the addition of glitter or mica powders for a sparkling finish.
Remember, the key is to have fun and let your imagination guide you. The possibilities are endless – from sophisticated and simple to playful and bold.
Shaping and Cutting
To shape your polymer clay, start by flattening it into a sheet using a rolling pin or a pasta machine. Aim for an even thickness of about 1/8 inch to ensure thorough baking and avoid brittleness. Use cookie cutters, clay blades, or craft knives for defined shapes and clean edges. For an original design, hand mold the clay or create texture with stamps, lace, or other patterned objects.
When cutting, apply gentle pressure to ensure smooth edges. Any imperfections can be refined later. If the clay sticks or distorts while cutting, try chilling it briefly in the refrigerator for easier manipulation. Remember to remove any lint or dust from your shapes before baking, as they’ll be hard to get rid of once cured.
Baking Polymer Clay
Proper baking is crucial for the durability of your earrings; it cures the clay and solidifies the design. Different brands require unique temperatures and times, so refer to the packaging for specifics.
Generally, ovens should be preheated to between 215-275°F (102-135°C). Place earrings on a parchment-lined baking sheet or on ceramic tiles for an even heat distribution. An oven thermometer can ensure accuracy, avoiding under or overbaking, which can lead to brittleness or burning.
Thin parts may require less time, while thicker pieces might need longer. To prevent discoloration, tent your creations with aluminum foil. After baking, let them cool down gradually to maintain shape and strength. If your earrings aren’t as hard as you’d like, you can bake them again, but do so cautiously to preserve the integrity of your designs.
Sanding and Smoothing
After baking, your earrings may have rough edges or a slightly uneven surface. To achieve a professional, smooth finish, sanding is essential. Here’s how to do it effectively:
- Begin with a lower grit sandpaper (around 400) and gently sand the baked surface. Be patient and avoid applying too much pressure to prevent warping.
- Gradually move to higher grits (600, 800, 1000, and above) as the surface becomes smoother. This stepwise progression creates a glass-like finish.
- Dip the sandpaper in water to minimize dust, or consider wet sanding techniques, which also help to achieve a finer finish.
- For intricate designs, use a small file or fold the sandpaper to reach tight spaces.
- Once satisfied with the smoothness, wipe the pieces with a damp cloth to remove any residue.
- If you desire an extra glossy finish, you can use a buffing tool or a soft cloth with a polishing compound.
Remember, patience is key during sanding; rushing may result in scratches or an uneven finish that detracts from your beautiful designs.
Adding Jump Rings and Earring Backs
After your earrings have cooled down, it’s time to transform them from pretty clay pieces into wearable art. Here’s how to attach jump rings and earring backs:
1. Identify the Attachment Points: Decide where the jump ring and earring back will go. For dangle earrings, the top is typical, whereas studs will have the back attached directly.
2. Use the Right Tools: Needle-nose pliers are ideal for opening and closing jump rings. You’ll need two pairs—one to hold the ring steady, the other to twist it open.
3. Open Jump Rings Properly: Twist the jump ring open by moving one side towards you and the other away. Avoid pulling the ends directly apart, as this can distort the shape.
4. Attach Jump Rings: Slide the opened jump ring through the hole in your earring and twist it back to close. If no hole exists, you can use a drill after baking to make a small one. Ensure it’s closed tightly to avoid your earrings slipping off.
5. Add Earring Backs: For studs, glue the flat pad earring post to the back of your earring using strong adhesive. Allow sufficient drying time as per the adhesive instructions.
6. Ensure Secure Attachments: Gently test the jump ring and earring back to make sure they’re firmly attached and won’t detach when worn.
By following these steps, you’ll have a beautifully handmade piece of jewelry ready to wear or gift.
Sealing Polymer Clay Earrings
After baking and cooling your earrings, the sealing process can enhance durability and impart a polished look. Not all earrings require sealing; it depends on the finish and effect you desire. If you opt to seal:
1. Choose a Sealant: Varathane, a water-based polyurethane, is a popular choice for its clarity and durability. Alternatively, you can use acrylic sealers in spray or brush-on forms. Some artists prefer a coat of resin for a glossy, protective finish.
2. Application: Apply your sealant according to the manufacturer’s instructions. Brush-on sealers should go on with a soft brush to avoid brush marks. For spray sealants, apply in a well-ventilated area and use even strokes to prevent drips.
3. Drying Time: Allow ample drying time between coats. Drying can take anywhere from a few hours to overnight, depending on the sealant and the number of layers.
4. Test for Tackiness: After your final coat and recommended drying time, check for a tack-free surface. If there is any stickiness, extending drying time can resolve the issue.
5. Handling with Care: Once sealed, handle your earrings carefully, as some sealants can take several days to cure fully.
Remember, sealing is an optional step that can provide extra protection and shine, or be omitted for a matte, natural-look.
FAQ
Is making polymer clay earrings hard?
No, making polymer clay earrings is not hard; it is fairly simple and requires some practice and perfection, which anyone can master.
What do you use to bake polymer clay earrings?
To bake polymer clay earrings, preheat your oven to 275 degrees F (135 C) and place them on a parchment-covered cookie sheet, ceramic tile, or glass surface.
What safety precautions are necessary when crafting polymer clay earrings?
When crafting polymer clay earrings, it’s essential to ensure adequate ventilation, use tools exclusively designated for clay work, follow baking guidelines precisely, and avoid skin contact by wearing gloves.
How do you add texture and color to polymer clay for earring designs?
To add texture and color to polymer clay for earring designs, use clay-shaping tools for texture and mix different colored pre-colored clay or use clay colorants.
How do you properly seal and finish polymer clay earrings after baking?
To properly seal and finish polymer clay earrings after baking, apply a thin coat of polymer varnish by brushing it on, let it dry for 24 hours, and repeat the process for a shiny, durable finish.
Related Reading
 Polymer Clay Flowers: Crafting Delicate Blooms for Any Occasion
 Polymer Clay Christmas Ornaments: Craft Your Own Festive Decor
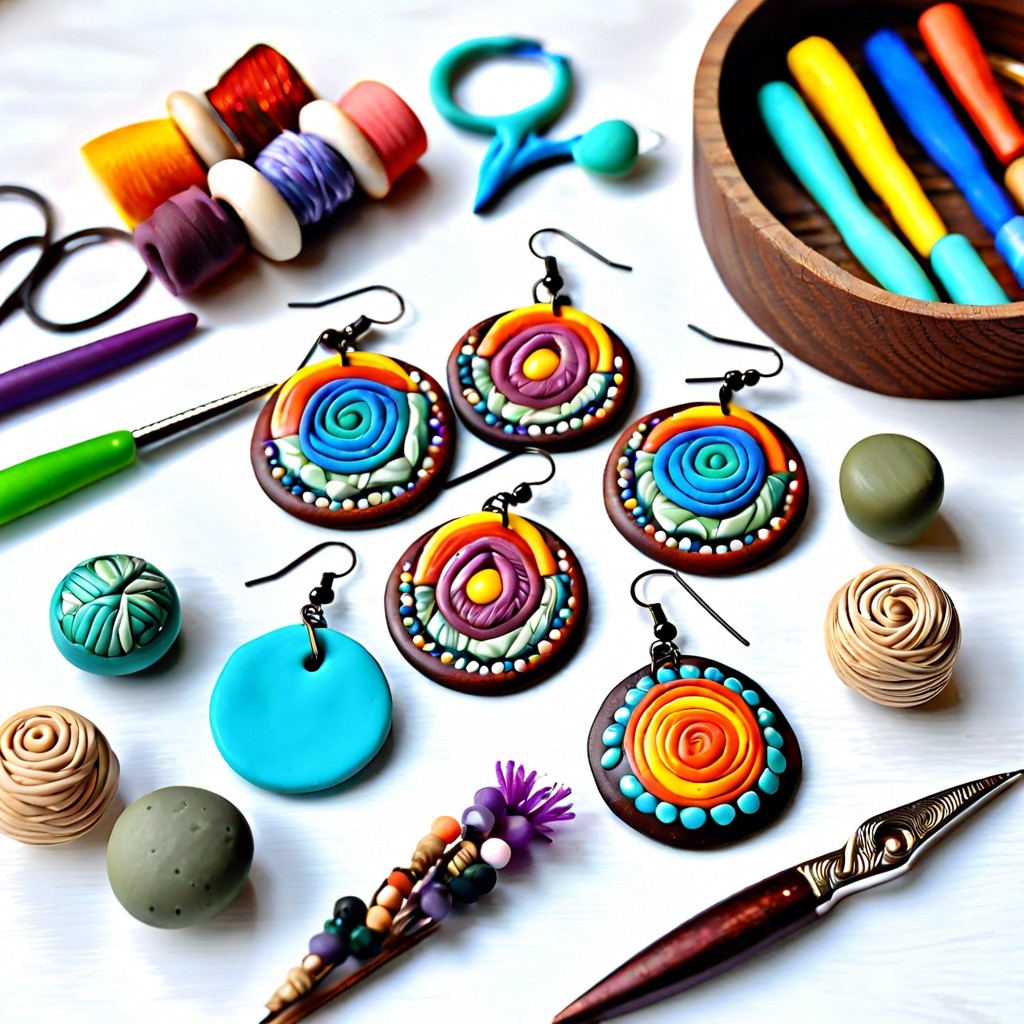 Polymer Clay Earring: Creating Fashion Statements with Your Own Hands
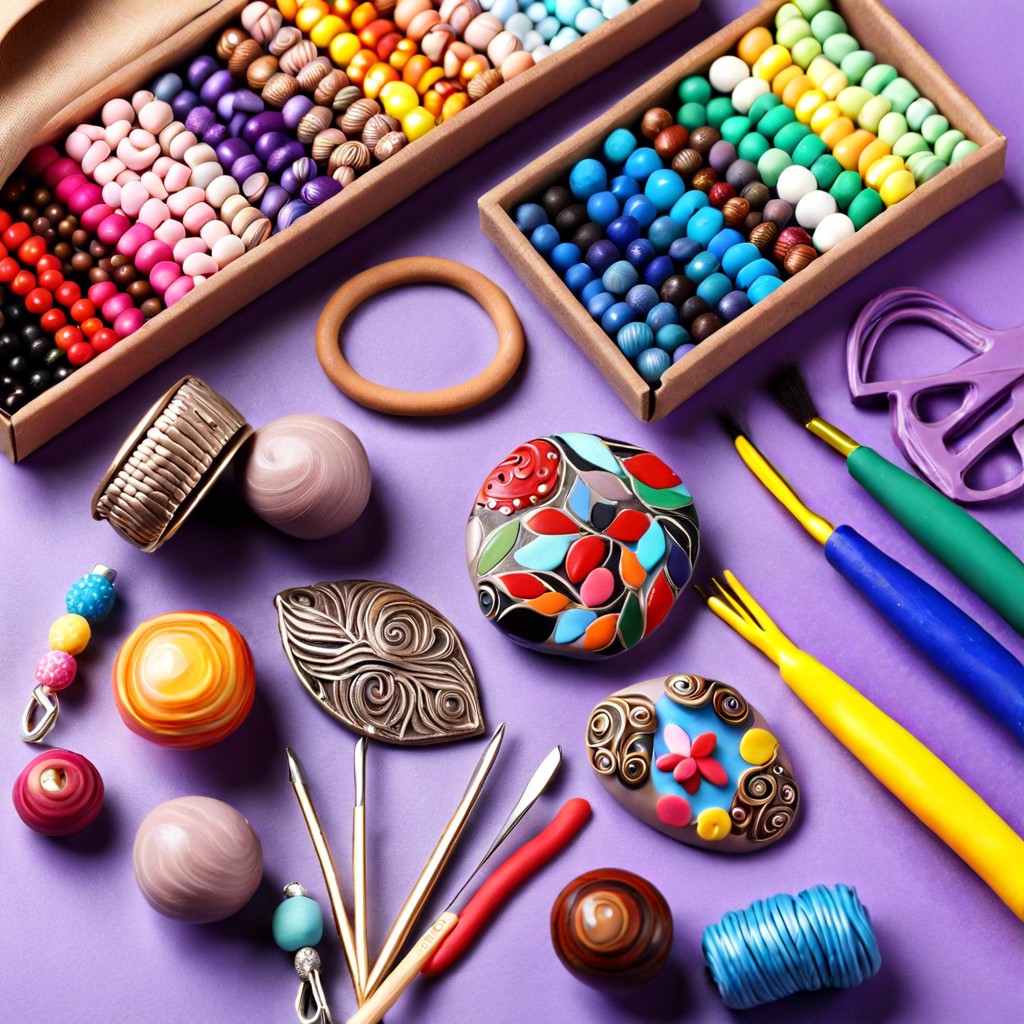 How to Make Polymer Clay Beads for Stunning DIY Jewelry
 Water Balz Jumbo Polymer Ball: The Ultimate Guide to Fun and Utility
Recap